
8 Easy One Hour Crochet Projects for Quick Handmade Wins
Explore one hour crochet projects with quick patterns for a coaster, bookmark, scrunchie, mug cozy, washcloth, headband, heart keychain, and mini basket.
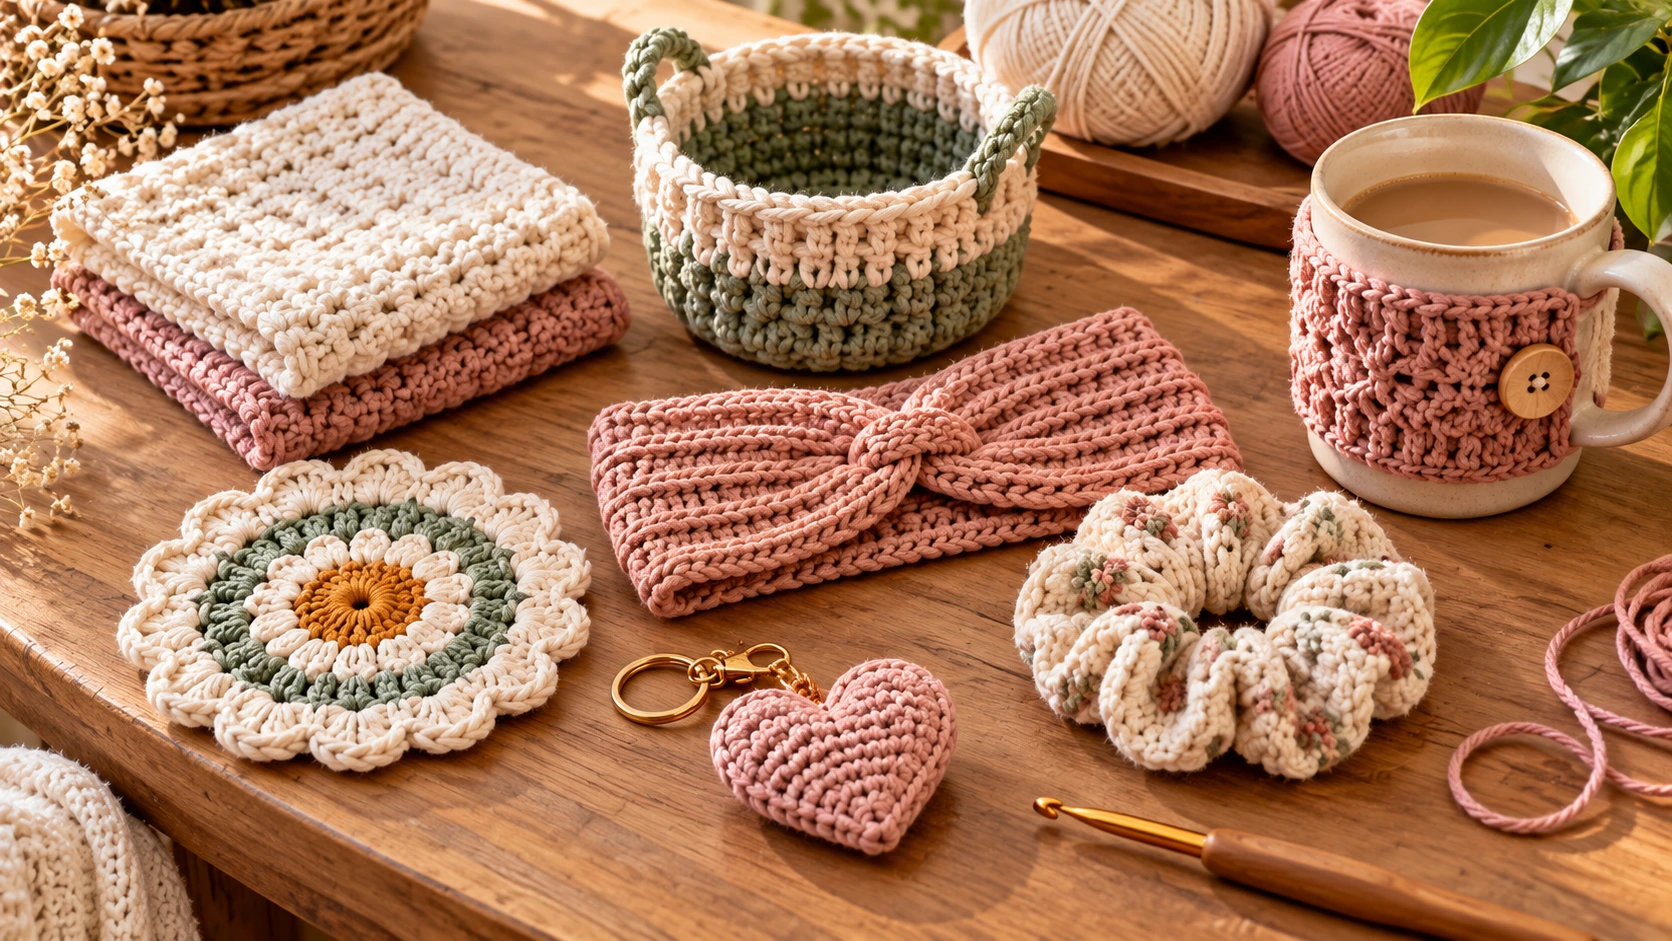
Table of Contents
You don’t need an entire weekend to make something useful with a crochet hook. Some projects need only a small amount of yarn, a few basic stitches, and a little time at your favorite crafting spot.
These one hour crochet projects are designed for short creative sessions. You’ll find practical ideas for your home, useful accessories, and small handmade gifts. Each project includes materials and step-by-step instructions, so you can start crocheting instead of spending your entire break searching for a pattern.
The estimated times are guidelines rather than guarantees. Your actual time will depend on your experience, yarn thickness, hook size, and how quickly you crochet.
What You Need for Quick Crochet Projects
A small collection of basic supplies is enough for most of these projects.
Materials
- Worsted-weight yarn (#4) in one or more colors
- A 4.0 mm or 5.0 mm crochet hook, depending on the project
- Cotton yarn for items that need to absorb water or tolerate frequent washing
- Yarn needle for weaving in ends
- Scissors
- Stitch markers for projects worked in rounds
- A hair elastic for the crochet scrunchie
- Optional key ring for the heart keychain
For the fastest results, choose a simple stitch pattern and a project that doesn’t require complicated shaping. Medium or bulky yarn can make a small item grow quickly, while cotton is a practical choice for kitchen accessories.
Crochet Abbreviations
The following instructions use standard US crochet terminology:
- ch: chain
- sl st: slip stitch
- sc: single crochet
- hdc: half double crochet
- dc: double crochet
- tr: treble crochet
- st(s): stitch(es)
- BLO: back loop only
- MR: magic ring
- inc: work two stitches in the same stitch
A chain made for turning does not count as a stitch unless an instruction specifically says otherwise.
1. Easy Crochet Coaster
Estimated time: 15–30 minutes
Skill level: Beginner
Finished size: Approximately 4 × 4 inches
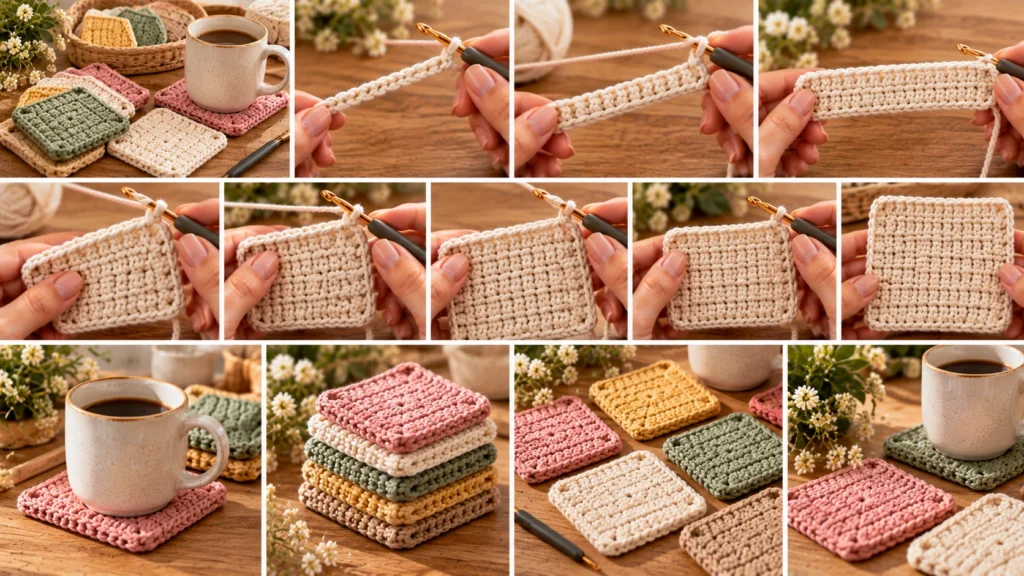
A crochet coaster is a useful first project because it is small, washable when made with suitable yarn, and forgiving of minor imperfections. Make a matching set in neutral colors or use scraps to create a colorful collection.
Materials
- Approximately 15–25 yards of worsted-weight cotton yarn
- 4.0 mm crochet hook
- Scissors and yarn needle
Pattern Instructions
Foundation: Ch 16.
Row 1: Sc in the second ch from the hook and in each remaining chain. You should have 15 sc.
Row 2: Ch 1, turn, and sc in each of the 15 stitches.
Rows 3 onward: Repeat Row 2 until the piece measures approximately 4 inches from top to bottom.
Fasten off and weave in the ends securely.
Finishing Tips
For a flatter coaster, lay it on a towel and gently shape it to a square. Avoid stretching it too much, especially if the yarn is cotton.
If your coaster is too narrow, begin with more chains. For a larger coaster, continue crocheting until the length matches the width.
Why it works: Repeating the same stitch makes this a low-stress project for practicing even tension.
2. Simple Crochet Bookmark
Estimated time: 15–30 minutes
Skill level: Beginner
Finished size: Approximately 1–1.25 inches wide and 6–7 inches long
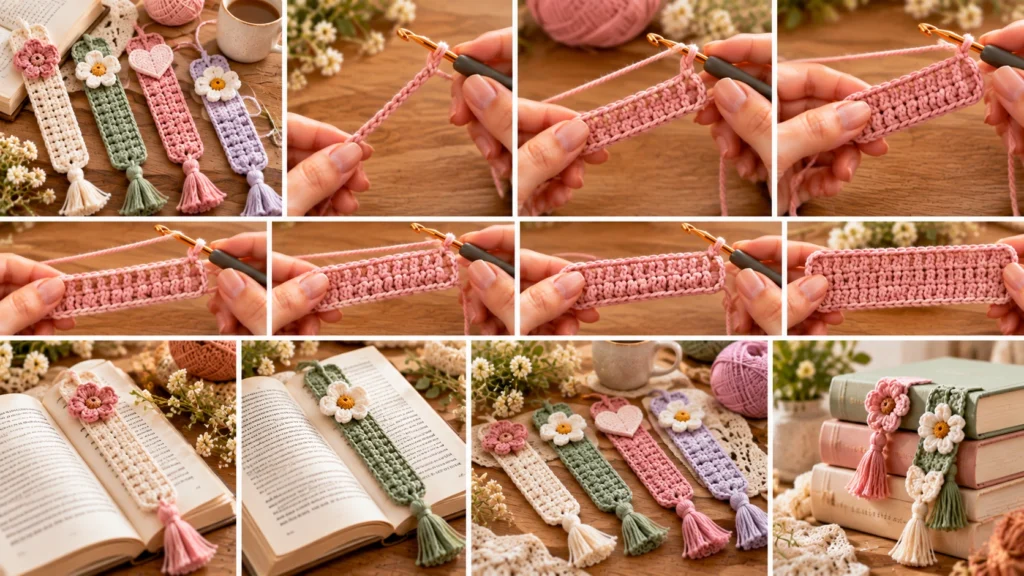
A crochet bookmark is a practical way to use leftover yarn. Cotton or lightweight acrylic creates a flexible strip that fits inside a book without adding much bulk.
Materials
- Small amount of worsted-weight or DK yarn
- 3.5–4.0 mm crochet hook
- Scissors and yarn needle
Pattern Instructions
Foundation: Ch 8.
Row 1: Sc in the second ch from the hook and in each remaining chain. You should have 7 sc.
Row 2: Ch 1, turn, and sc in each stitch across.
Repeat: Continue Row 2 until the bookmark measures approximately 6–7 inches long, or your preferred length.
Fasten off and weave in the ends.
Optional Tassel
Cut six strands of yarn, each approximately 6 inches long. Fold them in half, pull the folded loops through one end of the bookmark, then pass the loose ends through the loops and tighten gently. Trim the ends evenly.
Customization
Use a smaller hook for a thinner bookmark. Add a contrasting border with slip stitches or make several bookmarks in coordinating colors for small gifts.
3. Ruffled Crochet Scrunchie
Estimated time: 20–45 minutes
Skill level: Beginner
Finished size: Depends on the elastic and amount of ruffling
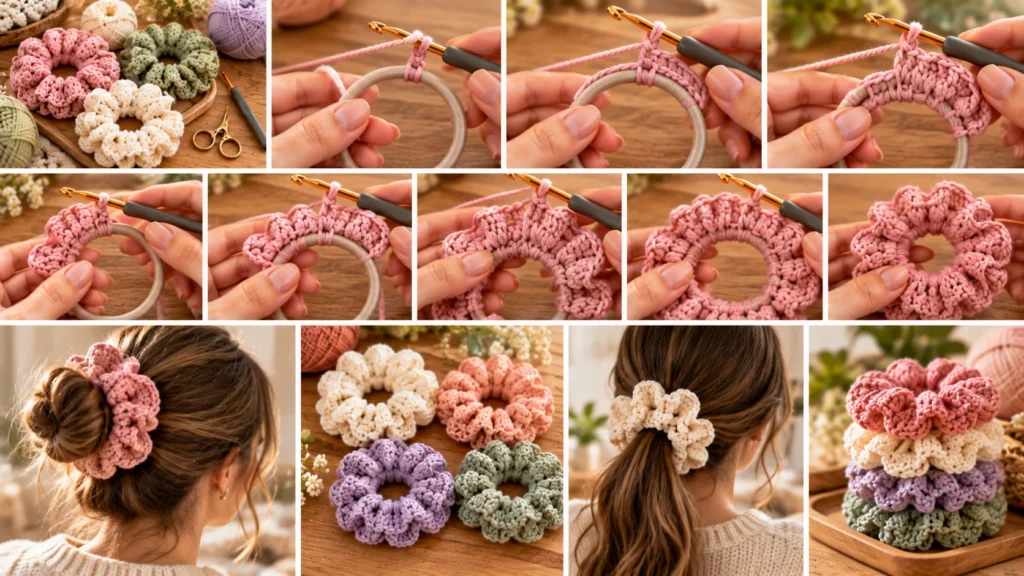
A crochet scrunchie adds texture to a simple hair accessory. The project also works well with leftover yarn, and changing the yarn color can completely change its look.
Materials
- One fabric-covered hair elastic
- Small amount of worsted-weight yarn
- 4.5–5.0 mm crochet hook
- Scissors and yarn needle
Pattern Instructions
Step 1: Make a slip knot and attach the yarn around the elastic with a sl st.
Step 2: Ch 3. Work 2 dc around the elastic, keeping the elastic inside the stitches.
Step 3: Continue working groups of 3 dc around the elastic. Push the groups close together so the elastic becomes covered and the yarn naturally gathers into ruffles.
Step 4: Continue until you have covered the entire elastic. The number of groups needed will vary with the thickness of the elastic and yarn.
Step 5: Join with a sl st to the top of the starting ch 3. Fasten off and weave in the end securely.
Adjusting the Ruffles
For a fuller scrunchie, add more dc groups around the elastic. For a simpler look, space the groups a little farther apart while still covering the elastic.
Avoid stretching the elastic excessively while crocheting. It should remain stretchy enough to hold hair comfortably.
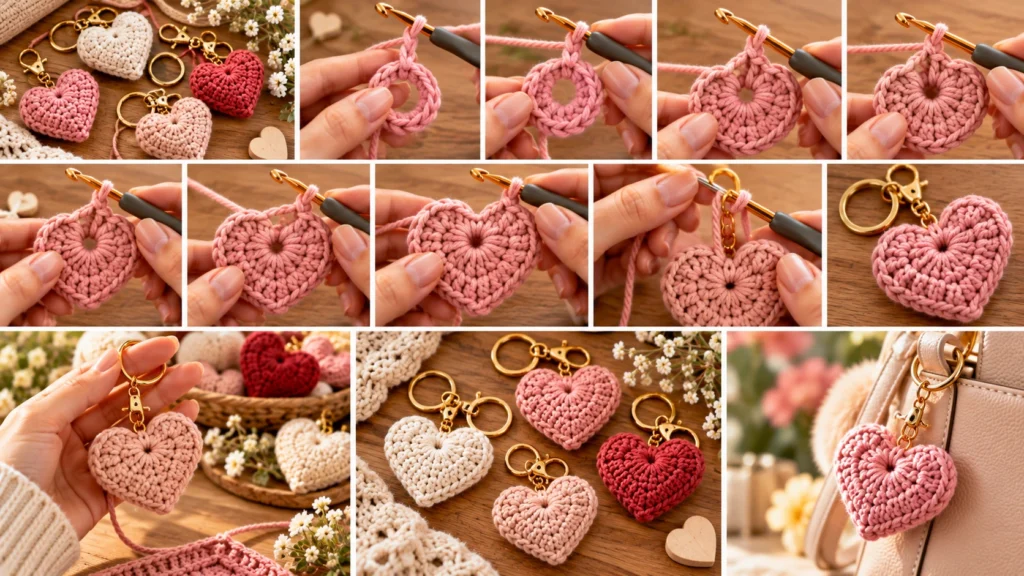
4. Crochet Heart Keychain
Estimated time: 30–60 minutes, depending on whether you make one or two heart motifs
Skill level: Confident beginner
Finished size: Approximately 2–3 inches, depending on yarn and hook
A small crochet heart is useful as a bag charm, keychain, gift tag, or decoration for another handmade item.
Materials
- Small amount of worsted-weight yarn
- 3.5–4.0 mm crochet hook
- Yarn needle
- Key ring or split ring
- Optional stuffing if making a two-sided charm
Pattern Instructions
Round 1: Make an MR. Work ch 3, 3 tr, 3 dc, ch 1, 1 tr, ch 1, 3 dc, 3 tr, and ch 3. Finish with a sl st into the MR.
Pull the ring closed carefully. Fasten off, leaving a tail long enough to weave in securely.
Shape the upper lobes and lower point gently with your fingers. If the edge looks uneven, use your fingers to spread the stitches before fastening off.
Making It a Keychain
For a flat charm, attach the key ring through a sturdy top stitch using a short chain loop. For a thicker charm, make a second heart, place the motifs together, and join their edges with sc. Add a small amount of stuffing before closing the final section, if desired.
Use tight stitches and secure the key-ring attachment well. Small parts and loose fiberfill should be kept away from young children.
5. Quick Crochet Mug Cozy
Estimated time: 30–50 minutes
Skill level: Beginner
Finished size: Custom fit for your mug
A mug cozy is a small project that can use less than a small ball of yarn. It also makes a thoughtful handmade gift when paired with coffee, tea, or a favorite mug.

Materials
- Worsted-weight cotton or acrylic yarn
- 4.5–5.0 mm crochet hook
- Scissors and yarn needle
Pattern Instructions
Foundation: Ch 13.
Row 1: Hdc in the third ch from the hook and in each remaining chain. You should have 11 hdc.
Row 2: Ch 2, turn, and hdc in each stitch across. The turning chain does not count as a stitch.
Repeat: Continue Row 2 until the strip is wide enough to cover the front of your mug, usually about 5–6 inches, depending on the mug.
Fasten off and weave in the ends.
Add Two Ties
Attach yarn at one top corner and ch 18. Sl st back along the chain to strengthen the tie, then fasten off. Repeat at the opposite top corner.
Wrap the band around the front of the mug and tie the ends near the handle roots. Keep the cozy away from the drinking rim, and remove it before microwaving the mug.
Getting the Fit Right
Measure the front section of the mug before finishing the rows. A cozy should sit snugly without being stretched tightly. The ties can be made longer or shorter to suit the handle shape.
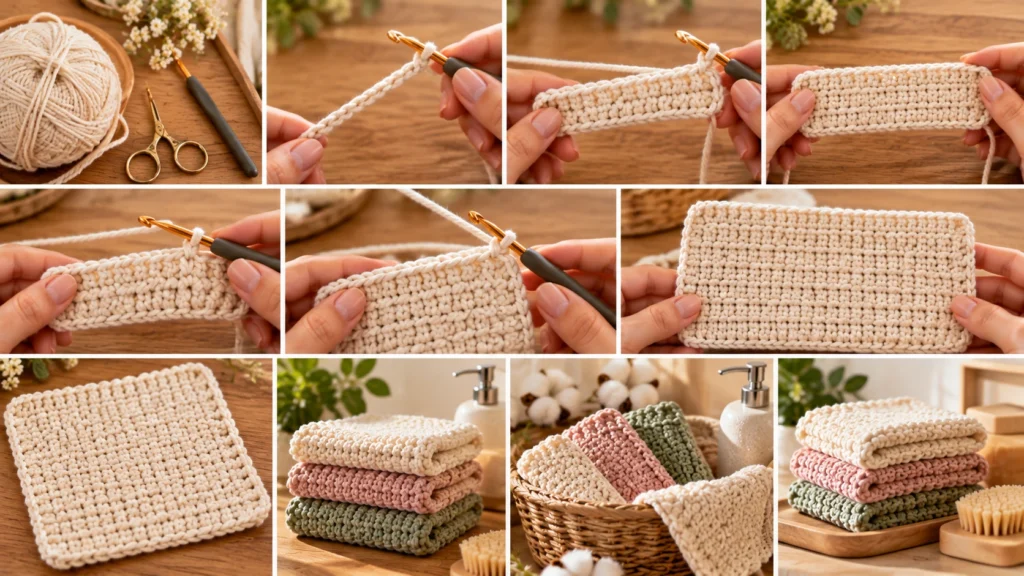
6. Textured Crochet Washcloth
Estimated time: 40–60 minutes
Skill level: Beginner
Finished size: Approximately 7 × 7 inches
A crochet washcloth is a practical project for the bathroom or kitchen. Use cotton yarn for absorbency, and choose a solid color if you want a simple, coordinated set.
Materials
- Approximately 45–65 yards of worsted-weight cotton yarn
- 4.0 mm crochet hook
- Scissors and yarn needle
Pattern Instructions
Foundation: Ch 25.
Row 1: Sc in the second ch from the hook and in each remaining chain. You should have 24 sc.
Row 2: Ch 1, turn, and sc in each stitch across.
Repeat: Continue Row 2 until the cloth measures approximately 7 inches tall.
Fasten off and weave in both ends.
Make It More Textured
For a slightly ridged surface, work every other row in BLO instead of through both loops. Keep the stitch count at 24 and continue until you reach the desired height.
Care Advice
Wash the finished cloth according to the yarn label. Cotton can shrink or change shape with heat, so test your care routine on the first cloth if you are making a matching set.
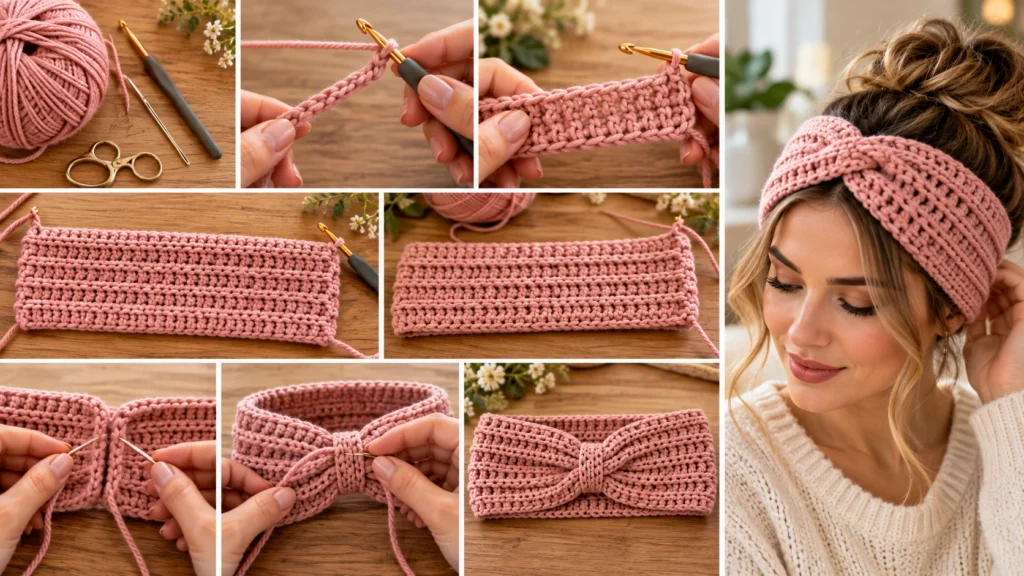
7. Stretchy Crochet Headband
Estimated time: 45–60 minutes
Skill level: Beginner
Finished size: Adjustable
A basic crochet headband is useful in cooler weather and can be made in a neutral shade or a bright accent color. The simple rectangular construction also makes sizing easier.
Materials
- Worsted-weight yarn
- 5.0 mm crochet hook
- Scissors and yarn needle
Pattern Instructions
Foundation: Ch 13.
Row 1: Hdc in the third ch from the hook and in each remaining chain. You should have 11 hdc.
Row 2: Ch 2, turn, and hdc in BLO across.
Repeat: Continue Row 2 until the band measures approximately 1–2 inches less than the wearer’s head circumference, allowing for stretch. For many adults, a starting length of around 18–20 inches may work, but measure for a better fit.
Fasten off, leaving a long tail. Bring the short ends together and sew them securely using the yarn needle. Weave in the remaining end.
Customize the Fit
For a wider headband, begin with more chains. For a narrower one, use fewer chains. Measure the finished strip around the intended wearer’s head before seaming so that the fit can be adjusted.
If the band feels too loose, shorten it slightly. If it stretches uncomfortably, add length before joining the ends.
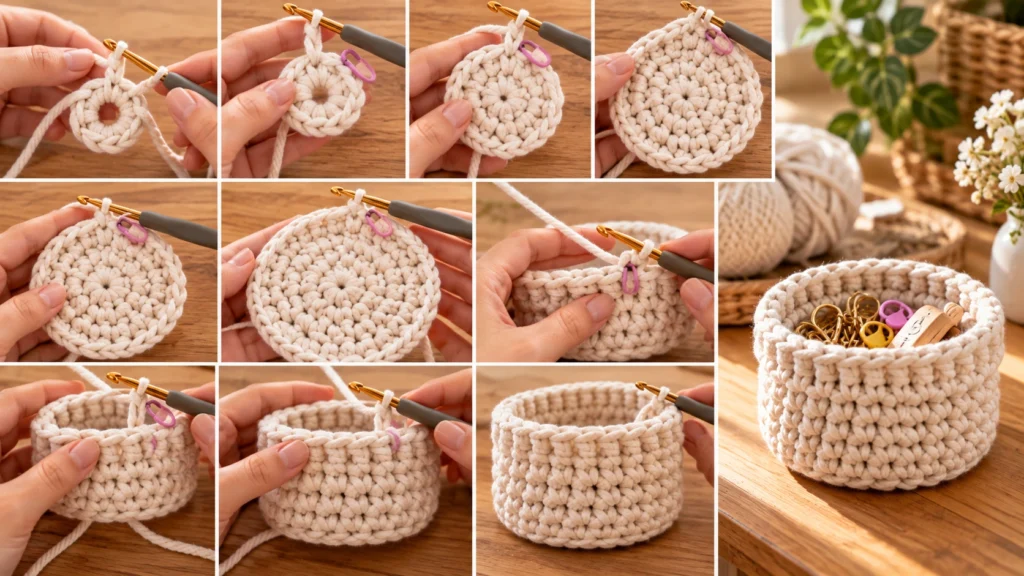
8. Mini Crochet Storage Basket
Estimated time: 45–60 minutes with bulky yarn and a practiced rhythm; a first attempt may take longer
Skill level: Confident beginner
Finished size: Approximately 4–5 inches across, depending on yarn and tension
A tiny basket is ideal for storing stitch markers, jewelry, hair accessories, or small craft supplies. Bulky yarn helps the basket take shape quickly.
Materials
- Bulky-weight yarn
- 6.0 mm crochet hook, adjusted to suit the yarn
- Stitch marker
- Scissors and yarn needle
Pattern Instructions
Work in continuous rounds. Use a stitch marker to mark the first stitch of each round.
Round 1: Make an MR and work 6 sc into it. (6 sts)
Round 2: Work 2 sc in each stitch around. (12 sts)
Round 3: Repeat sc in next st, 2 sc in next st around. (18 sts)
Round 4: Repeat sc in next 2 sts, 2 sc in next st around. (24 sts)
Round 5: Repeat sc in next 3 sts, 2 sc in next st around. (30 sts)
Round 6: Repeat sc in next 4 sts, 2 sc in next st around. (36 sts)
Round 7: Sc in BLO around. This creates a defined edge between the base and the sides.
Rounds 8–11: Sc in each stitch around without increasing. This builds the basket walls.
Optional Handles
On the next round, sc in the next 8 stitches, ch 5, skip the next 4 stitches, sc in the next 14 stitches, ch 5, skip the next 4 stitches, then sc in the remaining 6 stitches.
On the following round, sc in every sc and every chain stitch around. Fasten off and weave in the end.
Help the Basket Hold Its Shape
Keep the stitches fairly tight and use a hook that doesn’t leave large gaps. For a firmer basket, choose a sturdy cotton blend or thicker yarn. This small basket is intended for lightweight objects, not heavy items.
How to Finish Small Crochet Projects More Quickly
The goal is not simply to crochet faster. It’s to make choices that reduce interruptions and unnecessary rework.
Choose the project before pulling out the yarn. A coaster or bookmark is a better choice for a short break than an item requiring multiple pieces and extensive assembly.
Check the hook and yarn together. A hook that is too small can make the yarn difficult to work with; one that is too large can leave loose stitches. Follow the yarn label as a starting point, then adjust for your fabric.
Count at the end of every row. A missing or extra stitch can change the shape of a small project. Counting 15 stitches on each coaster row, for example, is faster than discovering a slanted edge at the end.
Weave in ends as you go when practical. If a project has several color changes, secure ends during natural pauses instead of leaving all finishing work until the end.
Keep a small project pouch ready. Store a hook, scissors, yarn needle, stitch markers, and a partially used ball of yarn together. It makes it easier to use short crafting windows.
How to Choose Your Next One-Hour Crochet Project
Choose a project based on what you want to achieve, not only how small it looks.
- For absolute beginners: Start with the coaster or bookmark to practice straight rows.
- For practical home accessories: Make the washcloth, mug cozy, or storage basket.
- For small gifts: Choose a heart keychain or scrunchie.
- For wearable accessories: Try the headband after you feel comfortable with consistent stitch counts.
- For leftover yarn: Use small remnants for the bookmark, heart, or scrunchie.
If you’re making a group of gifts, choose one design and repeat it in different colors. That usually makes the process easier because you don’t need to learn a new stitch sequence for each item.
Conclusion
These eight one hour crochet projects offer a manageable way to make useful accessories and handmade gifts without committing to a large pattern. Start with a coaster or bookmark if you’re new to crochet, then try the scrunchie, mug cozy, or mini basket as you grow more confident.
Keep your yarn and tools nearby, measure when fit matters, and treat the time estimates as flexible. A small project can still be satisfying when you give yourself enough time to finish it neatly.
FAQ
What is the easiest crochet project to finish in an hour?
A basic coaster or bookmark is a good starting point. Both use simple stitches, require very little yarn, and can be adjusted easily.
Can beginners really finish a crochet project in one hour?
Many small, simple projects can fit into an hour, especially when using familiar stitches. A complete beginner may need longer to learn the stitches, correct mistakes, and finish the ends.
What yarn is best for quick crochet projects?
Worsted-weight yarn is versatile and widely useful for small accessories. Cotton is a practical choice for coasters and washcloths, while bulky yarn can help small baskets grow faster.
What can I crochet with leftover yarn?
Scrunchies, bookmarks, heart motifs, and small coasters are useful ways to use short lengths of leftover yarn. Check that you have enough yarn for the full piece before beginning.
Which quick crochet projects make useful gifts?
A mug cozy, washcloth, headband, scrunchie, and heart keychain are all potential handmade gifts. Choose washable yarn for items that will be used frequently.
How can I crochet faster without making mistakes?
Use a familiar stitch, good lighting, comfortable tools, and a stitch count you can check at the end of each row. Consistent tension and fewer mistakes often save more time than rushing.