
Free Crochet Maple Leaf Pattern for Cozy Fall Decor
Make a crochet maple leaf with this free pattern using basic stitches. Includes yarn, hook, gauge, step-by-step instructions, assembly, and fall decor ideas.
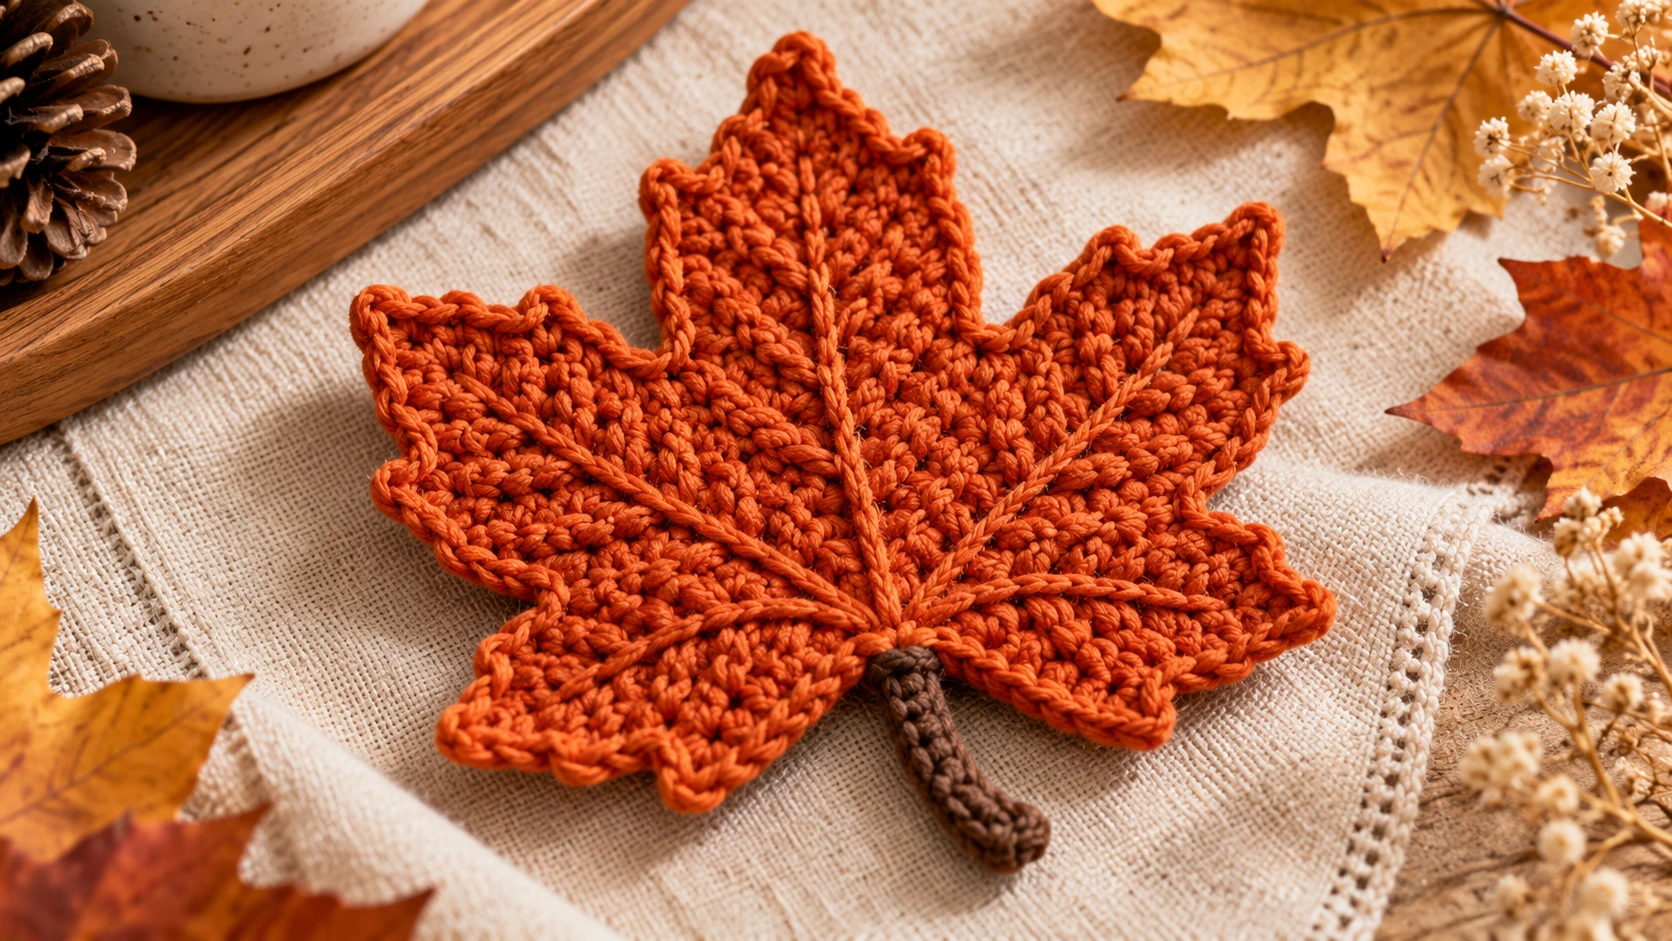
Table of Contents
A crocheted maple leaf is a simple way to bring autumn color into your home without taking on a large project. A handful of leaves can become a garland, wreath accent, table decoration, gift topper, or seasonal applique.
This crochet maple leaf pattern free tutorial uses basic stitches and a simple five-lobe construction. Instead of trying to crochet a complicated botanical shape in one continuous piece, the leaf is built from individual pointed lobes and assembled into a recognizable maple-leaf silhouette.
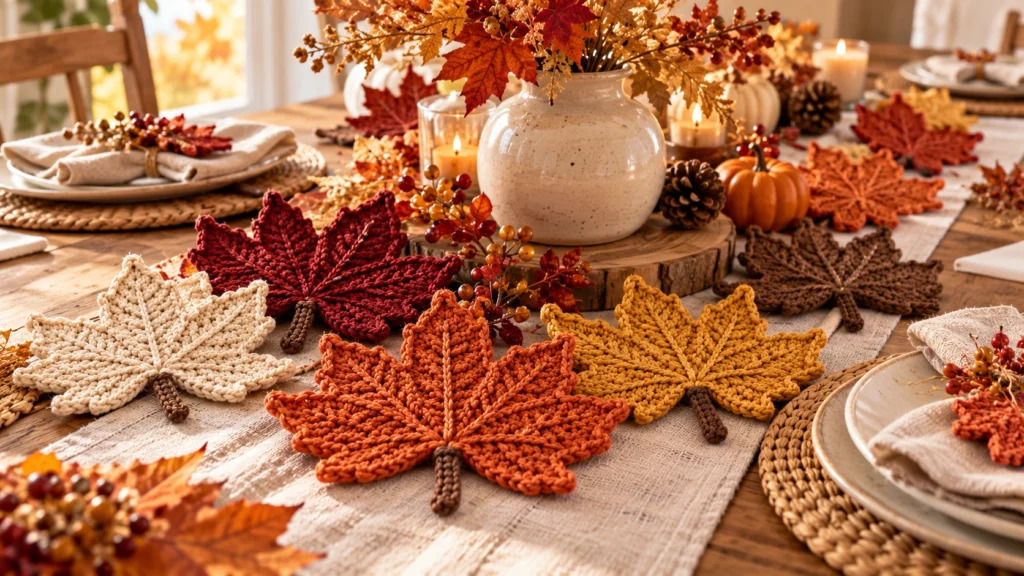
The construction also makes the design easy to customize. You can use deep red for a classic autumn look, mustard or burnt orange for a warmer palette, or cream and brown when you want your fall decor to blend with neutral interiors.
The finished sample is approximately 5 inches wide and 5½ inches tall, but the size can be changed by using different yarn weights or adjusting the lobe dimensions.
Crochet Maple Leaf Pattern at a Glance
Project type: Flat decorative applique
Skill level: Beginner to intermediate
Construction: Five crocheted leaf lobes sewn together
Yarn: Worsted-weight (#4)
Suggested fiber: Cotton, acrylic, or a smooth blend
Main color: Approximately 35–50 yards
Hook: 4.0 mm (G-6)
Finished size: Approximately 5 × 5½ inches
Notions: Yarn needle, scissors, stitch markers optional
Why This Maple Leaf Uses Five Pieces
A maple leaf has several distinct points that spread outward from a central area. Trying to create all of those points in one continuous round can make the shaping unnecessarily difficult.
This design uses:
- one larger center lobe
- two upper side lobes
- two lower side lobes
The pieces overlap slightly around the center and are sewn together.
This construction gives you more control over the final silhouette. You can also change the angle of each lobe during assembly to make the leaf narrower, wider, or more dramatic.
Gauge
Gauge is not critical for a decorative applique, but a useful starting gauge is:
16 sc × 18 rows = approximately 4 × 4 inches
The most important goal is a firm, stable fabric that will hold its shape.
If your fabric is very loose, try a smaller hook.
If it is unusually stiff, move up one hook size.
Changing the yarn weight will also change the finished dimensions.
Abbreviations
- ch: chain
- sl st: slip stitch
- sc: single crochet
- hdc: half double crochet
- dc: double crochet
- tr: treble crochet
- dtr: double treble crochet
- st: stitch
All terminology uses US crochet terms.
Materials for the Crochet Maple Leaf
For one approximately 5-inch leaf, gather:
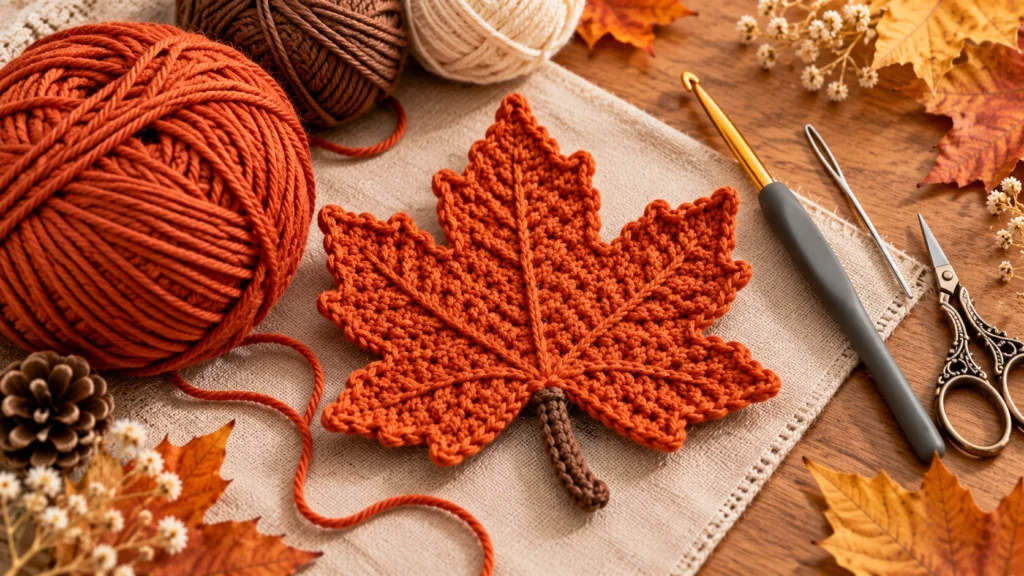
- 35–50 yards of worsted-weight (#4) yarn
- 4.0 mm crochet hook
- Yarn needle
- Scissors
For a firmer decorative leaf, cotton is a useful option because it tends to hold a crisp shape.
A smooth acrylic yarn also works well and gives you a softer finish.
Avoid very fuzzy yarn if you want the individual points and edges to remain clearly visible.
Choosing Your Fall Colors
A single color creates a classic applique, but a maple leaf can also be made with changing shades.
Try:
Traditional autumn: deep red, rust, orange, and mustard
Muted fall: terracotta, oatmeal, olive, and warm brown
Modern neutral: cream, camel, taupe, and charcoal
Harvest-inspired: golden yellow, burnt orange, brick red, and brown
You can also crochet every lobe in a slightly different shade and assemble them into one multicolored leaf.
Free Crochet Maple Leaf Pattern
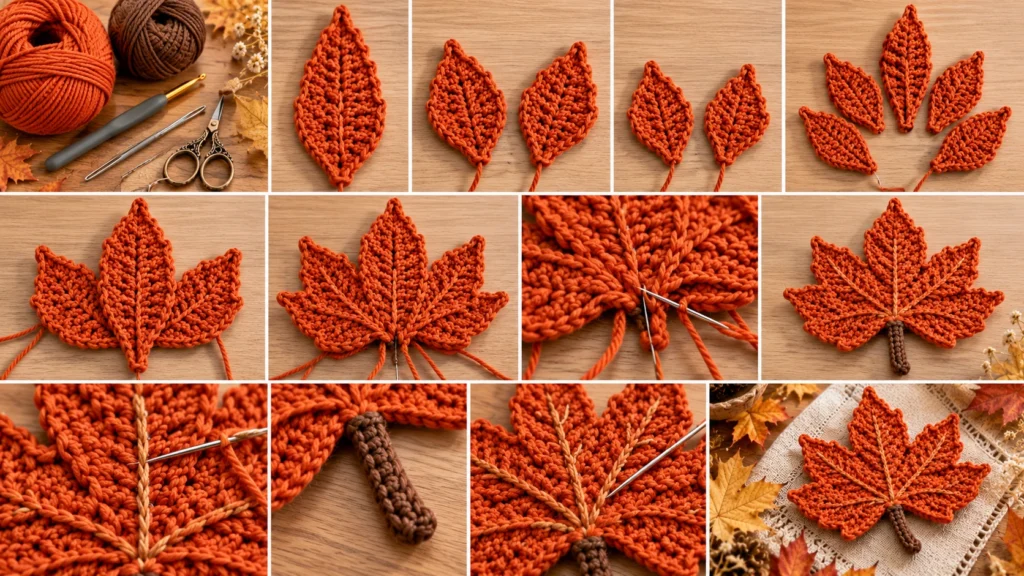
The leaf is made from five pointed lobes.
The center lobe is larger than the surrounding lobes.
Each lobe is crocheted around a foundation chain, creating a tapered shape with a pointed end.
Part 1: Center Lobe
The center lobe creates the tall point at the top of the maple leaf.
Foundation
Ch 13.
Round 1
Starting in the second chain from the hook, work:
- sl st in the next ch
- sc in the next ch
- hdc in the next ch
- dc in the next ch
- tr in the next ch
- dtr in each of the next 6 ch
You are now at the final chain.
Work 3 dtr in the last chain to create the pointed tip.
Continue around the underside of the foundation chain:
- dtr in the next 5 ch
- tr in the next ch
- dc in the next ch
- hdc in the next ch
- sc in the next ch
- sl st in the final available chain
Fasten off, leaving a sewing tail.
The center lobe should have a long pointed top and a narrower base.
Do not worry if it curls slightly. Light blocking after assembly can help flatten it.
Part 2: Upper Side Lobes
Make two identical upper side lobes.
These are slightly shorter than the center lobe.
Foundation
Ch 10.
Round 1
Starting in the second chain from the hook:
- sl st
- sc
- hdc
- dc
- tr
- dtr
- 3 dtr in the final chain
Work back along the underside:
- dtr
- tr
- dc
- hdc
- sc
- sl st
Fasten off, leaving a sewing tail.
Repeat for the second upper side lobe.
Positioning the Upper Lobes
The upper side lobes sit behind the center lobe, angled outward.
Place the left lobe at approximately a 40–45-degree angle.
Place the right lobe at approximately the same angle in the opposite direction.
The two lobes should overlap the bottom portion of the center lobe slightly.
Part 3: Lower Side Lobes
Make two lower side lobes.
These are shorter and slightly less dramatic than the upper lobes.
Foundation
Ch 8.
Round 1
Starting in the second chain from the hook:
- sl st
- sc
- hdc
- dc
- tr
- dtr
- 3 dtr in the final chain
Continue along the underside:
- tr
- dc
- hdc
- sc
- sl st
Fasten off, leaving a sewing tail.
Repeat for the second lower lobe.
Part 4: Create the Maple Leaf Shape
Lay the five pieces flat before sewing.
This step is important because the finished appearance depends heavily on how the pieces overlap.
Start with the large center lobe.
Place the two upper side lobes behind it, spreading them outward.
Then place the two lower lobes beneath the upper lobes.
The general arrangement should look like this:
Center point: tallest
Upper left + upper right: medium points
Lower left + lower right: shorter points
Leave a small opening between the lower lobes near the center so the leaf does not become a solid triangle.
Adjust the angles until the silhouette reads clearly as a maple leaf.
Part 5: Sew the Lobes Together
Thread your yarn needle with one of the sewing tails.
Start from the back of the leaf.
Sew through the overlapping bases of the lobes using small whip stitches.
Begin with the center lobe and one upper side lobe.
Secure them together around the lower section only.
Do not sew the entire length of the upper lobe because you want its edge to remain visible.
Repeat on the opposite side.
Next, attach the two lower lobes.
Sew their upper bases to the central area and to the lower portions of the upper lobes.
Once all five pieces are connected, turn the leaf over and check the front.
Add a few additional stitches wherever the pieces feel loose.
Part 6: Add the Stem
The leaf needs a small central stem to complete the silhouette.
Stem
Ch 6.
Sl st in the second chain from the hook and across.
Fasten off, leaving a sewing tail.
Place the stem at the bottom center of the leaf.
Sew it securely to the central base.
For a slightly longer stem, begin with 8 or 10 chains instead.
Part 7: Add a Central Vein
The central vein is optional but can give the finished leaf more definition.
Use a yarn needle and a contrasting or matching strand of yarn.
Starting at the bottom stem, work a line of small running stitches toward the center of the leaf.
Continue toward the tip of the center lobe.
Do not pull the yarn excessively tight.
The vein should sit on the surface of the leaf rather than gather the fabric.
You can add short diagonal veins extending toward the side lobes if you want additional detail.
For a minimalist look, the single central vein is enough.
Blocking the Maple Leaf
Blocking can help the five pieces settle into a more natural shape.
For cotton or another fiber suitable for wet blocking, gently dampen the finished leaf.
Place it flat on a suitable blocking surface.
Spread each point outward.
Pay particular attention to:
- the center point
- the two upper points
- the two lower points
- the stem
Allow it to dry completely before moving it.
The exact blocking method should suit the yarn fiber you selected.
Why Blocking Helps
Small crocheted pieces can curl slightly because of changes in stitch height.
Blocking gives the points a cleaner outline and makes the assembled pieces look more cohesive.
You do not need to stretch the leaf aggressively.
The goal is simply to encourage the intended shape.
How to Change the Size
One advantage of this crochet maple leaf pattern is that you do not need to recalculate the entire pattern to create different sizes.
Make a Smaller Leaf
Use DK or sport-weight yarn with a smaller hook.
You can also shorten the foundation chains.
For example:
- center lobe: reduce the chain by 2–3 stitches
- upper lobes: reduce by 2 stitches
- lower lobes: reduce by 1–2 stitches
Keep the same general stitch-height progression so the points remain pointed.
Make a Larger Leaf
Use bulky yarn with a proportionally larger hook.
Alternatively, add stitches to each foundation chain.
For a substantially larger center lobe, adding several dtr stitches along the longest section will increase its length and width.
Make corresponding adjustments to the side lobes so the overall proportions remain balanced.
Change the Leaf Width
The easiest way to make a wider leaf is to spread the side lobes farther apart during assembly.
You do not necessarily need to add more stitches.
The final width is influenced significantly by the angle at which the five pieces are sewn together.
Make a Two-Tone Maple Leaf
You can make the center lobe one color and the four side lobes another.
For example:
Center: deep burgundy
Upper sides: burnt orange
Lower sides: golden mustard
Stem: warm brown
This produces a layered autumn look without requiring complicated color changes during crocheting.
Another option is to make all five pieces in different shades.
This can work especially well for a fall garland where several leaves are displayed together.
Crochet Maple Leaf Decor Ideas
Once you have made one leaf, there are many ways to use it.
Fall Garland
Make several leaves in different sizes and shades.
Attach them to a long crocheted chain, jute-style cord, or another suitable decorative base.
Alternate the leaves with small crocheted pumpkins, acorns, or simple circles.
Table Setting
Place one leaf beside each napkin as a handmade autumn accent.
A smaller version can also be used as a coaster-style decorative element.
Fall Wreath
Sew or attach several leaves around a circular wreath base.
Mix larger and smaller leaves instead of making every leaf identical.
This gives the arrangement more visual movement.
Gift Wrapping
A small crochet maple leaf can become a reusable gift embellishment.
Attach it to ribbon or twine and remove it before reuse.
The recipient can then keep the leaf as a decoration.
Crochet Pillow Applique
Make one or several leaves and sew them onto a neutral crochet or fabric pillow cover.
Use coordinating shades rather than trying to match every autumn color.
Table Runner
Crochet a series of maple leaves and attach them along the edges of a plain runner.
Leave enough space between motifs so the fabric does not become visually crowded.
Common Problems
The Leaf Looks More Like a Star
This usually means the side lobes are spreading too evenly around the center.
Try moving the lower lobes farther downward and keeping the center lobe taller.
The maple-leaf silhouette depends on unequal point lengths.
The Points Curl
Very tall stitches naturally create some movement in the fabric.
Blocking can help.
You can also experiment with a slightly different hook size or yarn fiber.
The Lobes Do Not Line Up
Before sewing, arrange all five pieces on a flat surface.
Pin them temporarily if necessary.
Look at the leaf from directly above before making the final stitches.
The Center Looks Too Thick
Use fewer joining stitches at the center.
You only need enough stitches to hold the pieces together securely.
Overlapping too much fabric can make the middle bulky.
The Leaf Does Not Lie Flat
Check whether the yarn is being pulled too tightly while sewing.
Also check that the individual lobes are not being stretched unevenly during assembly.
A light blocking can usually improve minor shaping problems.
How to Make a More Natural-Looking Leaf
The shape is only one part of the finished effect.
Yarn color has a major visual influence.
For a deeper autumn appearance, use dark rust, cranberry, brown, and burnt orange.
For a lighter seasonal palette, try mustard, cream, tan, and sage.
You can also combine matte and slightly glossy yarns, although keeping similar thicknesses will make assembly easier.
Adding a few embroidered vein lines can make the leaf look more detailed without requiring a more complicated crochet pattern.
Care for Your Crochet Maple Leaves
Decorative leaves are generally simple to maintain.
Dust them gently with a soft brush or dry cloth.
If the yarn label allows washing, follow the manufacturer’s recommended method.
Avoid high heat unless the yarn specifically permits it.
Store the leaves flat or loosely folded when the season ends.
For heavily used decorative pieces, check the joining stitches occasionally and reinforce any loose sections.
Final Thoughts
This crochet maple leaf pattern free tutorial is designed to give you a practical decorative motif rather than a difficult one-piece shape.
The five-lobe construction makes the leaf easier to build and lets you control the proportions during assembly. Once you have the basic method down, experiment with different yarn weights, colors, vein details, and lobe angles.
A few leaves in coordinating autumn shades can become a garland, wreath, table accent, pillow applique, or reusable gift decoration.
Start with one leaf, check the proportions, and then repeat the design in colors that fit your space.
FAQ
How difficult is this crochet maple leaf pattern?
The individual lobes use basic crochet stitches, but the project requires some assembly. It is suitable for crocheters who are comfortable with chains, slip stitches, and different stitch heights.
What yarn is best for crochet maple leaves?
Worsted-weight (#4) yarn is a practical starting point. Cotton can produce a crisp decorative leaf, while smooth acrylic yarn gives a softer result.
Can I make the maple leaf smaller?
Yes. Use lighter yarn and a smaller hook, or shorten the foundation chains for each lobe while preserving the general stitch-height progression.
Can I use this pattern for a fall garland?
Yes. Make multiple leaves in different autumn colors and sizes, then attach them to a suitable cord or crocheted chain.
How do I stop the crochet leaf from curling?
Blocking can help flatten the finished leaf and define the points. Also avoid pulling the yarn too tightly during assembly.
Can I sew these crochet leaves onto other projects?
Yes. They can be used as appliques on pillows, bags, blankets, table linens, gift packaging, and other decorative projects. Sew them down securely and select the attachment method according to the item.