
Free Crochet Halter Top Pattern Beautiful DIY Top You’ll Love
Make a beautiful free crochet halter top pattern with easy step-by-step instructions, adjustable ties, cotton yarn, and beginner-friendly stitches.
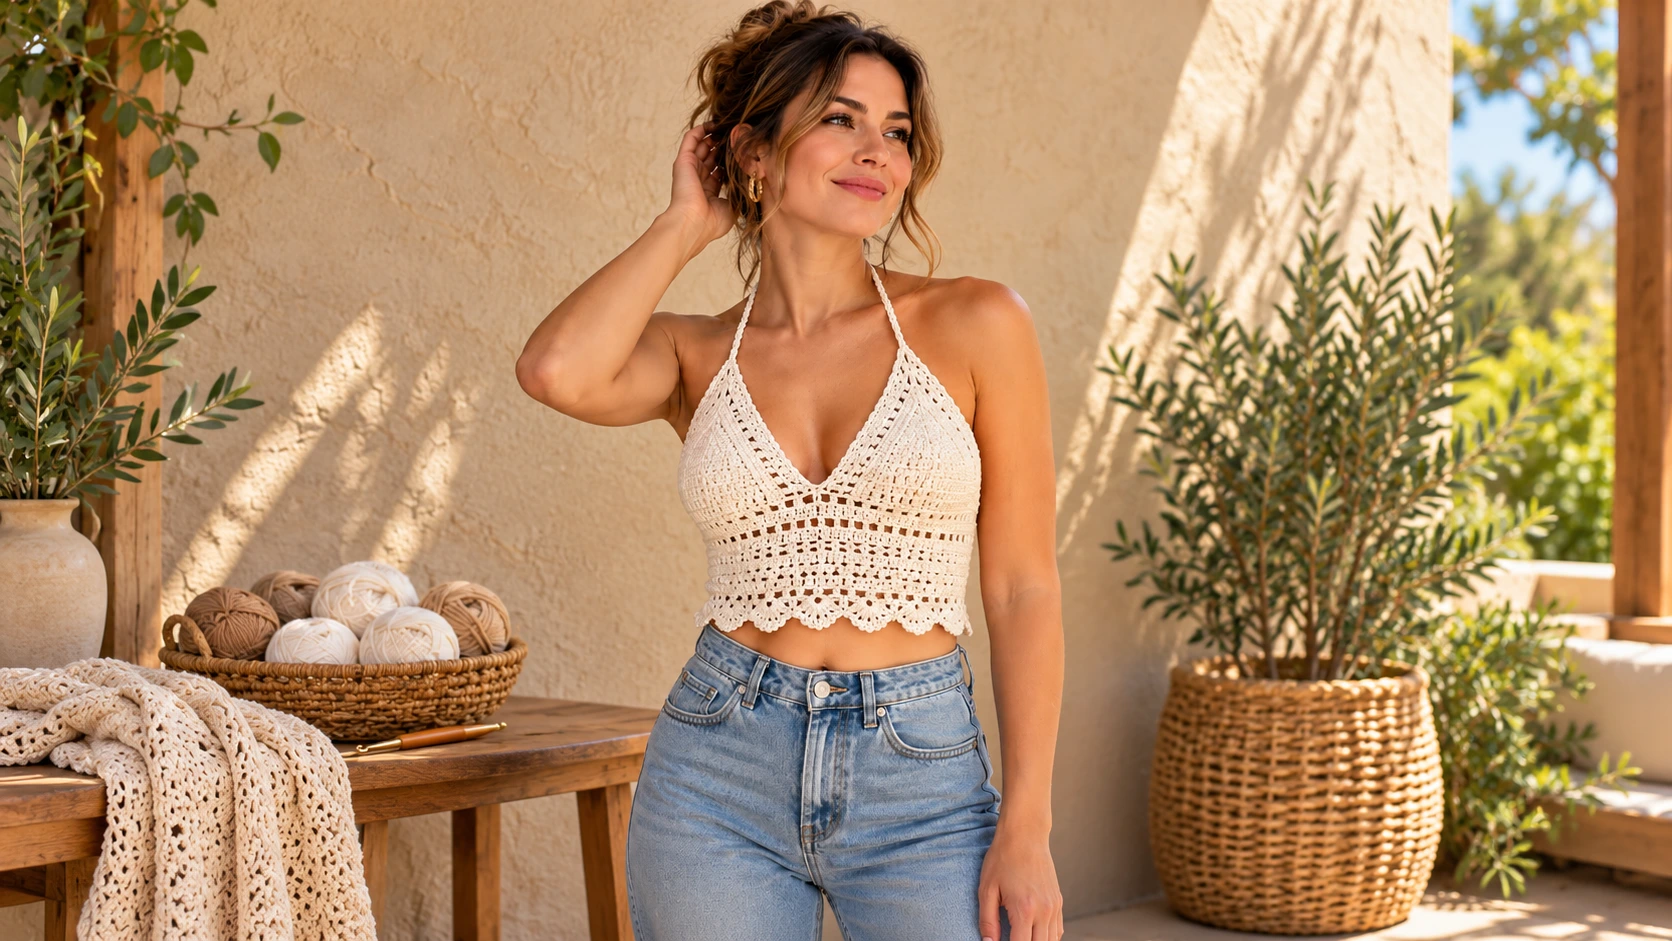
Table of Contents
Looking for a stylish handmade top to add to your summer wardrobe? This free crochet halter top pattern is a beautiful project that combines simple crochet stitches, a flattering triangular design, and adjustable ties for a comfortable fit.
Whether you’re planning a beach vacation, a summer festival, or simply want to create something special with your favorite cotton yarn, this crochet halter top is a fun and rewarding project.
The best part? You don’t need complicated crochet techniques to make it!
This original pattern includes step-by-step instructions, materials, gauge, sizing guidance, and helpful tips to customize your top. You can make it in your favorite color, adjust the length, and create a handmade summer piece that reflects your personal style.
Why You’ll Love This Free Crochet Halter Top Pattern
There are so many reasons to add this crochet halter top to your handmade wardrobe.
- Beginner-friendly construction: Uses basic stitches and simple increases.
- Adjustable fit: The neck and back ties allow you to customize the fit.
- Lightweight design: Cotton yarn creates a breathable summer garment.
- Customizable length: Make it cropped or extend the lower band.
- Beautiful handmade texture: The triangular cups and decorative edging create a feminine finish.
- Budget-friendly project: Uses a relatively small amount of yarn.
This pattern is also a lovely handmade gift idea for someone who enjoys unique summer clothing.
Materials You’ll Need
Before starting your free crochet halter top pattern, gather the following supplies.
| Material | Details |
|---|---|
| Yarn | DK weight (#3) cotton yarn |
| Hook | 4.0 mm crochet hook |
| Stitch markers | 2–4 markers |
| Scissors | For cutting yarn |
| Tapestry needle | For weaving in ends |
| Measuring tape | For checking measurements |
Recommended Yarn
Cotton yarn is an excellent choice for summer crochet clothing because it is breathable, comfortable, and helps the garment hold its shape.
Choose a smooth cotton yarn in a color you love.
Beautiful color ideas include:
- Ivory or cream for a classic boho look.
- Dusty pink for a feminine summer style.
- Sage green for a natural aesthetic.
- Terracotta for a warm vacation look.
- Black for a simple and elegant design.
Yarn Quantity
Estimated yarn requirements:
- XS–S: 200–250 yards
- M–L: 250–300 yards
- XL–2XL: 300–350 yards
These are planning estimates. Actual consumption depends on your yarn, tension, cup depth, and finished length.
Skill Level
Beginner to Advanced Beginner.
You should know how to make:
- Chain stitch (ch)
- Single crochet (sc)
- Half double crochet (hdc)
- Slip stitch (sl st)
- Basic increases
Crochet Abbreviations (US Terms)
| Abbreviation | Meaning |
|---|---|
| ch | Chain |
| st | Stitch |
| sts | Stitches |
| hdc | Half double crochet |
| sc | Single crochet |
| sl st | Slip stitch |
| inc | Increase |
| rep | Repeat |
| FO | Fasten off |
Important: This pattern uses US crochet terminology.
Gauge
Gauge: 16 hdc × 12 rows = 4 × 4 inches (10 × 10 cm).
To make your gauge swatch:
- Chain 18.
- Work hdc in the second chain from the hook and across.
- Chain 1 and turn.
- Repeat hdc rows until your swatch measures approximately 4 inches.
- Measure the center 4-inch section.
If you have more stitches than the gauge, try a larger hook. If you have fewer stitches, try a smaller hook.
Matching gauge helps you achieve the intended measurements.
Finished Sizes and Measurements
This pattern uses three adjustable size groups.
| Size | Suggested Bust | Cup Rows |
|---|---|---|
| XS–S | 30–34 inches | 14 |
| M–L | 35–40 inches | 16 |
| XL–2XL | 41–46 inches | 18 |
These are suggested fit ranges, not guaranteed bra-cup sizes. Measure your body and the finished cups as you work.
The cup depth and width can be adjusted independently.
Free Crochet Halter Top Pattern
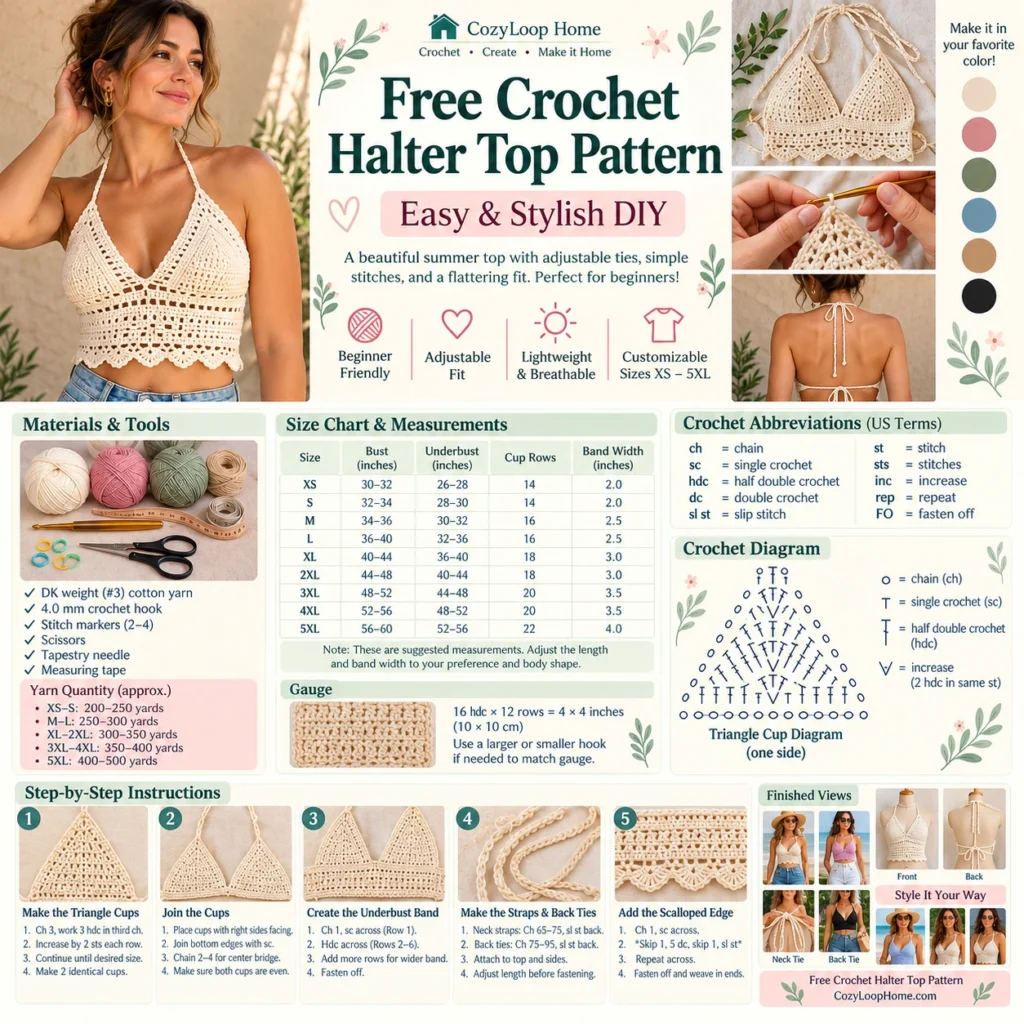
The top is made from two triangular crochet cups, a connecting underbust band, and adjustable straps.
Part 1: Make the First Triangle Cup
Start with your 4 mm crochet hook and cotton yarn.
Foundation:
Ch 3.
Row 1: Work 3 hdc into the third chain from the hook. Ch 1 and turn. (3 sts)
Row 2: Work 2 hdc in the first stitch, 1 hdc in the next stitch, and 2 hdc in the last stitch. Ch 1 and turn. (5 sts)
Row 3: Work 2 hdc in the first stitch, hdc across until the last stitch, and 2 hdc in the last stitch. Ch 1 and turn. (7 sts)
Row 4: Repeat Row 3. (9 sts)
Continue: Repeat the increase row, adding 2 stitches in every row, until you reach your selected cup row count:
- XS–S: 14 rows (29 sts)
- M–L: 16 rows (33 sts)
- XL–2XL: 18 rows (37 sts)
Fasten off and leave a long tail if you plan to use it for joining.
Part 2: Make the Second Triangle Cup
Repeat Part 1 to create the second cup.
Try to keep your tension consistent so both cups have the same dimensions.
Place the two cups side by side and check that their bottom edges are aligned.
Part 3: Join the Cups
Place both cups with the right sides facing you.
Using stitch markers, mark the inner bottom corners.
Join the yarn at the bottom outer corner of the first cup.
Work single crochet evenly across the bottom edge of the first cup.
Chain 2–4 stitches to create a small center bridge between the cups.
Continue single crochet across the bottom edge of the second cup.
Turn your work.
Part 4: Create the Underbust Band
Row 1: Ch 1, sc across the entire foundation row. Turn.
Row 2: Ch 1, hdc in every stitch across. Turn.
Rows 3–6: Repeat Row 2.
For a wider underbust band, add additional rows until you reach your preferred height.
Fasten off.
The band should sit comfortably beneath your bust without feeling too tight.
Part 5: Make the Neck Straps
Attach yarn to the top point of the first cup.
Ch 65–75, depending on your preferred strap length.
Work sl st back along the chain to create a stronger cord.
Fasten off.
Repeat for the second cup.
Try the top on before weaving in the ends. Adjust the strap length if necessary.
Part 6: Make the Adjustable Back Ties
Attach yarn to the outer bottom corner of the underbust band.
Ch 75–95.
Work sl st back along the chain.
Fasten off.
Repeat on the opposite side.
The two ties will wrap around your back and create an adjustable fit.
Part 7: Decorative Edging
For a polished handmade finish, add a simple scalloped edge.
Attach yarn to the lower edge of the band.
Edging Row:
Ch 1, sc evenly across.
Scallop Row:
Skip 1 stitch, work 5 dc in the next stitch, skip 1 stitch, sl st in the next stitch.
Repeat from * to * across the lower edge.
Fasten off and weave in all loose ends.
Assembly and Final Finishing
Your crochet halter top is almost complete!
Follow these final steps:
- Lay the top flat on a clean surface.
- Check that both triangular cups are symmetrical.
- Make sure the center bridge is secure.
- Check the neck and back ties for equal lengths.
- Weave in all loose yarn ends.
- Gently wet-block the garment according to the yarn care instructions.
Try the top on and adjust the ties for a comfortable fit.
Fit and support note: This is a lightweight handmade fashion top, not a supportive bra. For additional coverage, you can sew in removable cups or add a soft fabric lining.
How to Customize Your Crochet Halter Top
One of the best things about making your own crochet clothing is the ability to personalize every detail.
1. Make It Longer
If you prefer more coverage, add extra rows to the underbust band or extend the body section.
2. Try Different Colors
Use one solid color for a timeless look or alternate colors between rows for a playful summer design.
3. Add Decorative Details
You can add small crochet flowers, wooden beads, or a decorative border.
4. Create a More Modest Style
Use a matching fabric lining or add removable cups for extra coverage.
What to Wear With a Crochet Halter Top
A handmade crochet halter top is easy to style for different summer occasions.
- Pair it with high-waisted denim shorts for a relaxed beach look.
- Wear it with a long linen skirt for a boho-inspired outfit.
- Combine it with wide-leg trousers for an elegant summer outfit.
- Layer it under an oversized shirt for a casual everyday look.
- Add a straw hat and sandals for a vacation-ready style.
Common Crochet Halter Top Mistakes to Avoid
Choosing the Wrong Yarn
Avoid heavy yarns that make the top uncomfortable in warm weather. Lightweight cotton is a good starting point.
Skipping the Gauge Swatch
A small difference in tension can change the cup measurements and overall fit.
Making the Straps Too Short
Always test the strap length before fastening off.
Forgetting to Check Symmetry
Both triangular cups should have matching row counts and similar dimensions.
Not Testing the Fit
Try on the garment during construction instead of waiting until the very end.
FAQ
Is this free crochet halter top pattern suitable for beginners?
Yes! This pattern uses basic crochet stitches, simple increases, and straightforward construction. Beginners who know how to make hdc and chain stitches can give it a try.
What is the best yarn for a crochet halter top?
DK-weight cotton yarn is a great option because it is lightweight, breathable, and comfortable for summer clothing.
How long does it take to crochet a halter top?
Depending on your crochet experience and the size you choose, it may take several hours or a few evenings to complete.
Can I make this crochet halter top in a larger size?
Yes. Add more increase rows to each triangular cup, check your measurements, and adjust the band and ties accordingly.
Can I make the top longer?
Absolutely! Add more rows to the underbust band or create an extended body section for additional coverage.
How do I wash a handmade crochet halter top?
Follow the yarn manufacturer’s care instructions. For many cotton yarns, gentle washing and laying flat to dry help maintain the garment’s shape.
Can I sell the finished crochet top?
You can sell finished handmade items you make from your own work. If you publish or share this pattern, keep the pattern text and photographs credited to their original creator and do not claim another designer’s work as your own.
Final Thoughts
This free crochet halter top pattern is a lovely way to create a handmade summer wardrobe essential.
With two simple triangular cups, an adjustable underbust band, and decorative scalloped edging, you can create a beautiful top that reflects your own style.
Experiment with different cotton colors, customize the fit, and enjoy every stitch of your handmade project.
If you make this crochet halter top, share your finished creation and inspire other crochet lovers to start their next summer project!