
Easy Crochet Cap Pattern: Stylish, Simple & Custom Fit
Make a stylish crochet cap pattern. Learn the stitches, sizing, ribbed brim, fit adjustments, and tips for creating a comfortable handmade cap.
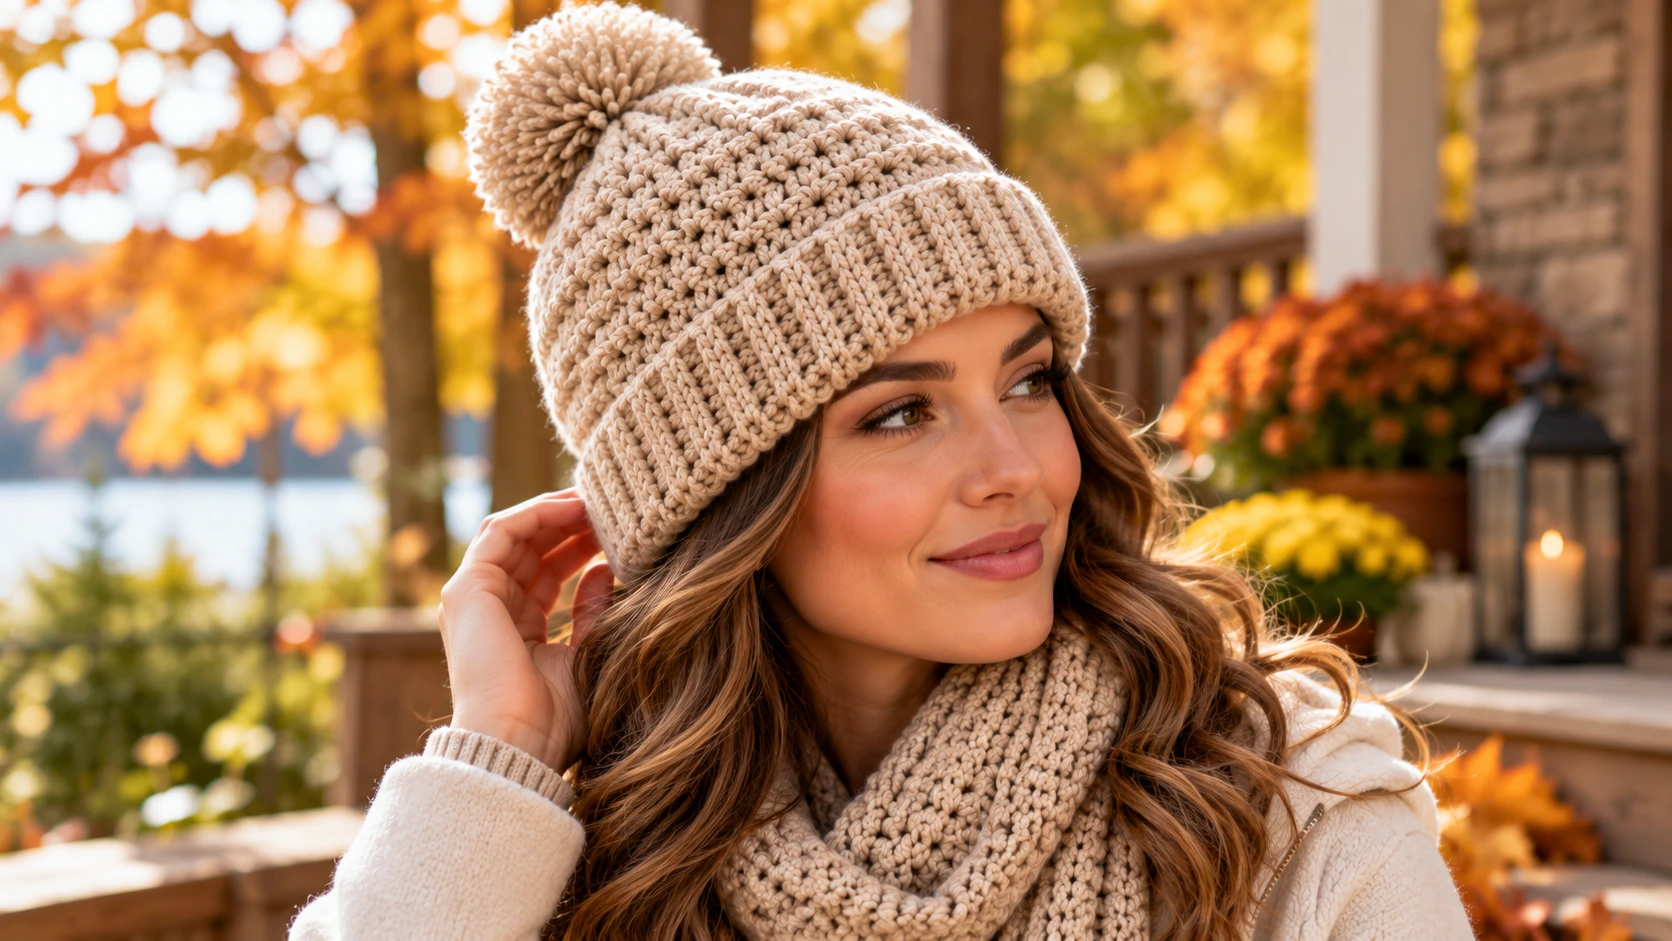
Table of Contents
A handmade crochet cap is a practical project when you want something wearable without taking on the complexity of a full sweater or fitted garment. With a simple top-down construction, you can adjust the crown as you work, check the fit before finishing, and create a cap in almost any color.
This crochet pattern cap tutorial is written as a complete adult crochet cape pattern using worsted-weight yarn and half double crochet. The main fabric is worked in joined rounds, followed by a simple post-stitch brim that adds structure and a little extra stretch.
The sample is designed for an average adult head measuring approximately 21–22½ inches around. Since head shapes, yarn, hook size, and tension vary, the pattern also explains how to use the crown diameter and actual head measurement to make a smaller or larger version.
The result is a clean everyday cap that can be made in a solid color, finished with a contrasting brim, or customized with stripes and small decorative details.
Crochet Cap Pattern Details
Skill level: Beginner to easy intermediate
Construction: Top-down, joined rounds
Main stitch: Half double crochet
Yarn: Worsted-weight (#4)
Approximate yardage: 180–240 yards
Hook: 5.0 mm (H-8)
Brim hook: 4.5 mm (7)
Sample fit: Adult approximately 21–22½-inch head circumference
Finished relaxed circumference: Approximately 20 inches, with crochet stretch allowing additional ease
Finished height: Approximately 8¾–9 inches
Notions: Yarn needle, scissors, stitch marker
Gauge
14 hdc × 10 rounds = approximately 4 × 4 inches
Gauge is especially important for the crown because the stitch count determines the overall circumference.
If your swatch is wider than 4 inches, use a smaller hook.
If it is narrower, try a larger hook.
A women’s crochet cap has some natural stretch, so the fabric should feel comfortable rather than stiff. The goal is a firm but wearable fabric.
Abbreviations
- ch: chain
- sl st: slip stitch
- sc: single crochet
- hdc: half double crochet
- fpdc: front post double crochet
- bpdc: back post double crochet
- st: stitch
- sts: stitches
- rep: repeat
All terminology uses standard US crochet terms.
Before You Start
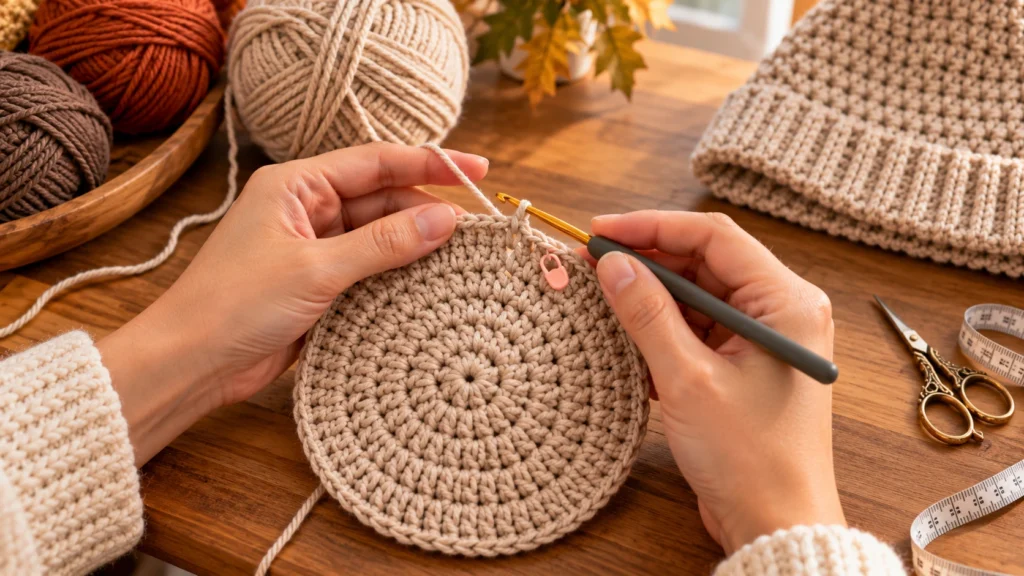
This cap is worked from the center of the crown downward.
Each round is joined with a slip stitch to the first hdc. The beginning ch-1 does not count as a stitch.
Place a stitch marker in the first stitch if it helps you keep track of the round.
The crown should resemble a shallow, flat circle while you are increasing. Once it reaches the correct diameter, stop increasing and work even rounds to create the sides of the cap.
That distinction is important. If you keep increasing after the crown has reached the correct size, the cap will begin to flare outward instead of forming a fitted shape.
Crochet Cap Pattern
Step 1: Create the Crown
Round 1
Make a magic ring.
Ch 1.
Work 10 hdc into the ring.
Join with a sl st to the first hdc.
Total: 10 sts
Pull the center of the magic ring closed.
Round 2
Ch 1.
Work 2 hdc in each stitch around.
Join with a sl st.
Total: 20 sts
Round 3
Ch 1.
2 hdc in the next st, hdc in the next st.
Repeat around.
Join with a sl st.
Total: 30 sts
Round 4
Ch 1.
2 hdc in the next st, hdc in each of the next 2 sts.
Repeat around.
Join with a sl st.
Total: 40 sts
Round 5
Ch 1.
2 hdc in the next st, hdc in each of the next 3 sts.
Repeat around.
Join with a sl st.
Total: 50 sts
Round 6
Ch 1.
2 hdc in the next st, hdc in each of the next 4 sts.
Repeat around.
Join with a sl st.
Total: 60 sts
Round 7
Ch 1.
2 hdc in the next st, hdc in each of the next 6 sts.
Repeat around.
Join with a sl st.
Total: 70 sts
At the stated gauge, the 70-stitch crown should measure approximately 6¼–6½ inches across when gently flattened.
Do not stretch the circle aggressively while measuring.
Check the Crown Before Continuing
This is the most useful fitting checkpoint in the pattern.
Measure across the crown from one side to the other.
For an adult head around 21–22½ inches, a crown diameter around 6¼–6½ inches is a useful starting point because the completed fabric will stretch around the head.
A simple calculation is:
Head circumference ÷ 3.14 = approximate crown diameter
For a 22-inch head:
22 ÷ 3.14 ≈ 7 inches
The crochet crown is smaller than that rigid mathematical diameter because the finished fabric has stretch and needs some negative ease.
The actual fit depends on your yarn and tension, so treat this as a fitting guide rather than a fixed rule.
Step 2: Work the Cap Body
Once your crown reaches the desired diameter, stop increasing.
Continue working hdc evenly around.
Rounds 8–18
Ch 1.
Hdc in every stitch around.
Join with a sl st.
Repeat for 11 rounds.
70 sts
The fabric should now begin curving downward rather than remaining flat.
At the stated gauge, the hat should measure approximately 7¼ inches from the center of the crown to the lower edge before the brim.
Check the Depth
Place the cap against the side of your head or compare it with the intended wearer’s measurement.
A typical adult cap often needs approximately 8–9 inches of total depth, depending on how closely fitted or slouchy you want it.
For a snug cap, continue to the brim once the body measures approximately 7–7½ inches from crown center.
For a deeper cap, add 2–3 additional hdc rounds.
Do not add extra rounds automatically. Measure the actual piece because yarn and tension affect row height.
Step 3: Create the Ribbed Brim
Switch to the 4.5 mm hook.
The smaller hook helps create a slightly firmer finishing edge.
Round 19
Ch 1.
Fpdc around the next stitch, bpdc around the next stitch.
Repeat around.
Join with a sl st.
70 sts
Round 20
Ch 1.
Fpdc around the next fpdc, bpdc around the next bpdc.
Repeat around.
Join with a sl st.
Round 21
Repeat Round 20.
Round 22
Repeat Round 20.
Fasten off.
Weave in the ends securely.
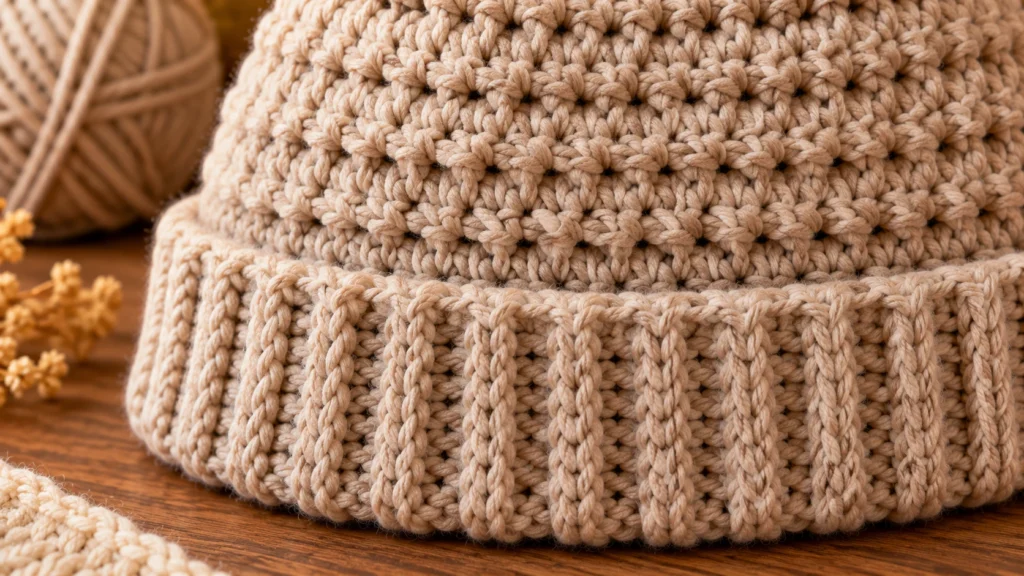
The four post-stitch rounds create a simple ribbed brim approximately 1½ inches deep, depending on tension.
If you prefer a shallower brim, stop after Round 21.
Step 4: Finish the Cap
Use a yarn needle to weave in both ends on the inside of the cap.
Avoid leaving long loose strands inside.
Turn the cap right side out and gently smooth the crown.
Do not pull the stitches aggressively.
The finished cap should have a rounded crown, straight sides, and a slightly firmer lower edge.
How to Make the Crochet Cap Smaller
The crown is the part that controls circumference, so adjust it before working the straight body rounds.
For a smaller adult size, stop increasing after Round 6 when you have 60 stitches.
Measure the crown across the center.
If the diameter is still too small for your intended head measurement, add an increase round with 5 evenly distributed increases, creating 65 stitches.
Then stop increasing and continue with the body.
The exact fit depends on the stretch of your yarn.
For a very small adult head, you can also use a slightly smaller hook rather than adding more increase stitches.
Make one change at a time so you can see how it affects the fabric.
How to Make the Crochet Cap Larger
For a larger adult head, continue the increase pattern after Round 7.
Round 8 — Larger Size
Ch 1.
2 hdc in the next st, hdc in each of the next 6 sts.
Because Round 7 already contains 70 stitches, distribute the additional increases evenly instead of blindly repeating the earlier round.
A practical method is to add 10 evenly spaced increases, giving approximately 80 stitches.
Then work the following rounds without increasing.
At the stated gauge:
80 ÷ 14 × 4 ≈ 22.9 inches
That gives an approximate relaxed circumference, which can be useful for a larger adult size once stretch is considered.
Always check the actual crown measurement rather than relying exclusively on the calculation.
How to Change the Cap Height
Changing the height is straightforward.
If the cap is too short, add more hdc rounds before beginning the brim.
If it is too long, remove one or more body rounds.
At the stated gauge, approximately 2½ rounds equal 1 inch of height.
For example, adding five rounds gives approximately:
5 ÷ 2.5 = 2 inches
Again, this is an estimate. Your individual tension may produce a different result.
Choosing Yarn for a Crochet Cap
Worsted-weight (#4) yarn is a practical choice for this pattern because it gives the cap enough body without becoming excessively heavy.
A smooth yarn also makes the hdc texture easy to see.
For an everyday cap, you can choose:
Soft acrylic: practical and easy to find in many colors.
Wool or wool blend: useful when you want a warmer cold-weather cap.
Cotton blend: can work for a lighter cap, although it generally behaves differently from wool or acrylic and may have less spring.
Pay attention to stretch.
A yarn with some elasticity can make a fitted cap more forgiving.
Very stiff yarn may produce a cap that feels less comfortable even when the measurements are technically correct.
Easy Color Ideas
The construction is simple enough that color can become the main design feature.
Classic Solid Cap
Use one color from beginning to end.
Cream, charcoal, navy, olive, rust, camel, or burgundy can create very different looks without changing the pattern.
Two-Tone Cap
Work the crown and body in one color.
Change to a contrasting shade for the final body rounds and brim.
For example, a cream cap with a dark brown brim creates a strong visual border.
Simple Stripes
Change yarn color every two or three rounds during the body.
Keep the crown in one color if you want the top to remain visually clean.
Neutral Minimalist Cap
Use one soft neutral yarn and allow the textured brim to provide the visual interest.
This can work particularly well with simple everyday outfits.
How to Add a Pom-Pom
A pom-pom is optional.
For a decorative version, make a medium-size yarn pom-pom and attach it firmly to the top center of the cap.
Use several passes of yarn through the crown so the pom-pom does not wobble.
For a simpler adult cap, leave it off.
The finished shape works well without any additional decoration.
How to Add a Folded Brim
The written pattern creates a single-layer ribbed brim.
For a deeper folded brim, work additional fpdc/bpdc rounds.
For example, instead of four brim rounds, work 8–10 rounds.
Fold the finished brim upward toward the body.
You can leave it loose for a softer folded look or sew a few small stitches around the sides to help keep the fold in position.
Measure as you work because a deeper brim reduces the visible height of the main cap body.
How to Make a Slouchier Crochet Cap
For a slouchy fit, do not continue increasing after the crown reaches the desired circumference.
Instead, add extra body rounds.
For example, if the fitted version uses 11 body rounds, adding another 6–8 rounds can create noticeably more fabric at the back of the head.
The cap will become longer without becoming wider.
This is usually easier than trying to create a slouchy shape by adding more crown increases.
Common Crochet Cap Problems
The Crown Looks Like a Bowl
You may be missing increases.
If the fabric begins curling upward before you reach the desired crown diameter, check your stitch count.
A flat crown should remain relatively flat during the increase stage.
The Crown Is Wavy
Too many increases can create extra fabric around the edge.
Check the count of each increase round.
If your tension is especially loose, you may also need a smaller hook.
The Cap Is Too Tight
Measure the crown before the body is finished.
If the crown diameter is too small, adding length will not fix the problem.
Instead, add another increase round or use a larger hook.
The Cap Is Too Loose
Check gauge first.
A cap made with larger stitches can become substantially wider even with the correct stitch count.
You may need to remake the crown with a smaller hook.
The Brim Feels Too Tight
Try the brim on before finishing all four rounds.
If it feels restrictive, use the larger 5.0 mm hook for the brim or reduce the tension of the post stitches.
You can also stop after three brim rounds.
The Brim Looks Uneven
Post stitches can be easier to distort than regular hdc.
Make sure each fpdc is worked around a post and each bpdc is worked around a post.
Keep your tension consistent between the two stitch types.
How to Get Cleaner Crochet Cap Seams
Joined rounds create a visible seam, especially in a solid-color cap.
To keep the seam subtle, join with a relaxed slip stitch rather than pulling the yarn tightly.
Begin each round directly above the previous joining area.
For a more polished look, keep the seam positioned toward the back of the cap.
Because the cap is worn on the head, the seam is naturally less noticeable than it would be on a flat object.
Measuring the Cap for a Better Fit
If you are making the cap for another person, measure around the fullest part of the head.
Do not pull the measuring tape tightly.
Record the head circumference.
Then compare it with the relaxed circumference of the crocheted cap.
A fitted crochet cap generally benefits from some negative ease because the fabric stretches.
For example, with a 22-inch head, a cap that measures around 20–21 inches before stretching may fit more naturally than a rigid 22-inch circumference.
The exact amount of ease depends on the yarn, stitch pattern, and wearer’s preference.
Ways to Personalize the Pattern
Once you understand the basic construction, there is plenty of room for experimentation.
Add a narrow contrasting stripe above the brim.
Use a different stitch for the final two body rounds.
Make the crown in one color and the brim in another.
Add a small embroidered initial.
Create matching caps for family members using different colors.
For a more textured version, alternate regular hdc rounds with hdc worked through the back loop.
Keep the main structure simple while changing one element at a time. That makes it much easier to understand how each design choice affects the final result.
Care Instructions
Care depends on your yarn fiber, so follow the washing instructions on the yarn label.
For a handmade cap, avoid unnecessary heat because some fibers can shrink, stretch, or lose their shape.
After washing, gently reshape the cap and allow it to dry according to the yarn manufacturer’s instructions.
Avoid hanging a wet cap for long periods because the fabric can stretch under its own weight.
Store it dry and away from excessive moisture.
Final Thoughts
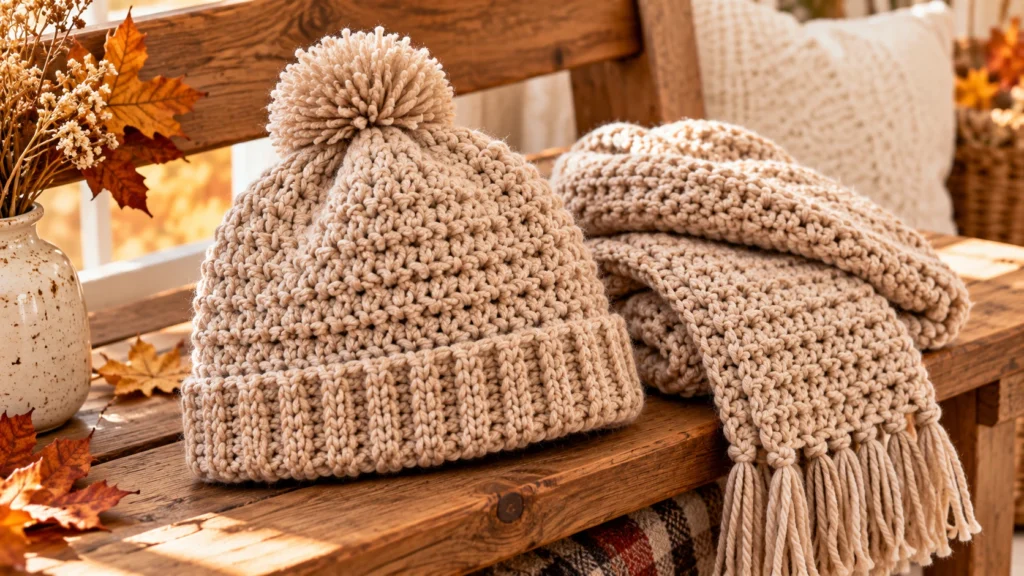
This crochet pattern cap is intentionally simple enough to customize while still producing a polished adult hat.
The most important part is not rushing past the crown. Measure it before continuing, compare it with the intended head size, and adjust the circumference before adding the body rounds.
Once the fit is right, the rest of the cap is mostly repetition. You can then change the length, brim depth, colors, or finishing details to create a completely different version from the same basic construction.
For a first cap, work the solid-color version exactly as written. Once you are comfortable with the shape, experiment with stripes, a folded brim, or a contrasting edge.
FAQ
What yarn is best for a crochet cap?
Worsted-weight (#4) yarn is a useful starting point for this pattern. Smooth acrylic, wool blends, and some cotton blends can work, but the final stretch and drape will vary by fiber.
What hook size is used for this crochet cap pattern?
The main cap uses a 5.0 mm (H-8) hook, while the sample brim uses a 4.5 mm hook to create a slightly firmer edge.
How do I know what size crochet cap to make?
Measure around the fullest part of the head, then compare that measurement with the relaxed circumference of the crocheted cap. Crochet stretches, so the finished cap is generally smaller than the head measurement.
Can I make this crochet cap larger?
Yes. Continue the crown increases until the flattened crown reaches the diameter you need, then work the body without increasing. For a larger adult sample, approximately 80 stitches can be a useful starting point.
How can I make the cap slouchy?
Keep the crown circumference the same but add more plain hdc rounds before working the brim. This increases the height without significantly increasing the circumference.
Can I add a folded brim?
Yes. Work additional rounds of alternating fpdc and bpdc to create a deeper ribbed band, then fold it upward. Measure as you work so the added brim does not make the cap too short.