
Fantastic Crochet Witches Hat Pattern Free: Easy DIY Project
Learn how to make a crochet witches hat pattern free with this easy DIY guide, including simple steps, helpful tips, and festive ideas for Halloween crafts.
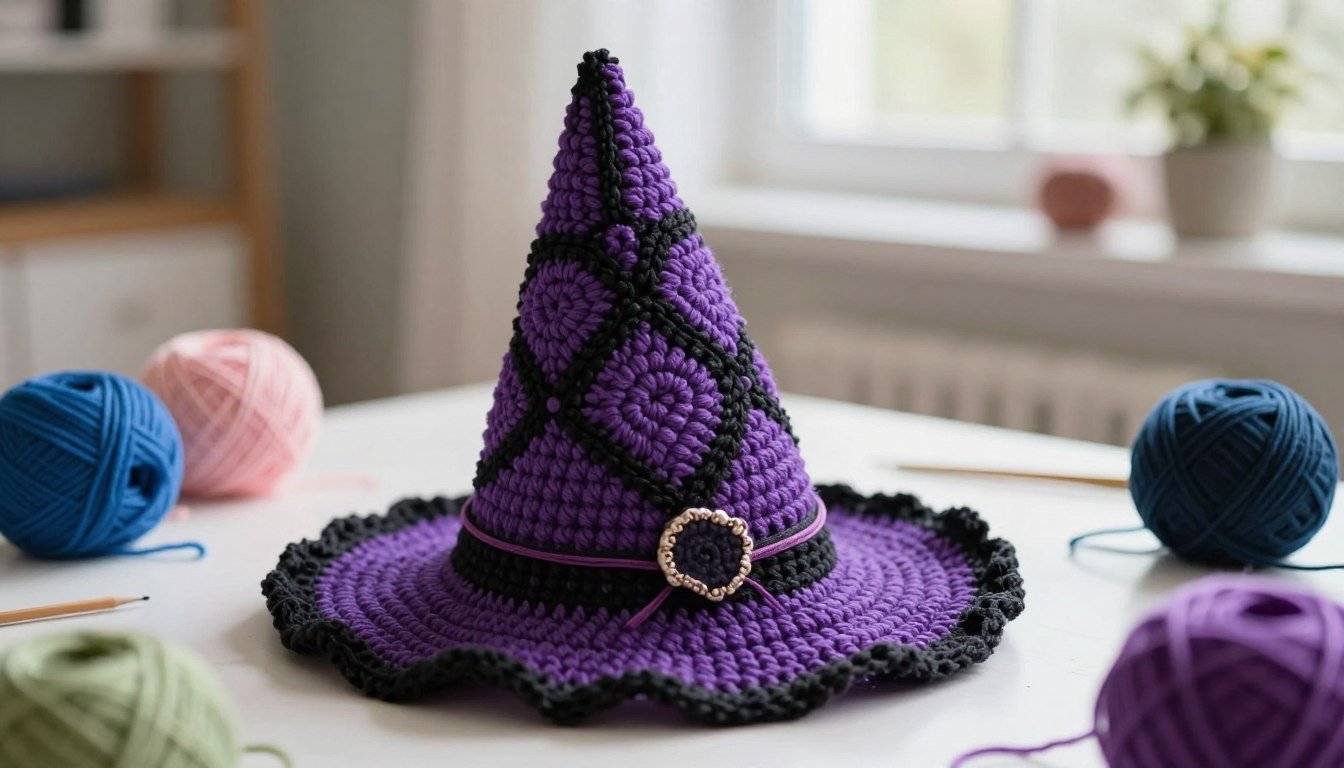
Table of Contents
Have you ever wondered if you could craft your own iconic Halloween headwear without spending a fortune? Many makers assume that creating seasonal accessories requires advanced skills, but this simple project proves otherwise. By using basic techniques, you can build a stunning accessory that looks professional and fits perfectly.
This guide offers a reliable crochet witches hat pattern free for anyone comfortable with fundamental stitches. The design relies on single loops and firm tension to maintain a sturdy shape. You will learn how to work in continuous rounds while using markers to keep your place throughout the build.
We will explore the top-down construction method, which allows for easy sizing adjustments. You can also personalize your final piece with unique decorative elements. Whether you are a beginner or a seasoned pro, this project provides a fun way to celebrate the spooky season with a handmade touch.
Gather Materials and Choose the Hat Size
Success with any easy crochet hat pattern starts with selecting high-quality yarn and the right tools. Proper preparation prevents frustration and ensures your finished project maintains its dramatic, pointed shape throughout the holiday season.
Select Yarn, Hook, and Essential Notions
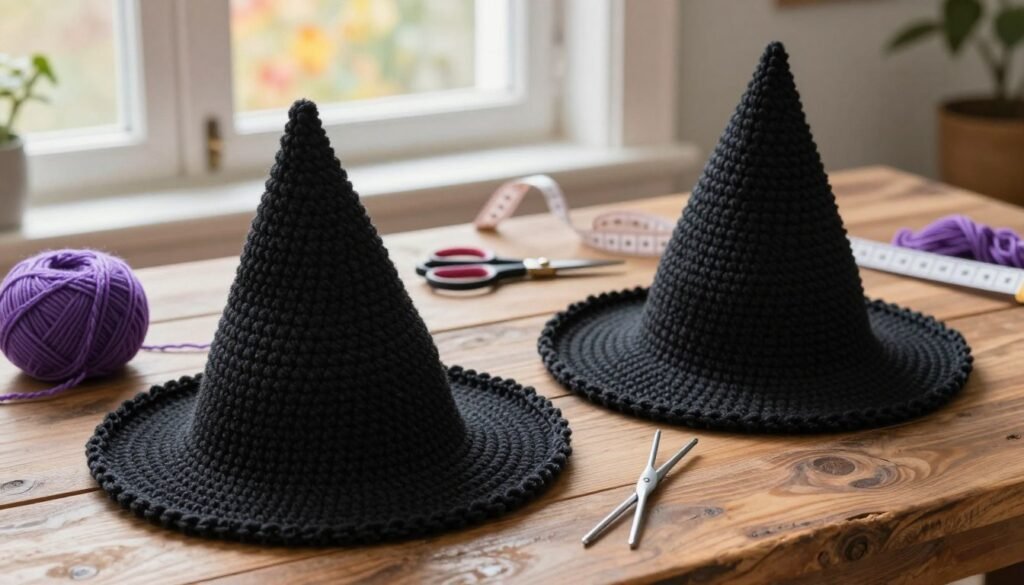
For this project, choose a super bulky weight yarn or a sturdy wool blend. These fibers provide the necessary structure to keep the crown upright without sagging. You will also need a 6.5 mm crochet hook, which creates a dense fabric that holds its form well.
Gather your essential notions before you begin your first stitch. You should have a pair of sharp scissors, a yarn needle for weaving in ends, and a few locking stitch markers. These small tools make the process much more manageable for beginners.
Measure the Head and Adjust the Finished Dimensions
To ensure a perfect fit, measure the circumference of the wearer’s head just above the ears. Most patterns categorize sizes into three main ranges: child, teen, and adult. Adjusting your starting chain or the number of increase rounds allows you to customize this easy crochet hat pattern for any individual.
If the head measurement falls between two sizes, always choose the larger option for comfort. A slightly loose hat is easier to secure with a ribbon or band than one that is too tight. Always record your measurements before you start working the base of the crown.
Check Gauge Before Starting the Crochet Witches Hat
Creating a gauge swatch is a vital step for any easy crochet hat pattern. Work a small square using your chosen yarn and hook to see how many stitches fit into a four-inch space. If your swatch is too loose, switch to a smaller hook to tighten the fabric.
Conversely, if your stitches feel too stiff or small, move up to a larger hook size. Matching the recommended gauge ensures that your hat will fit correctly and use the expected amount of yarn. This simple test saves time and prevents the need to unravel your work later.
Recommended Yarn Weights and Halloween Color Combinations
| Yarn Weight | Recommended Fiber | Classic Color Palette |
|---|---|---|
| Super Bulky | Wool Blend | Midnight Black |
| Bulky | Acrylic/Wool | Deep Purple |
| Worsted (Double) | Cotton Blend | Pumpkin Orange |
Understand the Crochet Witches Hat Pattern Free
Many free crochet patterns for beginners rely on simple shapes that build into impressive designs. By breaking this project into smaller, logical parts, you will find the process both rewarding and straightforward. This approach ensures that even those new to the craft can achieve a polished result.

Review the Construction of the Crown, Brim, and Band
The hat consists of three distinct sections that work together to create the classic silhouette. You will start with the pointed crown, which provides the height and structure of the piece. Once the crown reaches the desired width, you will transition into the wide brim to give the hat its iconic look.
An optional decorative band can be added at the base where the crown meets the brim. This band serves as a perfect spot for buckles or ribbons. Understanding how these components connect helps you visualize the final shape before you begin.
Learn the Abbreviations and Basic Crochet Stitches
Most free crochet patterns for beginners use standard US terminology to keep instructions clear. You will primarily work in continuous rounds, which means you do not join at the end of each row. Familiarizing yourself with these abbreviations is essential for following the pattern accurately.
| Abbreviation | Stitch Name | Purpose |
|---|---|---|
| ch | Chain | Foundation for the magic ring |
| sc | Single Crochet | Main stitch for structure |
| inc | Increase | Expands the hat diameter |
| st | Stitch | Reference for placement |
Use Stitch Markers to Track Rounds and Increases
Working in a spiral can make it difficult to track where one round ends and the next begins. Using stitch markers is a professional technique that prevents confusion during the increase process. Place a marker in the first stitch of every round to keep your count precise.
This system is especially helpful when you need to increase evenly around the circle. By marking your starting point, you can easily verify that your stitch count matches the pattern requirements. Consistent tracking leads to a symmetrical and well-shaped hat.
How to Read the Pattern Instructions and Maintain Even Tension
Reading the instructions requires attention to the specific sequence of stitches provided. Look for patterns in the text, such as repeating sets of increases that create the cone shape. Maintaining even tension is just as important as following the written steps correctly.
If your tension is too loose, the hat may lose its structure and sag. Conversely, tension that is too tight can make the fabric stiff and difficult to work with. Practice holding your yarn consistently to ensure a smooth, professional finish throughout your project.
Build the Pointed Crown from the Top Down
Building the crown from the top down allows you to control the shape and height of your project. This foundational stage is essential for any high-quality crochet witches hat pattern free. By working in a continuous spiral, you ensure a seamless look that defines the classic silhouette of the accessory.
Start the Adjustable Magic Ring
Begin your project by creating an adjustable magic ring. This technique allows you to pull the center tight, which eliminates the hole often found at the start of circular crochet projects. Wrap the yarn around your fingers and pull up a loop to secure your starting point.
Work the Initial Single Crochet Rounds
Once your ring is secure, work six single crochet stitches directly into the center. Pull the tail end firmly to close the ring completely. This tight start is a hallmark of a professional crochet witch hat tutorial, ensuring the tip of your hat remains sturdy and pointed.
Increase Evenly to Create the Cone Shape
To transition from a flat circle to a cone, you must increase your stitch count in every round. Place a stitch marker in the second stitch of each increase to keep track of your progress. Consistent increases are the secret to achieving a smooth, conical slope that does not bunch or ripple.
Prevent Gaps, Curling, and an Uneven Point
Tension is the most critical factor when working the crown. Pull your yarn firmly after every single crochet stitch to prevent unsightly gaps between stitches. If your work begins to curl, check your tension or consider using a slightly smaller hook size to maintain a firm, structured fabric.
| Increase Frequency | Resulting Shape | Best Use Case |
|---|---|---|
| Every Round | Wide, Flat Cone | Short, Slouchy Hats |
| Every Other Round | Steep, Tall Point | Classic Witch Style |
| Every Third Round | Narrow, Needle Point | Decorative Mini Hats |
Following this crochet witches hat pattern free requires patience during these first few rounds. Once you establish the rhythm of your increases, the crown will grow quickly. Keep your markers in place to ensure your stitch count remains accurate throughout the entire process.
Shape the Crown into a Dramatic Witch Hat
Shaping the crown is where your diy crochet hat truly starts to take on its unique character. By carefully managing your stitches, you can transition from a simple cone into a sophisticated accessory. This stage allows you to define the final silhouette, whether you prefer a classic pointed look or a more whimsical, slouchy style.
Continue the Spiral with Controlled Increases
To maintain a smooth surface, continue working in a continuous spiral rather than joining rounds. This technique prevents a visible seam from running up the side of your diy crochet hat. Ensure that you place your increases consistently in each round to keep the cone shape symmetrical and balanced.
Adjust the Slope for a Soft or Extra-Tall Point
You can easily modify the height of your hat by changing the frequency of your increase rounds. For a taller, more dramatic point, work several rounds of plain single crochet between each increase round. If you prefer a softer, shorter slope, increase more frequently to widen the cone quickly.
Check the Fit Before Beginning the Brim
Before you transition to the brim, it is vital to verify that the base of the crown fits the intended wearer. Use the following table to determine when to stop increasing based on the head size. These measurements serve as essential checkpoints for your project.
| Size Category | Target Diameter (Inches) | Recommended Rounds |
|---|---|---|
| Child | 6.0 – 6.5 | 12 – 14 |
| Adult S/M | 7.0 – 7.5 | 16 – 18 |
| Adult L | 8.0 – 8.5 | 20 – 22 |
Correct Common Crown Problems Without Unraveling the Entire Hat
If you notice the crown becoming too tight or wavy, you can often fix it by adjusting your tension in the next few rounds. A slightly loose crown can be tightened by skipping an increase round or using a smaller hook size for a short section. These minor tweaks help you perfect your diy crochet hat without needing to restart your work from the beginning.
Crochet the Structured Brim
You can easily adapt your knowledge of a standard crochet beanie pattern to craft a sturdy witch hat brim. While a beanie typically tapers inward, the brim requires a sudden expansion to create that iconic, dramatic silhouette. This shift in direction is the most important step for achieving a professional look.
Transition Smoothly from the Crown to the Brim
To begin the brim, work your first round into the front loops only of the final crown stitches. This technique creates a visible ridge that helps the brim extend outward at a sharp angle. It provides a clean, decorative transition that separates the cone from the base.
Increase around the Base for a Wide, Flat Edge
Achieving a flat, wide edge depends on your increase frequency. If you increase too slowly, the brim will curl upward like a bowl. If you increase too quickly, the fabric will ripple and wave. Follow these general guidelines for a balanced expansion:
- Increase every 2nd or 3rd stitch in the first brim round.
- Maintain a consistent stitch count in subsequent rounds to keep the edge flat.
- Use a slightly smaller hook if you find the fabric becoming too loose.
Stiffen the Brim with Firm Stitches and Optional Wire
A floppy brim can ruin the look of your project, so focus on maintaining tight tension. Single crochet stitches are ideal here because they create a dense, sturdy fabric. For extra support, you can weave a piece of millinery wire or heavy-duty plastic cord into the final round.
Keep the Brim Level Instead of Wavy or Floppy
If your brim does not lay flat, you may need to adjust your tension or increase count. Use the following table to troubleshoot common issues during this phase of your project:
| Issue | Likely Cause | Solution |
|---|---|---|
| Curling Upward | Too few increases | Add more increases per round |
| Rippling/Wavy | Too many increases | Reduce the number of increases |
| Floppy Brim | Loose tension | Use a smaller hook size |
By monitoring your stitch count closely, you ensure the brim remains level. This attention to detail elevates your work beyond a simple crochet beanie pattern and creates a durable accessory for any costume.
Finish, Decorate, and Personalize the Hat
Transforming your basic crochet cone into a professional-looking accessory requires a few final steps. These finishing touches ensure your project stands out as a high-quality piece of wearable art.
Fasten Off, Weave in Ends, and Shape the Hat
Once you reach the final stitch, cut your yarn, leaving a six-inch tail. Pull the tail through the loop to secure it firmly, then use a tapestry needle to weave the end into the interior of the hat.
To achieve a crisp, professional shape, lightly steam your hat using a garment steamer or a damp cloth with an iron. Gently pull the fabric into the desired silhouette while it is slightly warm, then let it cool completely to set the fibers.
Add a Crochet Band, Buckle, or Decorative Bow
A decorative band adds structure and visual interest to the base of your hat. You can crochet a simple flat strip in a contrasting color and sew it securely around the transition point between the crown and the brim.
For a classic look, create a small square buckle using gold or silver yarn and attach it to the front of the band. Alternatively, a large satin ribbon or a crocheted bow can provide a softer, more whimsical aesthetic for your witch costume crochet project.
Customize the Design for a Child, Adult, or Costume
Adjusting the scale and embellishments allows you to tailor the hat for any wearer. Smaller hats for children benefit from lightweight yarn and playful, oversized bows, while adult versions often look best with structured, minimalist bands.
Use Appliqués and Contrasting Colors for Halloween Crochet Patterns
Incorporating unique motifs is a hallmark of creative halloween crochet patterns. You can sew on felt spiderwebs, crocheted stars, or even small fabric patches to give your hat a spooky or magical flair.
| Decoration Type | Best For | Difficulty Level |
|---|---|---|
| Satin Ribbon | Elegant Adult Costumes | Easy |
| Crocheted Buckle | Classic Witch Look | Medium |
| Spiderweb Appliqué | Spooky Halloween Themes | Advanced |
| Felt Stars | Children’s Costumes | Easy |
By mixing and matching these elements, you ensure your work fits perfectly into broader halloween crochet patterns. Experimenting with color combinations, such as deep purple with lime green or classic black with orange, will make your final piece truly one-of-a-kind.
Wear and Care for the Handmade Crochet Hat
Protecting your hard work is the final stage of this handmade crochet hat tutorial. Proper maintenance ensures that your festive accessory remains a staple of your wardrobe for many years. By following these simple guidelines, you can keep the structure intact and the fabric looking fresh.
Secure the Hat Comfortably for Parties and Trick-or-Treating
A well-fitted hat should stay in place during active movement. If the fit feels slightly loose, you can easily add a hidden elastic chin strap or use bobby pins to anchor the brim to your hair. These small adjustments prevent the hat from slipping while you enjoy your festivities.
- Use matching thread to sew a small elastic band inside the crown.
- Slide bobby pins through the base of the brim for extra stability.
- Consider adding a soft ribbon tie if the hat is intended for younger children.
Clean, Dry, and Store the Hat Without Losing Its Shape
When it comes time to clean your project from this handmade crochet hat tutorial, always check the yarn label for specific instructions. Most wool-blend items require gentle hand washing in cool water with a mild detergent. Avoid wringing the fabric, as this can distort the pointed crown or the flat brim.
To dry, gently press out excess water with a clean towel and lay the hat flat on a blocking board or a clean surface. Reshape the brim while it is damp to ensure it stays crisp. For storage, stuff the crown with acid-free tissue paper to prevent crushing and keep it in a cool, dry place away from direct sunlight.
Follow Basic Safety Tips for Children and Costume Accessories
Safety is paramount when creating accessories for children. If you are making this for a toddler, avoid using buttons, beads, or loose sequins that could pose a choking hazard. Instead, use embroidery or crochet techniques to create decorative features that are securely attached to the fabric.
Always supervise young children while they wear costume accessories to ensure the hat does not obstruct their vision. If you choose to use wire for stiffening the brim, ensure the ends are tucked securely into the stitches or wrapped in tape to prevent poking. These precautions help ensure that your handmade crochet hat tutorial results in a safe and enjoyable experience for everyone.
Conclusion
Creating a custom witch hat requires attention to detail from the first stitch to the final trim. Success relies on your ability to maintain consistent tension and track your progress with markers. These habits ensure your project fits perfectly every time you pick up your crochet hook.
You now possess the skills to build a pointed crown and a structured brim using basic techniques. Accurate head measurements and careful gauge testing remain the foundation of a professional look. These core principles apply to any yarn weight or color palette you choose for your next seasonal project.
Experiment with different textures or add unique embellishments to make your design stand out. Whether you craft a piece for a child or an adult, your handmade accessory will serve as a highlight for any costume. Share your finished work with the crafting community to inspire others to start their own creative journey.