
Easy & Adorable Crochet Panda: A Step-by-Step Guide
Creating a crochet panda handmade stuffed animal is a rewarding project for crafters of all skill levels.
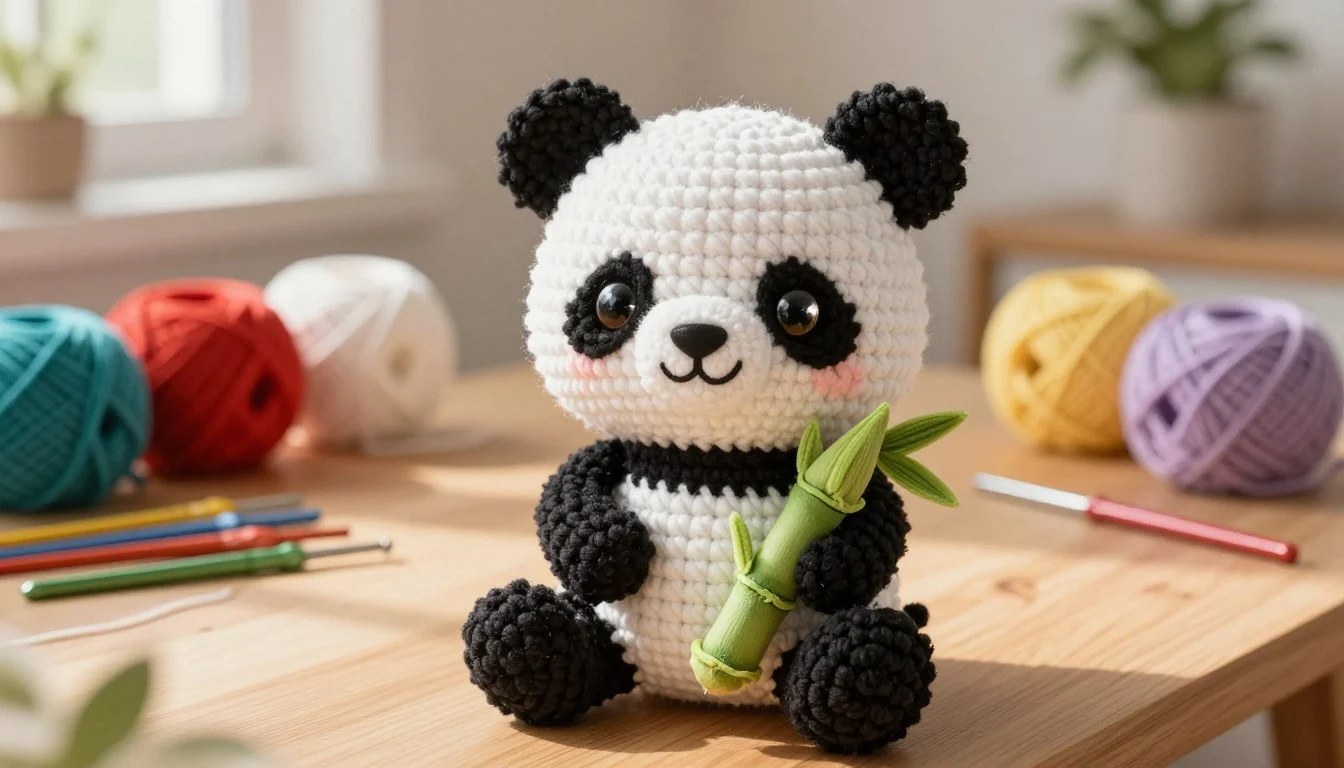
Table of Contents
Creating a handmade stuffed animal is a rewarding project for crafters of all skill levels. This comprehensive crochet panda tutorial walks you through every stage of the process, from selecting your materials to the final assembly. You will learn how to construct the head, body, and limbs while mastering the essential stitches needed for a professional finish.
Your choice of yarn weight and hook size will directly influence the final dimensions of your project. By adjusting these tools, you can easily scale your design to create a tiny keepsake or a larger companion. Many makers find that they can complete a small version of this adorable crochet panda in just a few hours of focused work.
We will cover the specific techniques for facial details and secure stuffing methods to ensure your creation remains durable. Follow these clear instructions to bring your own soft friend to life with ease and confidence.
Materials, Tools, and Crochet Skills for a Panda Amigurumi
Creating a charming panda amigurumi requires specific tools and a clear understanding of basic crochet stitches. Proper preparation ensures your project remains consistent and structurally sound throughout the process.
Yarn, Hook, and Fiberfill Requirements
Choosing Black, White, and Optional Accent Yarn
For a classic look, select high-quality cotton or acrylic yarn in black and white. Cotton is often preferred for its stitch definition, while chenille yarn provides a soft, plush texture. You may also choose an optional accent color, such as pink or blue, for small details like a bow or a heart.
Selecting a Hook for Tight Amigurumi Stitches
Amigurumi requires a tight tension to prevent the fiberfill from showing through the fabric. Use a hook size slightly smaller than the yarn label recommends to achieve this density. The following table helps you choose the right combination for your desired size.

A beautifully crafted panda amigurumi sits prominently in the foreground, showcasing its intricate details, including soft black and white yarn, tiny embroidered eyes, and a sweet, smiling expression. The panda is positioned on a textured wooden surface, enhancing its handmade charm. In the middle ground, a vibrant assortment of crochet materials surrounds the amigurumi, featuring colorful skeins of yarn, a pair of polished wooden crochet hooks, and a cozy basket brimming with supplies. The background displays a softly blurred homey craft room, illuminated by warm, natural light streaming through a nearby window, creating a cozy and inviting atmosphere. The overall mood is cheerful and creative, inviting crafters to explore the delightful world of crochet.
| Yarn Type | Hook Size | Finished Size |
| Sport Weight Cotton | 2.5 mm | Approx. 10 cm |
| Worsted Weight Acrylic | 3.5 mm | Approx. 14 cm |
| Bulky Chenille | 4.5 mm | Approx. 20 cm |
Safety Eyes, Embroidery Supplies, and Finishing Tools
Safety eyes are essential for a professional finish on your panda crochet pattern. Choose sizes between 6mm and 10mm depending on your yarn weight. You will also need a tapestry needle for weaving ends, sharp scissors, and sewing pins to hold pieces in place before joining.
Essential Techniques and Abbreviations to Know
Most patterns use standard American crochet terminology. Familiarizing yourself with these abbreviations will make following the instructions much easier.
Working a Magic Ring and Single Crochet
The magic ring is the standard starting point for most circular projects. It allows you to pull the center tight, leaving no visible hole. Single crochet (sc) is the primary stitch used to build the dense fabric required for stuffed toys.
Increasing, Decreasing, and Using a Stitch Marker
Increases (inc) and decreases (dec) are used to shape the head and body of your panda amigurumi. Always use a stitch marker to track the start of your rounds, as working in a continuous spiral can make it difficult to count stitches. Mastering these basics will ensure your panda crochet pattern turns out perfectly every time.
How to Make a Crochet Panda Body and Head
Building the foundation of your plush toy starts with the body and head. Achieving a professional look requires careful attention to tension and stitch placement throughout the process.
Step: Crochet the White Body Base
Build the Magic Ring and First Rounds
Start your project by creating a magic ring with white yarn. This technique ensures a tight center that prevents fiberfill from poking through your finished crochet panda.
Work six single crochet stitches into the ring to begin. Pull the tail firmly to close the gap completely before moving to the next round.
Shape the Body with Even Increases
Increase your stitch count in each round to create a rounded shape. Follow your specific panda crochet pattern to ensure the body grows at a steady rate.
Maintain consistent tension to keep the fabric dense. This prevents the stuffing from showing through the gaps between your stitches.

Step: Form the Panda Head
Work the Rounded Head in Continuous Rounds
The head is worked in continuous spirals rather than joining each round. This method creates a seamless look that is essential for a high-quality toy.
Place a stitch marker at the start of each round to keep track of your progress. Continue increasing until you reach the desired width for the head.
Place the Safety Eyes Before Closing the Opening
Insert your safety eyes between the designated rounds while the head is still open. Secure the washers firmly on the inside to ensure they stay in place.
Check the symmetry of the eyes before you proceed with the final decreases. Once the head is closed, you cannot adjust their position easily.
Step: Add Black Color Changes and Shape the Face
Keep Color Changes Neat on the Panda Crochet Pattern
When switching to black yarn for the face details, use the invisible color change method. This keeps the transition smooth and prevents unsightly bumps in your work.
Carry the yarn along the inside of the piece if you need to switch back to white. This minimizes the number of ends you need to weave in later.
Stuff the Head and Body Evenly Without Overfilling
Add fiberfill in small, fluffy clumps as you work toward the final rounds. This helps you achieve a smooth, rounded shape without creating lumps.
Avoid overfilling the pieces, as this can stretch the stitches and distort the shape of your crochet panda. Stop stuffing when the piece feels firm but still retains a slight squish.
Step-by-Step Crochet Panda Ears, Arms, and Legs
The personality of your panda amigurumi truly comes to life once you attach the smaller appendages. These features define the character and ensure your project looks professional and balanced.
Step: Make and Attach the Rounded Ears
Shape Two Matching Black Ears
Start by crocheting two identical circles using black yarn. Keep your tension consistent to ensure both ears match in size and density.
Position the Ears Symmetrically on the Head
Pin the ears to the top of the head before sewing them down. Use a measuring tape to ensure they are placed at the same distance from the center of the face.
Step: Crochet the Arms
Work Short Tubular Arms with Black Yarn
Create two small tubes by working in continuous rounds. Stuff these lightly so they maintain a soft, rounded shape without becoming too rigid.
Sew the arms to the sides of the body using a whip stitch. Go through the stitches multiple times to ensure the limbs stay attached during play.
Step: Create and Attach the Legs
Shape the Feet for a Stable Sitting Pose
Crochet the legs with a slightly wider base to act as a foundation. This extra width helps your panda plush crochet design stay upright on flat surfaces.
Align the Legs So the Panda Can Sit Upright
Position the legs at the bottom front of the body. Test the balance by placing the figure on a table to confirm it sits without tipping over before you finalize the sewing.
Step-by-Step Panda Face, Belly, and Color Details
You can bring your creation to life by carefully adding the face and belly details. These finishing touches define the personality of your project and transform simple yarn shapes into a cute panda crochet character. Taking your time during this stage ensures a polished and professional result.
Step: Crochet and Sew the White Face Patch
Make an Oval or Rounded Face Piece
Start by crocheting a small, flat oval or circle using white yarn. This piece serves as the base for the snout area. Keep your stitches tight to ensure the stuffing underneath does not show through.
Center the Patch Around the Safety Eyes
Position the white patch directly between and slightly below the safety eyes. Pin it in place before sewing to ensure it remains perfectly centered. Once satisfied with the placement, use a whip stitch to secure the edges to the head.
Step: Add the Panda’s Nose and Mouth
Embroider a Small Black Nose
Use black embroidery floss or thin yarn to create a small, inverted triangle nose on the center of the white patch. Work several horizontal stitches to build up the shape. This adds depth and character to your cute panda crochet design.
Create a Simple Smiling Mouth with Yarn
Bring your needle down from the bottom point of the nose to create a small vertical line. Then, stitch a gentle curve on either side to form a smile. Keep the tension light so the mouth looks soft and friendly.
Step: Add Eye Patches and the White Belly
Position Black Eye Patches for a Cute Panda Crochet Expression
Crochet two small black ovals to serve as the signature panda eye patches. Place them at a slight angle around the safety eyes to give the face a sweet, sleepy look. Secure them with pins to test the expression before you begin sewing.
Attach the White Belly Panel Without Loose Edges
Prepare a white circular or oval panel for the tummy area. Pin this piece firmly to the front of the body, ensuring the edges are tucked neatly. Use a matching white thread to sew the panel down, making sure no gaps remain.
| Feature | Material | Placement Tip |
| Eye Patches | Black Yarn | Angle slightly outward |
| Nose | Embroidery Floss | Center of white patch |
| Belly Panel | White Yarn | Align with center body |
Step: Check the Facial Expression Before Final Sewing
Before you finalize any stitches, hold your project at arm’s length to evaluate the overall look. Check that the eyes, nose, and mouth are balanced and symmetrical. If the expression feels right, proceed with the final sewing to lock every detail in place.
Assemble, Stuff, and Finish the Handmade Panda Crochet
Bringing your crochet panda tutorial project to completion requires careful assembly and attention to detail. This phase transforms individual pieces into a cohesive, huggable toy. By following these steps, you ensure your creation is both durable and aesthetically pleasing.
Step: Join Every Part with a Yarn Needle
Use Matching Yarn for Less Visible Seams
Always use the same color yarn as the section you are currently sewing. This technique hides the thread and creates a seamless look for your panda plush crochet. A blunt-tipped tapestry needle works best to avoid splitting the yarn fibers.
Secure Limb Attachments with Repeated Stitches
When attaching arms and legs, pass your needle through the body and back out several times. This creates a strong anchor point that prevents the limbs from becoming loose over time. Ensure the tension remains consistent to keep the handmade panda crochet looking uniform.
Step: Complete the Stuffing and Closing Process
Distribute Fiberfill into Small Areas
Use a wooden dowel or the back of a crochet hook to push fiberfill into narrow limbs and ears. Small, firm pinches of stuffing prevent lumps and ensure an even shape. Do not overstuff, as this can cause the stitches to stretch and reveal the filling inside.
Weave In Ends and Close Openings Neatly
Once the piece is full, use a whip stitch to close the final opening. Pull the yarn tail through the center of the body to hide the knot securely. This method keeps your work clean and prevents the stuffing from escaping.
Step: Shape the Panda Plush Crochet Design
Adjust the Head, Ears, and Limbs for Balance
Before the final knot, gently massage the plush to distribute the stuffing evenly. Check that the head sits straight and the limbs allow the panda to sit upright. Minor adjustments at this stage significantly improve the final appearance.
Trim Stray Fibers Without Cutting Structural Stitches
Use sharp embroidery scissors to carefully snip any loose yarn ends or stray fiberfill. Be extremely cautious to avoid cutting the actual stitches that hold your project together. A quick trim gives your finished piece a professional, polished look.
| Assembly Step | Primary Tool | Key Objective |
| Limb Attachment | Tapestry Needle | Structural Integrity |
| Stuffing | Wooden Dowel | Even Distribution |
| Final Finishing | Embroidery Scissors | Visual Polish |
Customize and Troubleshoot Your Crochet Panda
Customizing your handmade creations allows you to transform a standard pattern into a one-of-a-kind masterpiece. Whether you want to change the scale of your project or fix a minor mistake, these techniques help you refine your work. Mastering these skills ensures your crochet panda toy looks professional and unique.
Adjust the Size, Texture, and Pose
Make a Miniature or Larger Panda with Yarn and Hook Changes
You can easily alter the final size of your project by switching your materials. Using a thinner yarn with a smaller hook creates a delicate miniature version, while bulky yarn and a larger hook result in a soft, oversized plush. Always remember to adjust your tension to maintain a tight fabric that prevents stuffing from showing through.
Create a Sitting, Standing, or Hugging Pose
Changing the placement of the limbs allows you to give your panda crochet doll a distinct personality. Sew the legs at a right angle to the body to create a sitting pose, or attach them directly to the bottom for a standing look. You can even position the arms to meet in the front if you want your panda to appear as if it is hugging a small accessory.
Fix Common Panda Amigurumi Problems
Correct Loose Stitches, Gaps, and Uneven Increases
Visible gaps often occur when your hook size is too large for your yarn weight. To fix this, try dropping down one hook size or tightening your yarn tension during the increase rounds. If you notice uneven increases, ensure you are counting your stitches carefully at the end of every round to maintain the correct shape.
Repair Misaligned Features or Lopsided Limbs
If a limb looks lopsided, use locking stitch markers to pin the piece in place before you begin sewing. This allows you to check the symmetry from all angles. If facial features appear misaligned, carefully snip the yarn and re-position the eyes or nose patch to achieve a balanced expression.
Use Safe Finishing Practices for Children’s Toys
Secure Embellishments and Inspect Seams Regularly
Safety is vital when creating a crochet panda toy for young children. Use a strong, matching thread to double-stitch all limbs and facial patches to the main body. Perform a pull test on every part to ensure they are firmly attached and cannot be easily removed.
Choose Embroidered Eyes Instead of Safety Eyes for Infants
Safety eyes can pose a choking hazard for infants and toddlers. For a safer panda crochet doll, use black embroidery floss to stitch the eyes directly onto the face. This method provides a cute, expressive look while ensuring the toy remains completely safe for little hands to hold and play with.
Conclusion
Creating a crochet panda requires patience and attention to detail. You now possess the skills to transform simple yarn into a charming plush companion. Consistent stitch counts and balanced stuffing remain the secrets to a professional look.
Every handmade panda crochet project reflects your unique style. You can experiment with different yarn weights or textures to change the final size. Adjusting the limb placement allows you to create a sitting or standing pose for your new creation.
Secure facial features and hidden yarn ends ensure your work lasts for years. These small steps protect your hard work during play or display. Your ability to troubleshoot common issues gives you the confidence to tackle more complex patterns.
Share your finished work with friends or family members who appreciate handmade gifts. Each crochet panda serves as a testament to your growing talent in the fiber arts. Start your next project today and enjoy the rewarding process of bringing soft characters to life.
FAQ
Is this panda crochet tutorial suitable for someone who has never crocheted before?
While this guide is beginner-friendly, it is helpful to first practice the basic single crochet stitch and the magic ring. Once you master those, you will find making a panda amigurumi to be a straightforward and satisfying project.
What yarn works best for a soft panda plush crochet toy?
For a very soft and huggable result, brands like Premier Parfait Chunky or Bernat Blanket yarn are excellent choices. These “chenille” style yarns create a plush texture that hides stitches well.
How can I make my handmade panda crochet look more professional?
The secret lies in tension and assembly. Use a smaller hook than the yarn label recommends to keep stitches tight, and take your time pinning the parts symmetrically before sewing them together with a yarn needle.
Can I use this panda crochet pattern to make different sizes?
Absolutely. By switching from a sport-weight cotton like Schachenmayr Catania to a bulky velvet yarn, you can turn a small handheld toy into a large panda crochet doll without changing the stitch count.
Why does my crochet panda toy have visible gaps where the stuffing shows through?
Gaps usually occur if your hook is too large or your tension is too loose. Try using a 2.5 mm or 3.0 mm hook for standard worsted weight yarn to ensure the fabric is dense enough to hold the fiberfill securely.
Are safety eyes necessary for a panda amigurumi?
While safety eyes provide a polished look, they are not recommended for toys intended for babies. For an infant-safe version, it is better to embroider the eyes using black yarn or embroidery floss.
How long does it typically take to finish a cute panda crochet project?
A small 10 cm panda can usually be completed in 3 to 5 hours depending on your speed. Larger or more detailed versions with belly panels and eye patches may take a full afternoon or two.