
Easy Crochet Baby Romper Pattern with Custom Sizing
Make a sweet crochet baby romper pattern with this original pattern. Includes materials, gauge, measurements, step-by-step instructions, sizing tips, and finishing details.
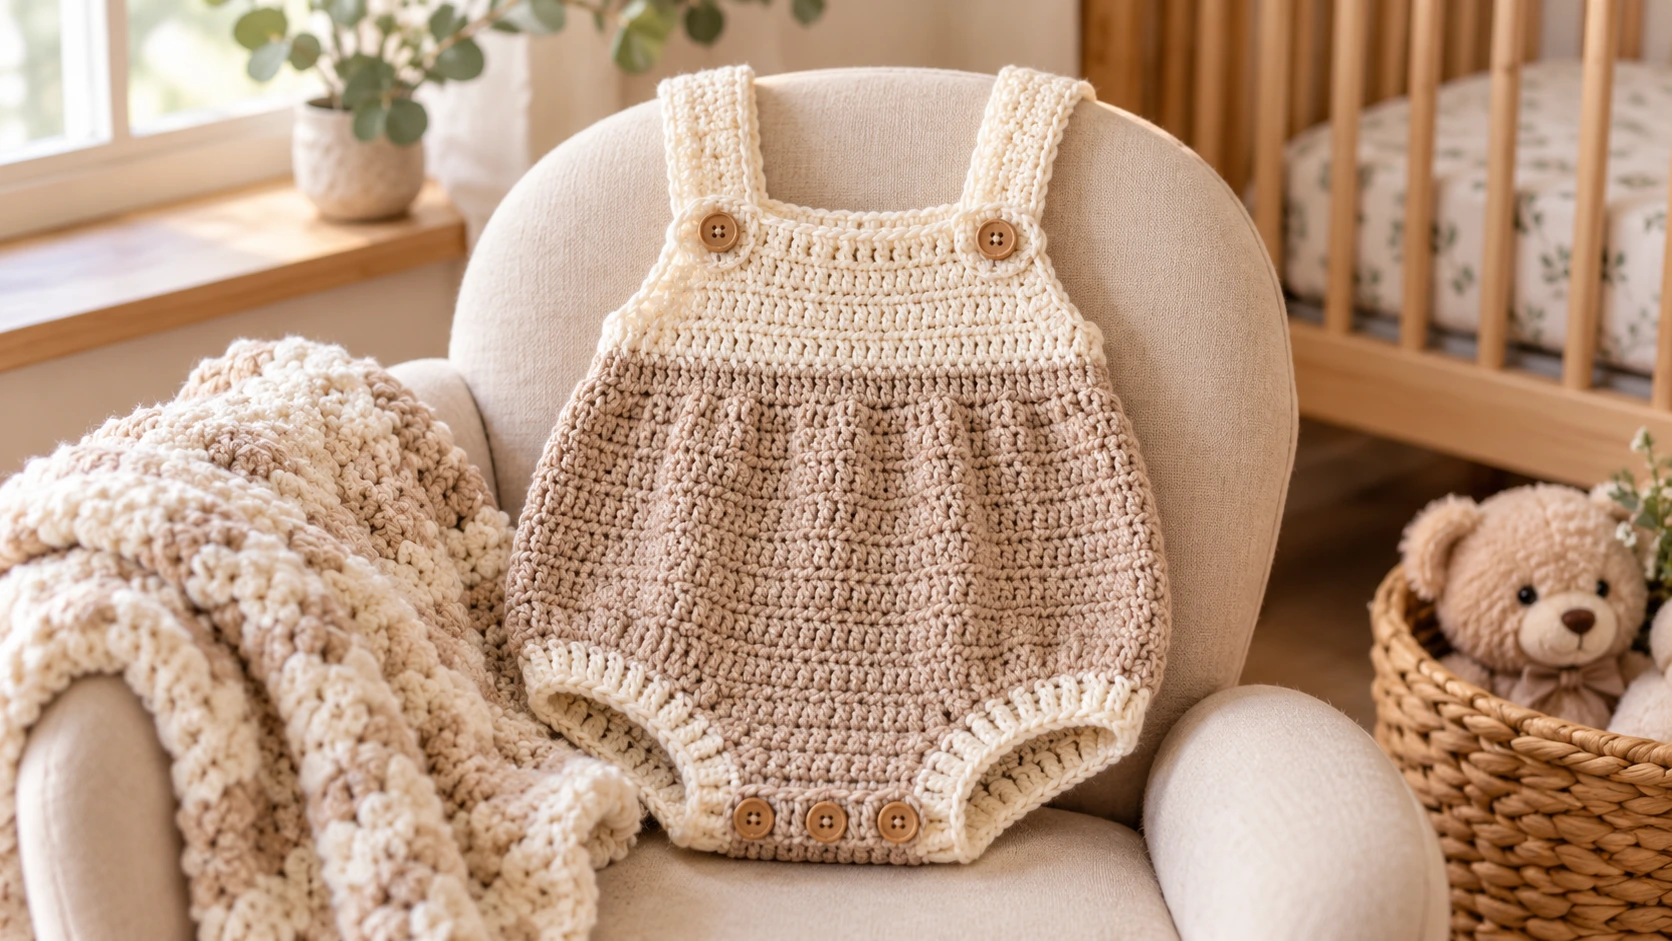
Table of Contents
A handmade baby romper is one of those crochet projects that feels special without requiring a complicated stitch pattern. The finished piece combines a simple shorts-style body with a sleeveless top and shoulder straps, making it a useful project for baby gifts, handmade wardrobes, or a small crochet collection.
This crochet baby romper pattern is designed as a pull-on style rather than a snap-crotch design. The lower body is crocheted in rounds from two separate legs that are joined at the crotch, then the upper body is divided into front and back sections for the armholes and straps.
The sample is designed around a 3–6 month size, but the pattern intentionally uses measurements so you can alter the fit instead of relying entirely on age labels. That matters because babies of the same age can have noticeably different proportions.
The fabric uses half double crochet, giving the romper a soft, flexible texture while keeping the construction straightforward.
Safety note: If you add buttons or other fasteners, sew them on exceptionally securely and inspect them regularly. The U.S. Consumer Product Safety Commission notes that detached buttons and other fasteners can create choking hazards for young children.
Crochet Baby Romper Pattern Details
Skill level: Easy to intermediate
Construction: Two legs joined into a seamless lower body, followed by separate front and back panels
Sample size: Approximately 3–6 months
Yarn: DK/light worsted-weight (#3)
Yardage: Approximately 200–250 yards for the sample, depending on yarn, tension, and finishing
Hook: 4.0 mm (G-6)
Notions: Yarn needle, scissors, stitch markers
Optional: Two small, securely attached buttons for the shoulder straps
Finished Measurements
The following are approximate design measurements for the sample, not a universal baby-size chart:
- Chest: approximately 18–19 inches
- Leg opening circumference: approximately 8 inches
- Crotch-to-underarm length: approximately 7.5–8 inches
- Crotch-to-shoulder length: approximately 10.5–12 inches, depending on strap length
Because crochet has stretch, compare the actual garment against the baby’s measurements whenever possible.
For a romper worn over a diaper, avoid making the body so fitted that there is no room for comfortable movement.
Gauge
18 hdc × 12 rounds = approximately 4 × 4 inches
Gauge should be checked before starting the garment.
If your stitches are smaller than this gauge, the romper will generally become narrower. If your stitches are larger, the finished piece will become wider.
A hook adjustment is often easier than trying to force your tension to match the sample.
Abbreviations
- ch: chain
- sl st: slip stitch
- sc: single crochet
- hdc: half double crochet
- st: stitch
- sts: stitches
- rep: repeat
- dec: decrease
All terminology in this pattern uses US crochet terms.
Before You Begin
This romper is worked from the legs upward.
Each leg begins as a small joined tube. After both legs are completed, they are connected with two short chain bridges at the crotch. This creates one continuous lower body.
The upper body is then divided into front and back sections.
The side seams remain open from the underarm to the waist until the final assembly stage.
A small hook adjustment may be needed if your yarn produces a fabric that is too loose or too stiff.
Crochet Baby Romper Pattern
Part 1: Make the First Leg
Round 1
Ch 36.
Being careful not to twist the chain, sl st to the first chain to form a ring.
Ch 1.
Work 36 hdc around the chain.
Sl st to the first hdc.
Total: 36 sts
Rounds 2–9
Ch 1.
Hdc in each stitch around.
Sl st to the first hdc.
Repeat for a total of 9 rounds.
At the end of Round 9, fasten off if desired and set the first leg aside.
The leg should measure approximately 3 inches tall at the stated gauge.
Part 2: Make the Second Leg
Repeat the first leg exactly:
Round 1
Ch 36.
Sl st to form a ring.
Ch 1 and work 36 hdc around.
Join with a sl st.
Rounds 2–9
Ch 1.
Hdc in each stitch around.
Join with a sl st.
Do not fasten off after Round 9.
You are ready to join the two legs.
Part 3: Join the Legs
Lay the two legs beside one another with the round joins positioned toward the back.
The six-chain bridges create the front and back portions of the crotch.
Joining Round
From the second leg, ch 1.
Hdc in each of the next 36 sts around the second leg.
Ch 6.
Join to the first leg and hdc around all 36 stitches of the first leg.
Ch 6.
Sl st to the first hdc.
You now have:
36 + 6 + 36 + 6 = 84 stitches
This becomes the circumference of the lower body.
Take a moment to check the garment before continuing. The two legs should sit naturally beneath the body rather than twisting inward.
Part 4: Crochet the Lower Body
Rounds 11–24
Ch 1.
Hdc in each stitch around.
Sl st to the first hdc.
Repeat for 14 rounds.
At the stated gauge, these rounds add approximately 4¾ inches to the garment.
The lower body should now extend from the leg openings toward the waist and lower chest.
Measuring the Rise
Lay the garment flat and measure from the lower edge of one leg opening to the top edge of the body.
For the sample, aim for approximately 7½–8 inches before starting the upper section.
If you need more room for a longer torso, add one or two additional rounds here.
If you are making a shorter romper, remove one or two rounds.
Part 5: Divide the Body Into Front and Back
You currently have 84 stitches.
Place a marker at the beginning of the round and another marker 42 stitches later.
The first 42 stitches become the front.
The remaining 42 stitches become the back.
From this point forward, you will work the front and back separately.
This also creates the side seams that will later be joined.
Part 6: Front Panel
Attach yarn at one side marker.
Row 1
Ch 1.
Hdc across the first 42 sts.
Turn.
Row 2 — Begin Armhole Shaping
Ch 1.
Hdc2tog over the first 2 sts.
Hdc across until 2 sts remain.
Hdc2tog over the final 2 sts.
38 sts
Row 3
Ch 1.
Hdc across.
Turn.
Row 4
Repeat the decrease from Row 2.
36 sts
Rows 5–7
Ch 1.
Hdc across.
Turn.
At the end of Row 7, you should have a gentle armhole shape.
Part 7: Shape the Front Neckline
For the front neckline, you will leave the center stitches unworked.
With 36 stitches remaining, leave the center 20 stitches unworked.
This leaves approximately 8 stitches on each shoulder.
Work one shoulder at a time.
First Shoulder
Attach yarn at the outer edge of one shoulder.
Row 1
Ch 1.
Hdc across the first 8 sts.
Turn.
Row 2
Ch 1.
Hdc across.
Turn.
Row 3
Ch 1.
Hdc across.
Turn.
Row 4
Ch 1.
Hdc across.
Turn.
Row 5
Ch 1.
Hdc across.
Fasten off.
Repeat the same five rows for the second shoulder.
The shoulder straps are intentionally kept fairly broad for stability and comfort.
Part 8: Back Panel
Attach yarn at the opposite side of the body.
Row 1
Ch 1.
Hdc across 42 sts.
Turn.
Row 2
Ch 1.
Hdc2tog at the beginning of the row.
Hdc across until 2 sts remain.
Hdc2tog.
Turn.
38 sts
Row 3
Ch 1.
Hdc across.
Turn.
Row 4
Repeat the decrease.
36 sts
Rows 5–7
Ch 1.
Hdc across.
Turn.
Part 9: Shape the Back Neckline
Leave the center 18 stitches unworked.
The remaining 9 stitches on each side become the back shoulders.
Work one shoulder at a time.
Back Shoulder Rows 1–4
Ch 1.
Hdc across the shoulder stitches.
Turn.
Repeat until you have completed four rows.
Fasten off.
Repeat on the second shoulder.
The back neckline is slightly shallower than the front, helping maintain the shape of the garment.
Part 10: Add Button Loops
The button loops are optional.
If you want a completely hardware-free romper, simply seam the shoulder straps together.
For button closures, work a small loop at the end of each back shoulder.
Attach yarn at the outside corner of the shoulder.
Ch 4.
Sl st back into the same corner.
Fasten off securely.
The exact loop length may need to change depending on the button size.
Use buttons that fit snugly through the loops rather than making a very large opening.
Sew each button securely to the corresponding front shoulder.
After sewing, tug gently on each button and inspect the attachment before the garment is used.
Part 11: Seam the Sides
Place the front and back panels together with the wrong sides facing outward.
Align the armholes and waist edges.
Using a yarn needle and matching yarn, seam each side from the underarm downward until you reach the continuous lower body.
A mattress stitch can create a relatively neat seam, while a whip stitch is straightforward and easy to control.
Try not to pull the seam excessively tight.
The fabric should still stretch enough to allow normal movement.
Part 12: Finish the Edges
A simple edging helps the armholes and neckline look more finished.
Join yarn at one armhole.
Armhole Edging
Ch 1.
Sc evenly around the armhole.
Sl st to the first sc.
Fasten off.
Repeat on the second armhole.
Neckline Edging
Attach yarn at the back neckline.
Sc evenly around the entire neckline.
Sl st to the first sc.
Fasten off.
Weave in all ends carefully.
Avoid making the edging so tight that it changes the opening size.
How to Adjust the Crochet Baby Romper Size
One of the useful features of this construction is that sizing can be approached through measurements instead of relying only on age.
To Change the Leg Size
Measure the desired leg opening circumference.
At the sample gauge, you have approximately:
18 stitches ÷ 4 inches = 4.5 stitches per inch
So a desired 8-inch leg circumference gives:
8 × 4.5 = approximately 36 stitches
That is why the sample uses 36 stitches.
For a smaller opening, calculate the approximate stitch count using the same formula and round to a number that works with your construction.
Both legs should use the same number of stitches.
To Change the Body Width
The joined body in the sample contains:
36 + 36 + 6 + 6 = 84 stitches
At 4.5 stitches per inch:
84 ÷ 4.5 ≈ 18.7 inches
This is the approximate relaxed body circumference before the upper-body shaping.
For another size, calculate:
Desired body circumference × stitches per inch = approximate body stitch count
For example:
19 inches × 4.5 = approximately 86 stitches
Because the body is divided into front and back, choose an even stitch count that can be divided sensibly into two panels.
Do not treat the calculation as an exact universal size chart. Yarn stretch, gauge, diaper bulk, and the baby’s actual measurements all affect fit.
To Make the Romper Longer
Add rounds to the lower body before dividing into the front and back.
At approximately three rounds per inch, adding three rounds gives roughly another inch of length.
This is especially useful when the chest width already fits but the torso needs more room.
To Make the Romper Shorter
Remove one or more lower-body rounds.
Measure from the leg opening toward the underarm while the garment is lying flat.
This is safer than removing random rows from the upper section because the armhole and neckline shaping are already established there.
Choosing Yarn for Baby Clothing
For this pattern, a smooth DK or light worsted-weight yarn gives a useful combination of stitch definition and flexibility.
A washable yarn can be practical for baby clothing because garments may need frequent cleaning.
Avoid extremely fuzzy yarns if you want crisp stitch definition.
Also consider how the yarn feels against the skin. A yarn that looks beautiful in the skein may not be comfortable when worn.
Always check the yarn label for the manufacturer’s care instructions.
Why Gauge Matters Even More With Baby Clothes
A blanket can often tolerate a slightly different gauge without becoming unusable. Clothing is less forgiving.
A small difference in stitch size can change the chest circumference enough to affect the fit.
Make a swatch, measure it, and adjust your hook before beginning the romper.
If your swatch is too wide, try a smaller hook.
If it is too narrow, try a larger hook.
Do not change hook size and yarn weight simultaneously unless you are also prepared to recalculate the pattern.
Common Crochet Baby Romper Problems
The Legs Twist After Joining
Make sure both foundation chains form neat circles before beginning.
When joining the legs, line up the round joins consistently. A twisted leg can make the entire lower body hang incorrectly.
The Crotch Feels Too Tight
Add one or two chain stitches to each bridge when adapting the pattern.
Remember that the bridge contributes directly to the body circumference.
The Body Is Too Wide
Check your gauge first.
If your stitches are larger than the stated gauge, the same stitch count will produce a larger garment.
You can also reduce the number of stitches in the leg foundation when making another version.
The Armholes Are Too Tight
Add an extra even row after the armhole decreases.
If the circumference is correct but the opening itself feels restrictive, slightly lower the armhole by working one additional row before shaping the neckline.
The Shoulder Straps Keep Sliding
This can happen when the straps are too narrow or when the neckline is too wide.
Try making the shoulder straps one or two stitches wider, or move the neckline opening slightly inward.
The Finished Romper Looks Stiff
A dense fabric often means your gauge is too tight for the yarn.
Try a larger hook and make another gauge swatch.
For baby clothing, a little flexibility is generally more useful than an overly firm fabric.
Simple Ways to Customize the Romper
The basic structure can look completely different with small design changes.
Try a solid cream or beige yarn for a minimalist handmade look.
Use one contrasting color for the neckline and armhole edging.
Create two- or three-round stripes across the lower body.
For a more playful design, alternate muted shades while keeping the same stitch throughout.
You can also add a narrow crocheted band at the waist, but avoid ties or long decorative cords that could become a snagging issue.
The simplest versions often look especially polished when the stitch pattern and color palette are allowed to do the work.
How to Care for a Handmade Baby Romper
Follow the washing instructions for the specific yarn.
If the yarn permits machine washing, place the romper in a garment bag when appropriate and use a gentle cycle.
Avoid high heat unless the yarn label specifically allows it.
After washing, gently reshape the romper while damp and dry it according to the yarn manufacturer’s instructions.
Before each use, check the seams, button attachments, loops, and edging for signs of loosening or damage.
Final Thoughts
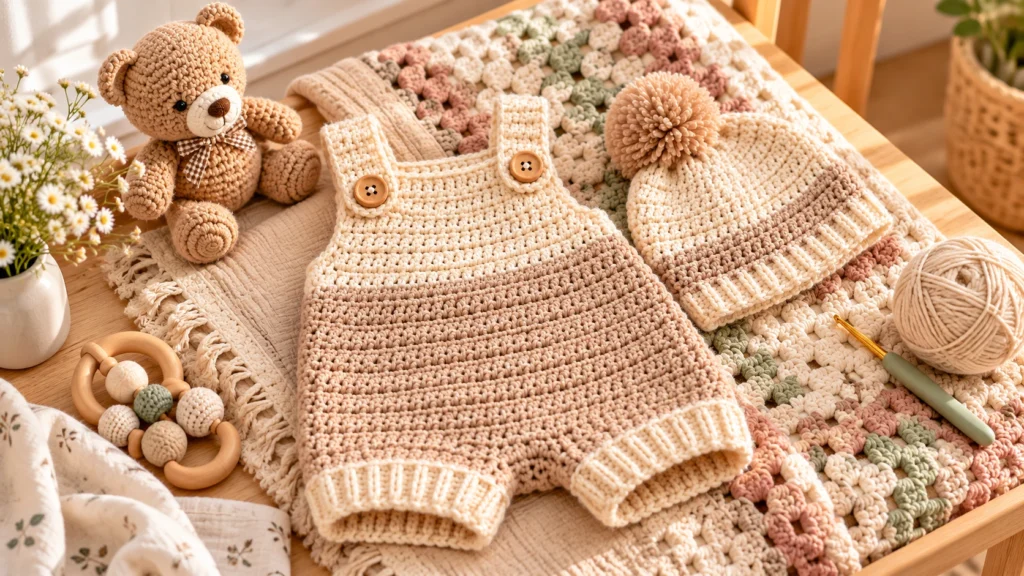
This crochet baby romper pattern is intentionally based on a straightforward construction rather than complicated stitch combinations. Two simple legs become the lower body, the upper section is divided into front and back panels, and the neckline and shoulder straps provide the finished shape.
The most important step is checking the fit as you work. Baby clothing benefits from measurement-based adjustments because age ranges do not account for every baby’s proportions.
Once the basic version fits, changing the yarn colors, edging, strap finish, or length gives you plenty of ways to create a different romper without learning an entirely new construction.
FAQ
Can a beginner make this crochet baby romper?
Yes, provided you are comfortable with chains, slip stitches, half double crochet, simple decreases, working flat, and seaming. The construction is more involved than a small crochet accessory but does not require advanced colorwork.
What size is this crochet baby romper pattern?
The written sample is approximately designed for a 3–6 month size, but the pattern is measurement-based so the leg circumference, body width, and length can be adjusted.
How much yarn does a baby crochet romper use?
The sample is estimated at approximately 200–250 yards of DK/light worsted-weight yarn. Actual yardage depends on gauge, yarn construction, size adjustments, and how much edging you add.
Can I make this romper larger?
Yes. Measure the baby’s chest and leg circumference, calculate the approximate stitch counts using your measured gauge, and adjust the lower-body rounds for the desired length.
Can I make a snap-crotch version?
The written pattern is a pull-on romper and does not include a snap-crotch modification. A snap-crotch version would require changing the lower-body construction and adding a separate closure band.
What crochet stitch works well for baby clothing?
Half double crochet is useful for this design because it creates a relatively substantial fabric while remaining simpler than many textured stitch patterns. The final fabric still depends heavily on yarn and tension.