
Easy & Cute Crochet Black Cat Amigurumi Pattern
Create a cute crochet black cat amigurumi with this easy pattern. Includes materials, stitch counts, shaping, assembly, facial details, and size tips.
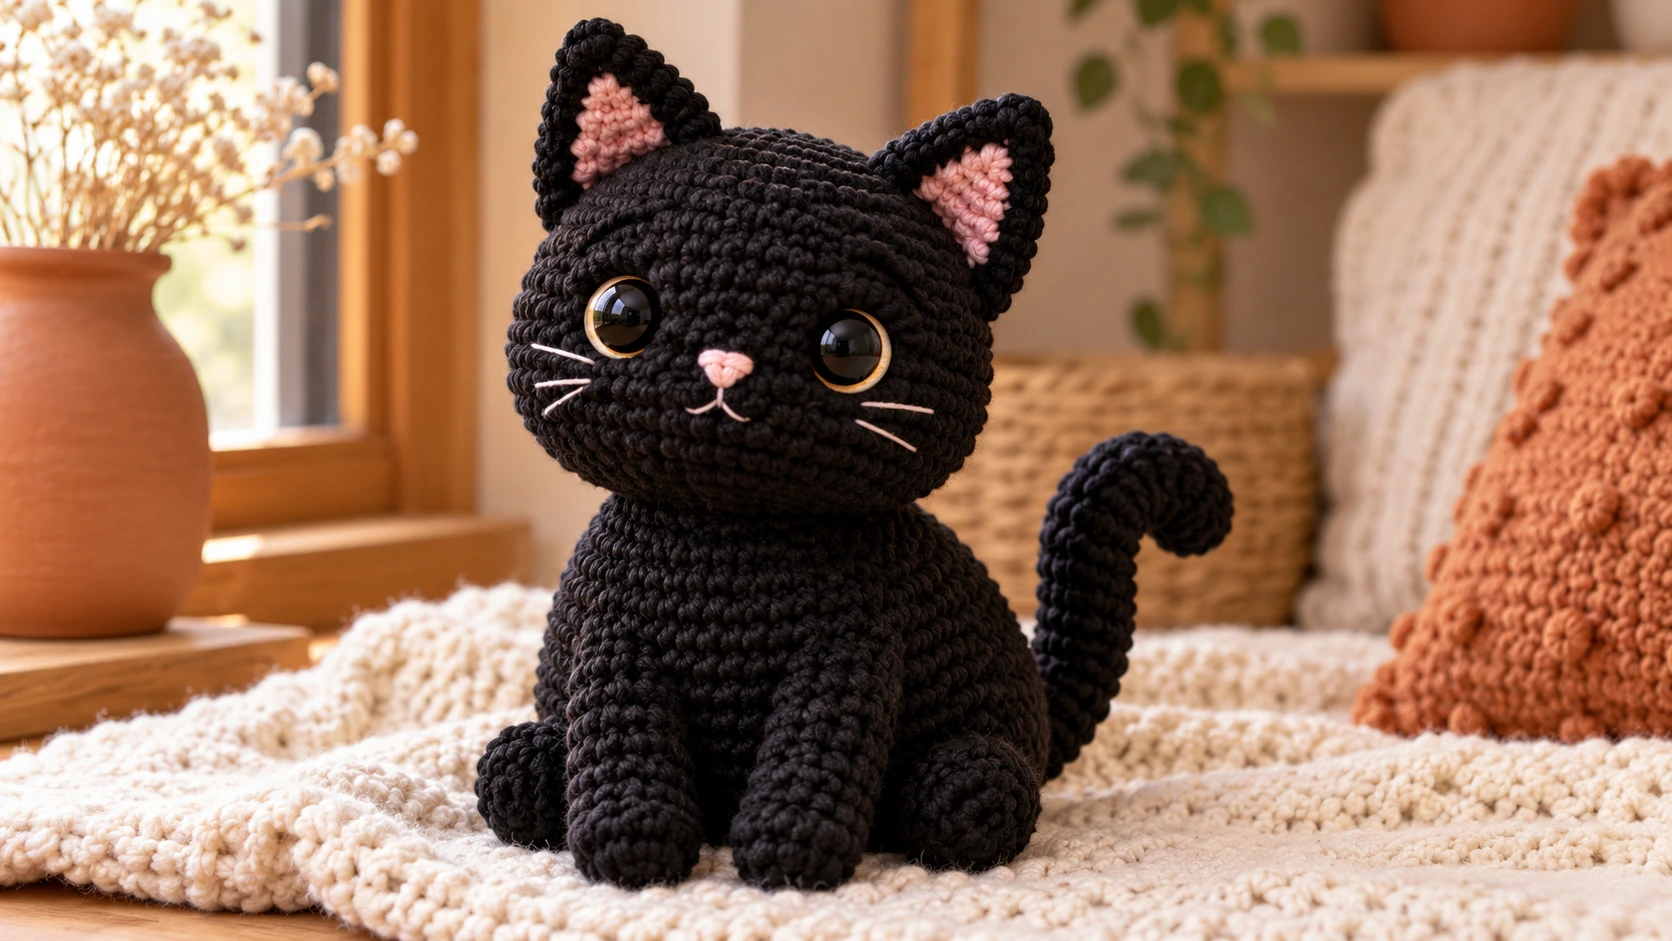
Table of Contents
A little black cat makes a fun amigurumi project because its recognizable shape can be created with simple pieces: a rounded head, compact body, pointed ears, four paws, and a curved tail. Add embroidered facial features and you have a handmade cat with plenty of personality.
This crochet black cat amigurumi pattern is worked mainly in single crochet using continuous rounds. The individual pieces are made separately and then sewn together, which lets you adjust the placement of the ears, eyes, legs, and tail before permanently attaching them.
The finished cat is approximately 6 inches tall, depending on yarn, hook size, stuffing, and tension. It works nicely as a shelf decoration, Halloween craft, handmade gift, or small crochet collectible.
The pattern uses black worsted-weight yarn, but you can easily change the colors or add a tiny collar to give your cat a completely different look.
Safety note: Safety eyes and other small attachments can present a choking hazard if they detach. For toys intended for babies or toddlers, use embroidered facial features instead of plastic safety eyes, and inspect all sewn parts regularly.
Crochet Black Cat Amigurumi Details
Skill level: Beginner to intermediate
Construction: Individual crocheted pieces sewn together
Finished size: Approximately 6 inches tall
Yarn: Worsted-weight (#4)
Main color: Approximately 80–100 yards black yarn
Accent yarn: Small amount of pink, gray, or cream if desired
Hook: 3.5 mm (E-4)
Stuffing: Polyester fiberfill
Eyes: 8 mm safety eyes for decorative use, or embroidery thread
Tools: Yarn needle, scissors, stitch marker
Gauge
Amigurumi does not require a conventional garment-style gauge, but the fabric should be tight enough that the stuffing is not visible.
A useful target with the recommended yarn and hook is approximately:
20 sc × 22 rounds = 4 × 4 inches
If your stitches are loose enough for stuffing to show through, go down one hook size.
If the fabric is extremely tight and uncomfortable to work, try a slightly larger hook.
Changing yarn weight will also change the finished size.
Abbreviations
MR: magic ring
sc: single crochet
inc: increase
dec: decrease
sl st: slip stitch
ch: chain
st: stitch
sts: stitches
All terminology uses US crochet terms.
Before You Begin
The head, body, legs, ears, and tail are crocheted separately.
Most parts are worked in continuous rounds, so place a stitch marker in the first stitch of each round.
When an increase is listed, work two sc into the same stitch.
When a decrease is listed, work an invisible single crochet decrease over the next two stitches when possible.
Stuff the head and body gradually. Adding small amounts as you crochet gives you much better control over the shape than filling the piece all at once.
Crochet Black Cat Amigurumi Pattern
Part 1: Crochet the Head
The head is worked from the top downward.

Round 1
Make a MR.
Work 6 sc into the ring.
Total: 6 sts
Round 2
Inc around.
Total: 12 sts
Round 3
Sc in the next st, inc in the next st.
Repeat around.
Total: 18 sts
Round 4
Sc in the next 2 sts, inc in the next st.
Repeat around.
Total: 24 sts
Round 5
Sc in the next 3 sts, inc in the next st.
Repeat around.
Total: 30 sts
Round 6
Sc in the next 4 sts, inc in the next st.
Repeat around.
Total: 36 sts
Rounds 7–11
Sc in each stitch around.
36 sts
The head should now look like a rounded ball.
Position the Eyes
If using safety eyes, place them between approximately Rounds 8 and 10.
A spacing of around 7–9 stitches apart is a useful starting point, but adjust the placement according to the expression you want.
For a child-safe decorative version, embroider the eyes instead.
Round 12
Sc in the next 4 sts, dec over the next 2 sts.
Repeat around.
Total: 30 sts
Round 13
Sc in the next 3 sts, dec.
Repeat around.
Total: 24 sts
Start adding fiberfill.
Round 14
Sc in the next 2 sts, dec.
Repeat around.
Total: 18 sts
Continue adding small amounts of stuffing.
Round 15
Sc in the next st, dec.
Repeat around.
Total: 12 sts
Check the shape before closing.
Add stuffing if the head feels too soft.
Round 16
Dec around.
Total: 6 sts
Fasten off, leaving a yarn tail.
Thread the tail through the front loops of the remaining stitches and pull gently to close.
Weave the end inside the head.
Part 2: Crochet the Body
Round 1
Make a MR.
Work 6 sc into the ring.
6 sts
Round 2
Inc around.
12 sts
Round 3
Sc in the next st, inc.
Repeat around.
18 sts
Round 4
Sc in the next 2 sts, inc.
Repeat around.
24 sts
Rounds 5–8
Sc in each stitch around.
24 sts
Start stuffing gradually.
Round 9
Sc in the next 2 sts, dec.
Repeat around.
18 sts
Round 10
Sc around.
18 sts
Round 11
Sc in the next st, dec.
Repeat around.
12 sts
Add the final amount of stuffing and shape the body.
Round 12
Sc around.
12 sts
Round 13
Dec around.
6 sts
Fasten off.
Close the opening with a yarn needle.
Leave enough yarn for sewing if needed.
Part 3: Make the Ears
Make two ears.
These are worked flat so they naturally form a pointed triangle.
Row 1
Ch 7.
Sc in the second chain from the hook and across.
6 sts
Row 2
Sc2tog.
Sc across the remaining stitches.
5 sts
Row 3
Sc2tog.
Sc across.
4 sts
Row 4
Sc2tog.
Sc across.
3 sts
Row 5
Sc2tog.
Sc across.
2 sts
Row 6
Sc2tog.
1 st
Fasten off and leave a long sewing tail.
Repeat for the second ear.
Do not stuff the ears.
Optional Inner Ear
Use a small amount of pink, gray, or charcoal yarn to embroider a smaller triangle inside each ear.
Keep the detail flat and secured.
Part 4: Make the Legs
Make four legs.
You can use the same pattern for all four, which keeps assembly simple.
Round 1
Make a MR.
Work 6 sc into the ring.
6 sts
Round 2
Inc around.
12 sts
Rounds 3–5
Sc around.
12 sts
Lightly stuff the lower part of the leg.
Round 6
Sc in the next st, dec.
Repeat around.
8 sts
Add a small final amount of stuffing.
Do not pack the leg tightly.
Fasten off, leaving a sewing tail.
Close the opening with a yarn needle.
Repeat three more times.
Part 5: Make the Tail
The tail can be left flexible so you can shape it into a gentle curve.
Round 1
Make a MR.
Work 6 sc into the ring.
6 sts
Rounds 2–18
Sc around.
6 sts
The tail can be left unstuffed.
For a slightly firmer tail, add a very small amount of stuffing near the base.
Fasten off and leave a long sewing tail.
Part 6: Assemble the Cat
Before sewing anything permanently, place all the pieces around the body and check the proportions.
This makes it much easier to correct the position of the features.
Attach the Head
Center the head over the body.
Use the yarn needle and black yarn to sew around the entire neck area.
Work several small stitches through both pieces.
Keep the seam firm without pulling it so tightly that the neck becomes pinched.
Attach the Ears
Place one ear on each upper side of the head.
For a classic alert cat, keep the ears upright.
For a softer expression, angle them slightly outward.
Sew across the entire lower edge of each ear.
Secure the ends inside the head.
Attach the Front Legs
Place the front legs on either side of the upper body.
Try to keep the two legs at the same height.
Sew through the upper portion of each leg and into the body several times.
Attach the Back Legs
Attach the remaining two legs slightly lower and farther back.
If you want a sitting cat, angle the back legs outward.
This creates a broader base and helps the cat sit upright.
If you prefer a standing appearance, keep the legs closer to vertical.
Attach the Tail
Sew the tail to the lower back of the body.
Start with the base positioned near the lower side of the body.
Curve the tail upward or sideways before securing it.
You can anchor the tail at a second point if you want the curve to remain more pronounced.
Part 7: Embroider the Face
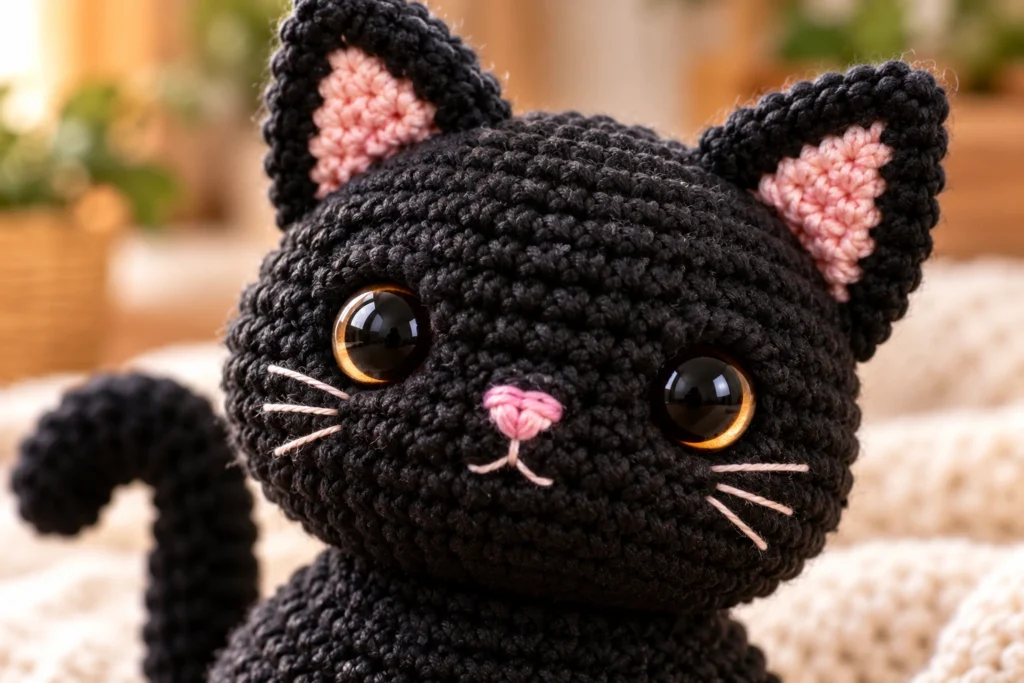
The face is where the cat really comes to life.
Nose
Using pink, dark gray, or cream embroidery thread, create a small triangular or oval nose.
Keep it centered between the eyes.
Mouth
Add one small vertical stitch directly below the nose.
For a simple cat expression, add two short diagonal stitches beneath it.
Whiskers
Whiskers are optional.
Use a thin strand of embroidery floss and make two or three short stitches on each side of the muzzle.
Avoid long loose loops.
Eyes
Safety eyes give the cat a polished appearance, but embroidered eyes allow greater control over the expression.
For an embroidered version, make two small oval or almond-shaped eyes using black thread or a contrasting color.
Optional Crochet Collar
A simple collar is an easy way to give your black cat a little personality.
Choose a contrasting color such as rust, mustard, cream, dusty pink, or muted orange.
Chain enough stitches to loosely fit around the cat’s neck.
Join with a sl st.
Work one round of sc.
Fasten off and weave in the ends securely.
Avoid long loose ties or dangling decorations.
How to Make a Larger or Smaller Cat
The easiest way to resize this amigurumi is to change your yarn weight and hook size while maintaining a tight fabric.
Smaller Cat
Use a lighter yarn and a smaller hook.
You can also remove one or two plain rounds from the head and body.
Keep the increase and decrease sections gradual so the proportions remain rounded.
Larger Cat
Use bulky yarn with a proportionally larger hook.
Because thicker yarn produces larger stitches, the cat can grow substantially without rewriting every round.
Keep the fabric tight enough to prevent stuffing from showing through.
Taller Cat
Add extra plain rounds to the body.
For example, adding two or three rounds between the increase and decrease sections makes the body longer without greatly changing its circumference.
You can also lengthen the legs by adding extra plain rounds.
Plumper Cat
Add another increase round before beginning the plain body rounds.
If you make the body wider, consider adding a few extra plain rounds as well so the finished shape does not look unusually short.
How to Give Your Cat Different Personalities
Small placement changes create surprisingly different expressions.
For an alert cat, keep the ears upright and place the eyes slightly higher.
For a sleepy cat, embroider the eyes as narrow curved lines.
For a playful cat, angle the ears outward and curve the tail upward.
For a Halloween-inspired version, use a black body with a tiny pumpkin-orange collar or muted orange details.
For a softer everyday version, combine black, charcoal, cream, and dusty pink.
You can also embroider a small cream patch on the chest or one paw for an individualized look.
Common Amigurumi Problems
The Stuffing Shows Through
The fabric is probably too loose.
Try a smaller hook.
Also avoid stretching the stitches while stuffing.
Add fiberfill in small portions rather than forcing a large amount inside.
The Head Looks Uneven
Check your increase and decrease counts.
One missed stitch can shift the shape noticeably in a small amigurumi project.
Use a stitch marker and count each increase round carefully.
The Cat Looks Lopsided
This is often an assembly issue rather than a crochet issue.
Temporarily pin the ears, eyes, legs, and tail before sewing them down.
View the cat from the front, side, and back.
Move the pieces until the overall silhouette looks balanced.
The Cat Falls Forward
A head that is heavily stuffed can make the cat top-heavy.
Use slightly less stuffing in the head and make sure the body is firm enough to support it.
For a sitting cat, angle the rear legs outward to create a wider base.
The Ears Flop
The ears are designed to be unstuffed.
If they are too soft, add a few tighter stitches around their lower edge or slightly reduce your hook size.
You can also make the ears marginally wider at the base.
The Tail Will Not Stay Curved
The tail is intentionally flexible.
Sew it to the body at a second point to hold the desired shape, or add a very small amount of stuffing.
Yarn and Hook Tips
Black yarn can sometimes make individual stitches difficult to see, especially in low light.
A bright work surface and strong daylight can make counting much easier.
Choose a smooth yarn with clear stitch definition.
Very fuzzy yarn can make small amigurumi details harder to control.
For the neatest appearance, keep your tension consistent throughout each piece.
A 3.5 mm hook is a starting point rather than an absolute requirement. The important result is a firm fabric that holds stuffing without obvious gaps.
Care and Display
For a decorative amigurumi cat, regular dusting with a soft cloth can help keep the surface clean.
If the yarn permits washing, follow its care instructions rather than assuming all crochet toys can be machine washed.
Avoid excessive heat.
Allow the piece to dry completely before storing it.
Before giving the cat to a child, inspect the eyes, embroidered details, ears, legs, tail, and seams.
If any part has loosened, repair it before the toy is used again.

Final Thoughts
This crochet black cat amigurumi is built from simple shapes, but careful assembly makes the finished character look much more polished.
The head and body establish the silhouette, while the pointed ears and curved tail make the cat instantly recognizable. The biggest opportunity for customization comes after the crochet is finished: move the ears, adjust the eye placement, change the tail position, and experiment with small embroidered details.
Keep the fabric tight, stuff gradually, count your stitches, and take your time during assembly. A few careful finishing decisions can turn this basic pattern into a black cat with its own personality.
FAQ
What yarn is best for a crochet black cat amigurumi?
Worsted-weight (#4) yarn is a practical choice for this pattern because it creates a small but clearly defined amigurumi. A smooth yarn is especially helpful for seeing black stitches.
What hook size should I use for black cat amigurumi?
The pattern uses a 3.5 mm (E-4) hook with worsted-weight yarn. The correct hook is the one that produces firm stitches without visible gaps.
Can I make this crochet cat without safety eyes?
Yes. Embroidered eyes are a good alternative and give you more control over the expression. They are also preferable when making a toy intended for very young children.
How big is the finished crochet cat?
The sample is approximately 6 inches tall, although the final size can vary with yarn, hook size, stuffing, and tension.
Is this a good Halloween crochet project?
Yes. The black cat silhouette naturally works for Halloween, and you can add muted orange, cream, or autumn-colored details for a seasonal version.
How do I make the amigurumi cat bigger?
Use thicker yarn with a proportionally larger hook, or add extra plain rounds to the head and body. Keep the stitches tight enough that stuffing does not show through.