
Easy Ghost Crochet Hoodie Pattern for Halloween
Make a cozy Ghost Crochet Hoodie with this beginner-friendly pattern. Includes sizes XS–5XL, stitch counts, hood instructions, ghost details.
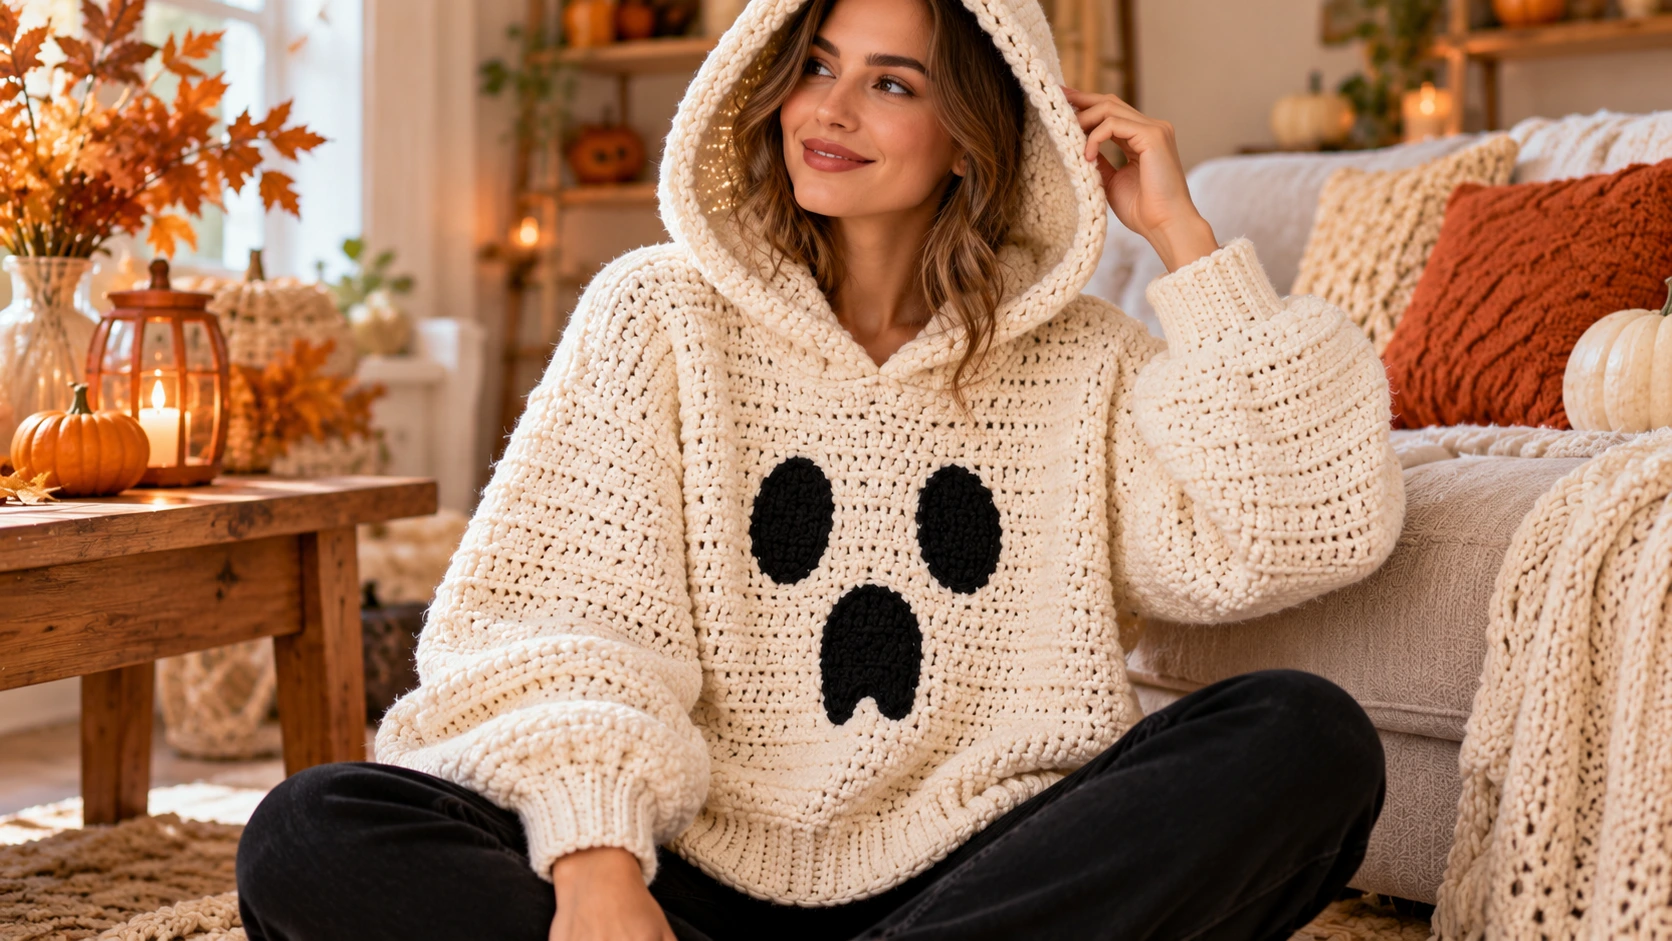
Table of Contents
A Ghost Crochet Hoodie Pattern is a fun way to bring a little Halloween personality into handmade clothing without relying on complicated colorwork. This pullover hoodie is built from simple crochet panels, a roomy hood, straight sleeves, and an embroidered ghost face on the front.
The construction is intentionally beginner-friendly. You work the main body as separate front and back panels, sew the shoulders and sides, add two simple sleeves, then attach a hood around the neckline.
The ghost face is added after the garment is finished, which makes it easy to change the expression or move the design higher or lower.
This pattern uses US crochet terminology and includes sizes XS through 5XL.
Ghost Crochet Hoodie at a Glance
Skill level: Easy / Advanced Beginner
Construction: Flat panels with seamed shoulders and sides
Sizes: XS–5XL
Yarn: Category 4 worsted weight
Main stitch: Double crochet
Hook: 5.0 mm (US H-8)
Ribbing hook: 4.5 mm (US 7)
Gauge: 12 dc × 7 rows = 4 × 4 inches
Fit: Relaxed
Style: Pullover hoodie
Ghost detail: Surface embroidery
The finished garment is designed with several inches of ease. For a closer fit, select the size closest to your body measurement. For an oversized Halloween hoodie, size up.
Materials
You will need:
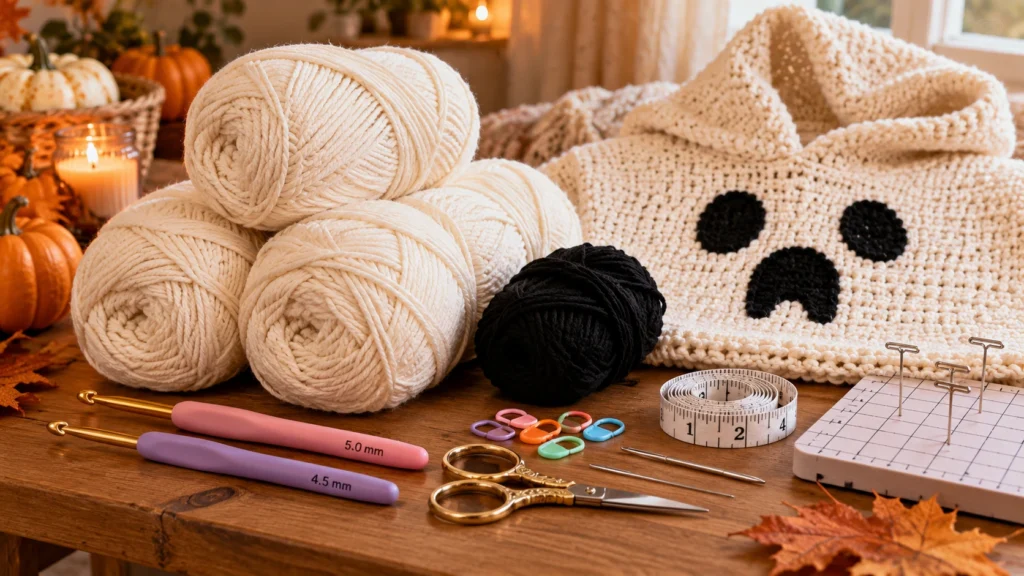
- Category 4 worsted-weight yarn
- Main hoodie color: approximately 1,500–2,600 yards depending on size
- Small amount of black yarn for the ghost face
- 5.0 mm crochet hook
- 4.5 mm crochet hook
- Tapestry needle
- Stitch markers
- Scissors
- Measuring tape
- Optional blocking mat and pins
Choose a smooth yarn so the stitches remain easy to count. Black facial details show especially well when the main hoodie color is white, cream, light gray, pale pink, or muted lavender.
Approximate Yarn Amount
These amounts are starting estimates because yarn usage changes with tension, sleeve length, and whether you make an oversized fit.
| Size | Finished Bust | Approx. Yarn |
|---|---|---|
| XS | 40 in | 1,500–1,650 yd |
| S | 44 in | 1,600–1,800 yd |
| M | 48 in | 1,750–1,950 yd |
| L | 52 in | 1,900–2,100 yd |
| XL | 56 in | 2,050–2,250 yd |
| 2XL | 60 in | 2,200–2,400 yd |
| 3XL | 64 in | 2,300–2,500 yd |
| 4XL | 68 in | 2,400–2,550 yd |
| 5XL | 72 in | 2,500–2,700 yd |
Buy extra yarn when possible, especially when substituting a different yarn brand or fiber.
Finished Measurements
The chart below gives the intended finished bust and approximate body length.
| Size | Body Bust | Finished Bust | Body Length |
|---|---|---|---|
| XS | 32–34 in | 40 in | 21 in |
| S | 34–36 in | 44 in | 22 in |
| M | 38–40 in | 48 in | 23 in |
| L | 42–44 in | 52 in | 24 in |
| XL | 46–48 in | 56 in | 25 in |
| 2XL | 50–52 in | 60 in | 26 in |
| 3XL | 54–56 in | 64 in | 27 in |
| 4XL | 58–60 in | 68 in | 28 in |
| 5XL | 62–64 in | 72 in | 29 in |
Measure around the fullest part of the chest and choose the size that gives you the amount of ease you prefer.
Crochet Abbreviations
- ch = chain
- dc = double crochet
- sc = single crochet
- sl st = slip stitch
- st = stitch
- sts = stitches
- RS = right side
- WS = wrong side
Gauge
Work a swatch in double crochet.
Gauge: 12 dc × 7 rows = 4 × 4 inches
If your swatch has more than 12 stitches in 4 inches, use a larger hook.
If it has fewer than 12 stitches, try a smaller hook.
For this pattern, width gauge is particularly important because the front and back panels determine the overall bust measurement.
Ghost Crochet Hoodie Pattern
Pattern Notes
The hoodie is worked in five main pieces:
- 1 back panel
- 1 front panel
- 2 sleeves
- 1 hood
The front and back panels are rectangles. The shoulders are seamed while leaving a center neckline opening. The side seams are sewn after the sleeves are prepared.
The ghost face is added after assembly.
Step 1: Crochet the Back Panel
The back panel determines half of the finished bust measurement.
Back Panel Measurements
| Size | Foundation | Dc Stitches | Rows |
|---|---|---|---|
| XS | ch 62 | 60 | 37 |
| S | ch 68 | 66 | 39 |
| M | ch 74 | 72 | 41 |
| L | ch 80 | 78 | 42 |
| XL | ch 86 | 84 | 44 |
| 2XL | ch 92 | 90 | 46 |
| 3XL | ch 98 | 96 | 47 |
| 4XL | ch 104 | 102 | 49 |
| 5XL | ch 110 | 108 | 51 |
Back Panel Instructions
Foundation: Chain the number listed for your size.
Row 1: Dc in the third ch from the hook and in each chain across.
Stitch count: See the chart above.
Rows 2–final: Ch 2, turn. Dc in each stitch across.
Fasten off after the final row.
Do not count the turning chain as a stitch.
Measure the panel before moving on. It should be approximately half of your finished bust measurement.
Step 2: Crochet the Front Panel
The front panel is worked exactly like the back panel.
Use the same foundation chain and row count for your size.
Front Panel Instructions
Foundation: Chain the size-specific number.
Row 1: Dc in the third ch from the hook and in each chain across.
Rows 2–final: Ch 2, turn. Dc across.
Fasten off.
The front and back should be the same width and length.
Ghost Face Placement
Do not add the ghost face yet.
It is easier to position the design once the front panel has been blocked and assembled.
For a centered design, plan to place the eyes approximately 3–4 inches below the neckline.
Step 3: Crochet the Sleeves
The sleeves are worked as simple rectangles.
The wider edge becomes the upper arm opening, while the narrower cuff is created with ribbing after the main sleeve is assembled.
Sleeve Measurements
| Size | Sleeve Width | Sleeve Length | Rows |
|---|---|---|---|
| XS | 14 in | 17 in | 30 |
| S | 15 in | 18 in | 32 |
| M | 16 in | 18 in | 32 |
| L | 17 in | 19 in | 34 |
| XL | 18 in | 19 in | 34 |
| 2XL | 19 in | 20 in | 35 |
| 3XL | 20 in | 20 in | 35 |
| 4XL | 21 in | 21 in | 37 |
| 5XL | 22 in | 21 in | 37 |
At the listed gauge, use these approximate foundation chains:
- XS: ch 44
- S: ch 47
- M: ch 50
- L: ch 53
- XL: ch 56
- 2XL: ch 59
- 3XL: ch 62
- 4XL: ch 65
- 5XL: ch 68
Sleeve Instructions
Row 1: Dc in the third chain from hook and across.
Rows 2–final: Ch 2, turn. Dc across.
Fasten off.
Make a second identical sleeve.
If your sleeve feels too narrow around the upper arm, add chains to the foundation before completing the second sleeve.
Step 4: Block the Pieces
Blocking is optional, but it can make assembly much easier.
Lay the front, back, and sleeves flat.
Gently shape each piece to the measurements listed above.
Do not pull aggressively. The goal is to straighten the edges rather than stretch the fabric dramatically.
Allow the pieces to dry completely before assembling them.
Step 5: Join the Shoulders
Place the front and back panels with right sides together.
Decide how wide you want the neckline.
For this relaxed hoodie, leave approximately:
- XS–S: 8 in neckline opening
- M–L: 8.5 in
- XL–2XL: 9 in
- 3XL–5XL: 9.5 in
Sew the remaining shoulder sections together using a mattress stitch or slip stitch.
Check that both shoulders are the same width.
Step 6: Join the Side Seams
Lay the hoodie body flat.
Match the lower corners.
Beginning at the bottom hem, sew upward.
Leave an opening for the armhole.
A practical starting point is approximately:
- XS: 8 in
- S: 8.5 in
- M: 9 in
- L: 9.5 in
- XL: 10 in
- 2XL: 10.5 in
- 3XL: 11 in
- 4XL: 11.5 in
- 5XL: 12 in
Repeat on the opposite side.
Try the unfinished hoodie on before closing the seams completely. This gives you a chance to adjust the fit around the chest and underarms.
Step 7: Assemble the Sleeves
Fold each sleeve rectangle in half lengthwise with the right side facing inward.
Sew the long edge to create the underarm seam.
Turn the sleeve right side out.
Insert the sleeve into the armhole so that the sleeve seam lines up with the hoodie side seam.
Use stitch markers to divide the sleeve and armhole into manageable sections.
Sew around the opening.
Repeat for the second sleeve.
Step 8: Add the Sleeve Cuffs
Switch to the 4.5 mm hook.
Join yarn around the bottom edge of one sleeve.
Work one round of sc evenly around the opening.
Ribbed Cuff
Round 1: Ch 1. Sc around. Join with sl st.
Round 2: Ch 2. Alternate fpdc and bpdc around the opening.
Repeat Round 2 for 3–4 rounds.
Fasten off.
Repeat for the second sleeve.
A fourth ribbing round gives a deeper cuff, while three rounds create a lighter finish.
Step 9: Add the Bottom Hem
Join yarn around the bottom edge of the hoodie.
Work one round of sc evenly around.
Switch to the 4.5 mm hook.
For a simple ribbed hem, work 3–4 rounds alternating fpdc and bpdc.
Keep your tension even around both sides.
If the hem begins to pull inward, use a slightly larger hook.
Step 10: Crochet the Hood
The hood is worked as a rectangle and folded in half.
Hood Measurements
Aim for approximately:
- Width: 18–20 inches
- Height: 13–14 inches
At the listed gauge, begin with approximately ch 56–62, depending on the size and desired hood depth.
Hood Instructions
Row 1: Dc in the third chain from hook and across.
Rows 2–23: Ch 2, turn. Dc across.
For a deeper hood, add 2–4 additional rows.
Fasten off, leaving a long sewing tail.
Fold the rectangle in half so the foundation edge becomes the face opening.
Sew the top and back edges together.
Leave the lower edge open.
Step 11: Attach the Hood
Place the hood around the neckline.
Center the seam of the hood at the center back of the hoodie.
Use stitch markers to distribute the hood evenly around the neckline.
Sew the lower hood edge to the neckline using a mattress stitch.
Check that the front edges of the hood meet evenly on either side of the neck.
For a softer drape, avoid pulling the seam too tightly.
Step 12: Add the Ghost Face
Now the hoodie becomes the Halloween design.
Use black yarn and a tapestry needle.
Ghost Eyes
Place two vertical oval-shaped eyes approximately 4–5 inches apart.
You can make each eye around 1 inch tall.
Use surface crochet or simple embroidery stitches to build each oval shape.
Ghost Mouth
Center the mouth beneath the eyes.
Create a wide rounded opening approximately 2–3 inches across.
Use short vertical stitches around the mouth to create a cartoon ghost expression.
For a more playful face, add two or three tiny teeth with cream or white yarn.
Keep the expression simple so the hoodie remains comfortable and wearable.
Optional: Add a Ghost Pocket
For an extra detail, make one front pocket.
Foundation: Ch 24.
Rows 1–14: Sc across.
Fasten off.
Add two small black embroidered eyes and a tiny mouth.
Sew the pocket to the lower front of the hoodie.
This is optional, but it can add both decoration and useful storage.
Optional: Add a Drawstring
For a functional hood, make a simple crochet cord.
Chain approximately 80–100 stitches.
Slip stitch back across the chain.
Thread the cord through the lower edge of the hood, leaving the ends at the front.
Tie the ends loosely.
Do not make the cord excessively tight around the neck.
How to Customize the Ghost Hoodie
Make It Longer
Add rows to both front and back panels before assembly.
Because the body uses straight rows, this is one of the easiest modifications.
Make It Cropped
Remove several body rows while keeping the front and back panels the same length.
Make It Oversized
Go up one size or add extra stitches to the front and back panels.
For the cleanest result, add the same number of stitches to both panels.
Make the Sleeves Baggy
Increase the sleeve foundation chain.
A wider sleeve creates a relaxed, slouchy silhouette.
Change the Ghost Face
Try:
- Happy eyes
- Sleepy eyes
- Scared expression
- Blushing cheeks
- Open mouth
- Tiny fangs
- Heart-shaped eyes
Black yarn provides the strongest contrast, but charcoal, dark purple, or deep brown can also work.
Choosing Colors
A white or cream hoodie gives the strongest connection to the ghost theme.
For a softer Halloween look, try light gray with charcoal details.
A pastel lavender or pale blue hoodie gives the design a whimsical feel.
For a darker version, use black yarn and create the ghost face in white or gray.
Common Problems
The Hoodie Feels Too Small
Check your gauge before changing the pattern.
If your stitch count per inch is higher than specified, the panels will be narrower.
The Hood Does Not Sit Correctly
Check that the center back of the hood is aligned with the center back seam.
Distribute the hood evenly around the neckline before sewing.
The Sleeves Feel Tight
Measure the upper arm before finishing the sleeve seams.
Add width to the sleeve foundation if necessary.
The Ghost Face Is Crooked
Place the eyes and mouth with stitch markers before embroidering.
Step back from the garment and check the overall placement before securing the yarn.
The Bottom Hem Curls
Use the smaller hook for firmer ribbing and maintain even tension.
If necessary, block the hem lightly after finishing.
How to Style a Ghost Crochet Hoodie
For a subtle Halloween outfit, pair the hoodie with black jeans and simple sneakers.
For a playful fall look, wear it with leggings, ankle boots, and a beanie.
The hoodie can also work beyond Halloween when made in cream or gray with a small, understated ghost face.
Layer it over a long-sleeve shirt during cooler weather or wear it alone indoors.
Care Instructions
Always check the care instructions for your yarn.
For many crochet garments, gentle washing in cool water is a practical choice.
Lay the hoodie flat to dry rather than hanging it while wet.
Reshape the hood, sleeves, and hem while the fabric is damp.
Store the finished hoodie folded to help maintain its shape.
Final Thoughts
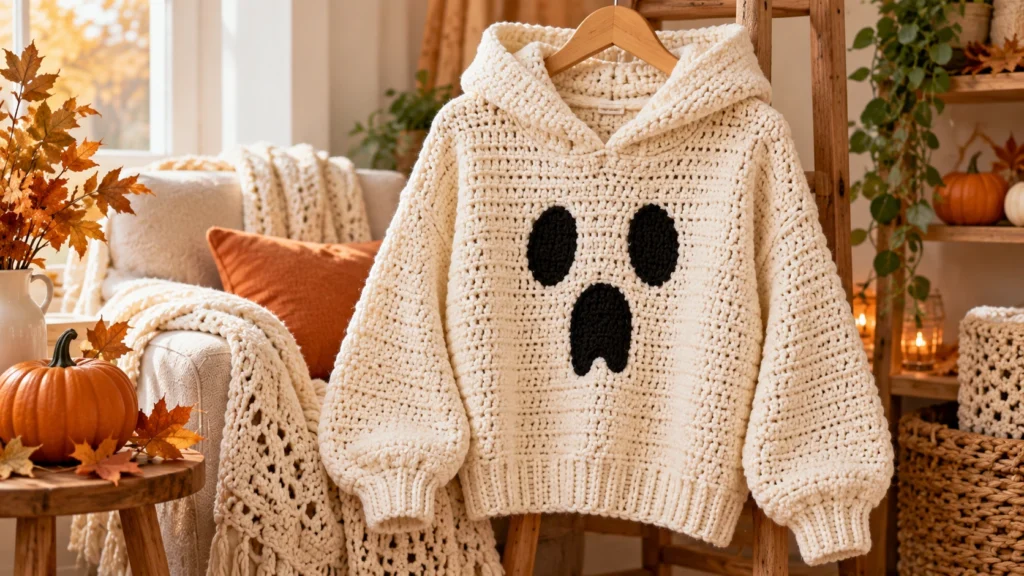
This Ghost Crochet Hoodie Pattern combines a simple garment construction with one fun Halloween detail: the ghost face.
The body is made from straightforward crochet panels, the sleeves are simple rectangles, and the hood is created separately before being attached to the neckline. That keeps the construction approachable while still producing a recognizable finished hoodie.
The design is also easy to customize. Change the hoodie color, make the sleeves oversized, add a pocket, adjust the length, or give the ghost a completely different expression.
For a seasonal version, cream and black create a classic Halloween combination. For something you can wear more often, try soft gray, lavender, or pale blue.
Once you have your gauge and measurements worked out, this pattern becomes a useful foundation for creating your own spooky crochet clothing.
9. FAQ
Is this Ghost Crochet Hoodie Pattern suitable for beginners?
Yes. The main pieces use basic double crochet and straightforward seaming. Basic garment construction and comfort with measuring are helpful.
What yarn weight should I use?
Category 4 worsted-weight yarn is the recommended starting point. Changing yarn weight will alter the gauge and finished measurements.
Can I make the hoodie without a drawstring?
Yes. The drawstring is completely optional. The hood can be worn without one.
Can I make the ghost face different?
Absolutely. The face is added after construction, so you can change the eyes, mouth, expression, or color without changing the garment itself.
How do I make the hoodie oversized?
Choose one size larger or increase the width of both front and back panels. Keep the modifications symmetrical.
Can I make the sleeves longer?
Yes. Add rows before sewing the sleeve into the armhole. Try the sleeve against your arm as you work so you can stop at the desired length.