5 Grim Reaper Amigurumi Patterns for Halloween Fun
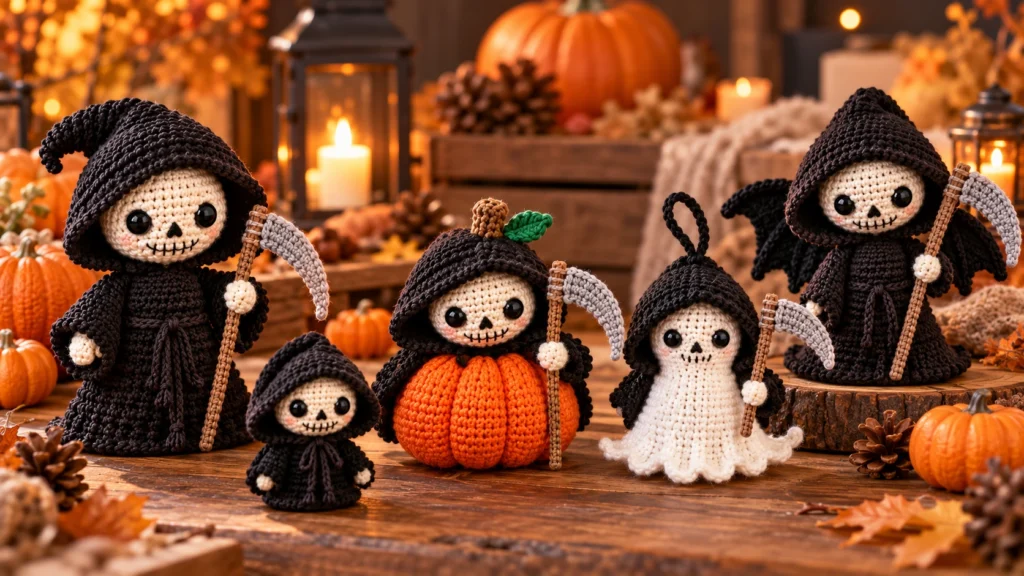
Crochet 5 spooky Grim Reaper amigurumi patterns for Halloween, including a classic Reaper, pumpkin buddy, ghost ornament, pocket pal, and bat-wing design.
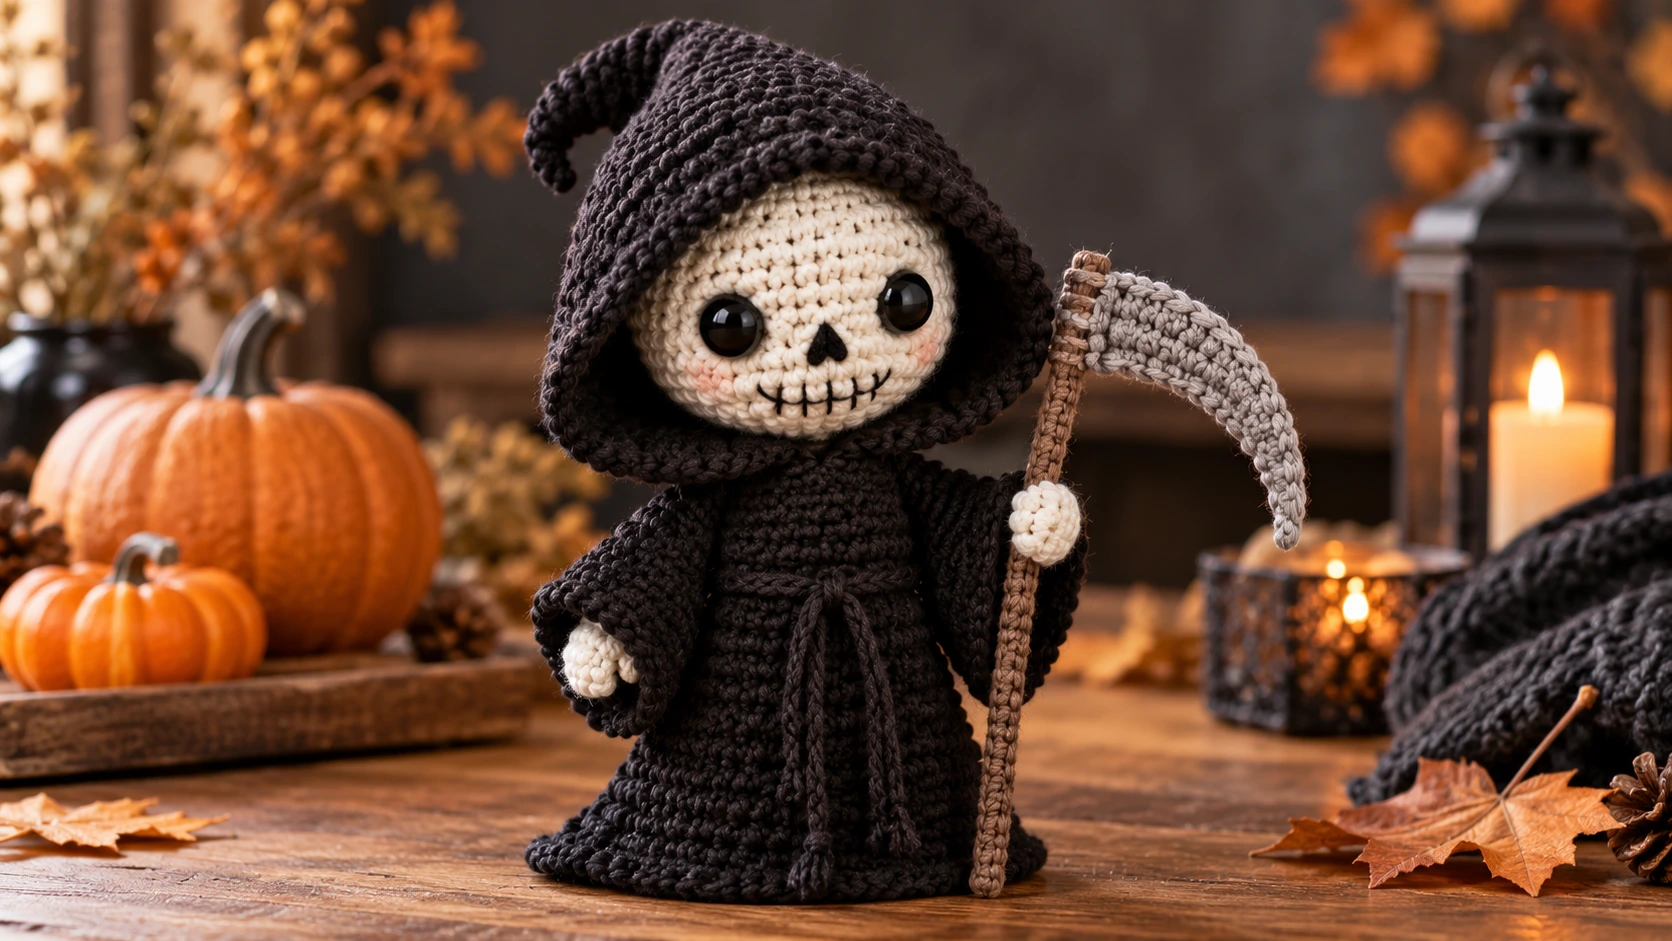
Table of Contents
Looking for Grim Reaper amigurumi patterns that are spooky, cute, and actually fun to crochet? These five Halloween-inspired projects combine simple amigurumi shapes with recognizable Grim Reaper details such as black robes, skull faces, tiny scythes, hoods, pumpkins, and bat-inspired accents.
The projects range from small ornaments to slightly larger shelf decorations, so you can choose one based on your crochet experience and the amount of time you have available. The patterns use US crochet terminology and are designed around simple single crochet construction.
For the cleanest amigurumi fabric, use a hook smaller than you would normally choose for the yarn. This keeps the stuffing from showing through the stitches.
Before You Start Your Grim Reaper Amigurumi
Materials
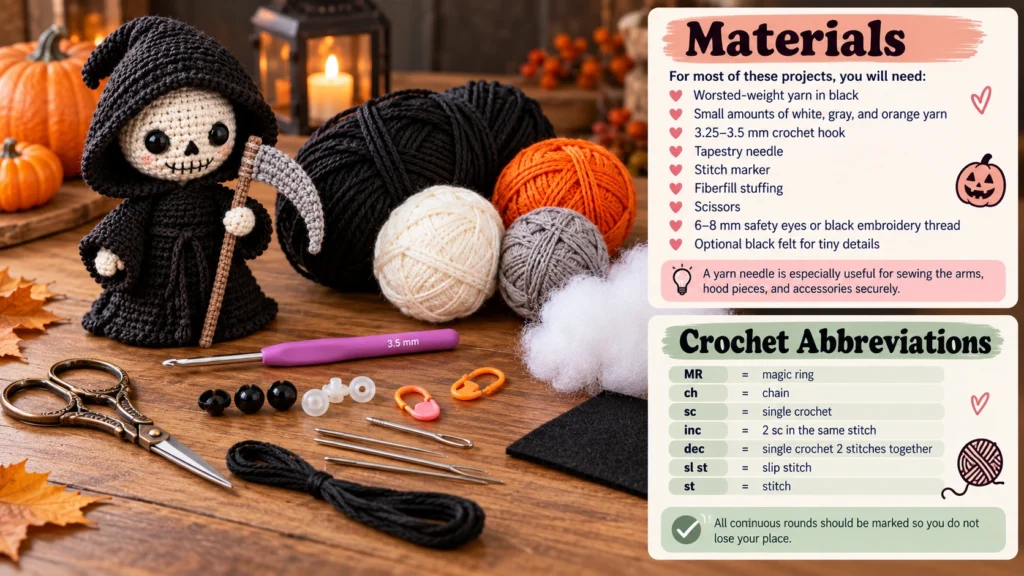
For most of these projects, you will need:
- Worsted-weight yarn in black
- Small amounts of white, gray, and orange yarn
- 3.25–3.5 mm crochet hook
- Tapestry needle
- Stitch marker
- Fiberfill stuffing
- Scissors
- 6–8 mm safety eyes or black embroidery thread
- Optional black felt for tiny details
A yarn needle is especially useful for sewing the arms, hood pieces, and accessories securely.
Crochet Abbreviations
- MR = magic ring
- ch = chain
- sc = single crochet
- inc = 2 sc in the same stitch
- dec = single crochet 2 stitches together
- sl st = slip stitch
- st = stitch
All continuous rounds should be marked so you do not lose your place.
General Amigurumi Tips
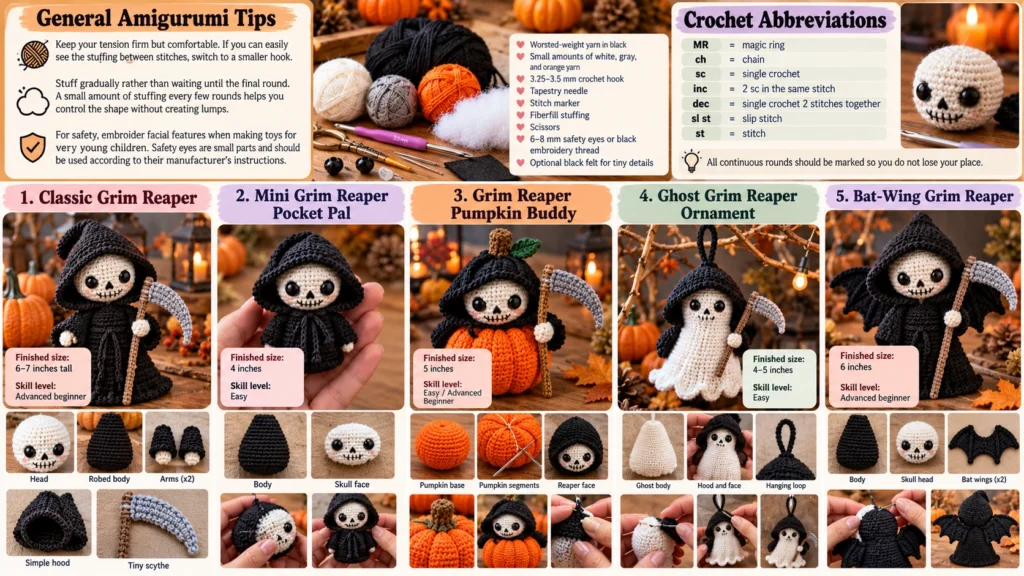
Keep your tension firm but comfortable. If you can easily see the stuffing between stitches, switch to a smaller hook.
Stuff gradually rather than waiting until the final round. A small amount of stuffing every few rounds helps you control the shape without creating lumps.
For safety, embroider facial features when making toys for very young children. Safety eyes are small parts and should be used according to their manufacturer’s instructions.
1. Classic Grim Reaper Amigurumi
This small Grim Reaper makes a fun Halloween shelf decoration or handmade gift. The design uses a white skull, black robe, simple arms, and a miniature crochet scythe.
Finished size: Approximately 6–7 inches tall
Skill level: Advanced beginner
Head
Using white yarn:
Round 1: MR, 6 sc.
Round 2: Inc around — 12 sts.
Round 3: Sc 1, inc around — 18 sts.
Round 4: Sc 2, inc around — 24 sts.
Rounds 5–8: Sc around — 24 sts.
Round 9: Sc 2, dec around — 18 sts.
Round 10: Sc 1, dec around — 12 sts.
Insert the safety eyes between Rounds 6 and 7, leaving several stitches between them.
Lightly stuff the head.
Round 11: Dec around — 6 sts. Fasten off and close the opening.
Embroider two small dark stitches for the nose and a curved line for the mouth.
Robed Body
Switch to black yarn.
Round 1: MR, 6 sc.
Round 2: Inc around — 12 sts.
Round 3: Sc 1, inc around — 18 sts.
Rounds 4–8: Sc around — 18 sts.
Round 9: Sc 1, dec around — 12 sts.
Rounds 10–11: Sc around — 12 sts.
Add stuffing as you work.
Round 12: Dec around — 6 sts.
Fasten off and close.
Arms
Make 2 with black yarn.
Round 1: MR, 6 sc.
Rounds 2–5: Sc around — 6 sts.
Add only a little stuffing. Flatten the opening and sew the arms to the upper sides of the robe.
Simple Hood
Chain 18 with black yarn.
Row 1: Sc in the second chain from the hook and across — 17 sts.
Rows 2–7: Ch 1, turn, sc across.
Fold the rectangle over the top and back of the head. Sew the upper and back edges together while leaving the front opening clear.
Tiny Scythe
For the handle, chain 18 with gray or brown yarn and sl st back along the chain.
For the blade, use gray yarn:
Row 1: Ch 9, sc in the second chain and across — 8 sts.
Row 2: Ch 1, turn, dec at the beginning and end — 6 sts.
Row 3: Ch 1, turn, dec at both ends — 4 sts.
Row 4: Ch 1, turn, dec at both ends — 2 sts.
Fasten off. Curve the blade slightly and sew it to the top of the handle.
Attach the scythe to one hand.
2. Mini Grim Reaper Pocket Pal
This tiny version is designed to fit in a hand, display tray, or Halloween gift basket.
Finished size: Approximately 4 inches
Skill level: Easy
Body
Use black yarn.
Round 1: MR, 6 sc.
Round 2: Inc around — 12 sts.
Round 3: Sc 1, inc around — 18 sts.
Rounds 4–7: Sc around — 18 sts.
Round 8: Sc 1, dec around — 12 sts.
Round 9: Sc around — 12 sts.
Stuff firmly but gently.
Round 10: Dec around — 6 sts.
Fasten off and close.
Skull Face
Use white yarn to crochet a tiny oval:
Round 1: Ch 6. Sc in second chain and across. Work 3 sc around the end of the chain, then sc back along the opposite side.
Continue with one additional round of sc around the oval.
Sew the white face to the upper front of the black body.
Embroider two dark eyes and a tiny stitched mouth.
For extra character, add three loose chains in black yarn on each side as simple robe ties.
This version is perfect when you want a very small Halloween crochet project without building a complicated body shape.
3. Grim Reaper Pumpkin Buddy
This pattern combines two classic Halloween elements: the Grim Reaper and a pumpkin. The finished piece works well as a seasonal desk or shelf decoration.
Finished size: Approximately 5 inches
Skill level: Easy / Advanced Beginner
Pumpkin Base
Using orange yarn:
Round 1: MR, 6 sc.
Round 2: Inc around — 12 sts.
Round 3: Sc 1, inc around — 18 sts.
Round 4: Sc 2, inc around — 24 sts.
Rounds 5–8: Sc around — 24 sts.
Round 9: Sc 2, dec around — 18 sts.
Round 10: Sc 1, dec around — 12 sts.
Stuff the pumpkin.
Round 11: Dec around — 6 sts.
Close the opening.
Pumpkin Segments
Using a tapestry needle and orange yarn, make several vertical lines from the top toward the bottom of the pumpkin. Pull the yarn gently so the sections become slightly indented.
Add a small brown stem made from a short tube of 6 sc stitches worked for four rounds.
Reaper Face
Create a small black hood from a rectangle:
Foundation: Ch 16.
Rows 1–6: Sc across.
Fold the piece into a shallow hood shape and sew it around the top portion of the pumpkin.
Add two tiny white or gray eyes beneath the hood.
For a more dramatic result, embroider a curved dark mouth.
The pumpkin itself becomes the body, making this one of the fastest Grim Reaper amigurumi patterns in the collection.
4. Ghost Grim Reaper Ornament
This lightweight project can be used as a Halloween tree ornament, garland piece, gift topper, or hanging decoration.
Finished size: Approximately 4–5 inches
Skill level: Easy
Ghost Body
Use white yarn.
Round 1: MR, 6 sc.
Round 2: Inc around — 12 sts.
Round 3: Sc 1, inc around — 18 sts.
Rounds 4–7: Sc around — 18 sts.
Begin shaping the lower body:
Round 8: Sc 2, inc around — 24 sts.
Round 9: Sc around — 24 sts.
Round 10: Sc 2, dec around — 18 sts.
Round 11: Sc 1, dec around — 12 sts.
Stuff lightly.
Round 12: Dec around — 6 sts.
Close the opening.
Hood and Face
Use black yarn to make a small rectangle measuring approximately 2 × 2 inches in proportion to your yarn and tension.
Sew it around the upper portion of the white body, leaving an opening over the face.
Embroider two black eyes underneath the hood.
Add a tiny gray crocheted scythe using the same chain-handle and tapered-blade method from the classic Reaper pattern.
Hanging Loop
At the top center, attach black yarn and chain 12. Join back at the starting point with a slip stitch.
This creates a simple hanging loop without adding another large crocheted component.
5. Bat-Wing Grim Reaper
For something a little more dramatic, add tiny bat wings to the back of a traditional Grim Reaper body.
Finished size: Approximately 6 inches
Skill level: Advanced Beginner
Body
Use black yarn.
Round 1: MR, 6 sc.
Round 2: Inc around — 12 sts.
Round 3: Sc 1, inc around — 18 sts.
Rounds 4–8: Sc around — 18 sts.
Round 9: Sc 1, dec around — 12 sts.
Rounds 10–11: Sc around — 12 sts.
Stuff the body.
Round 12: Dec around — 6 sts.
Close the bottom.
Attach a small white crocheted skull head made using the same head instructions from Pattern 1.
Bat Wings
Make 2.
Using black yarn, chain 9.
Row 1: Sc across — 8 sts.
Row 2: Ch 1, turn. Sc 6, leaving 2 stitches unworked.
Row 3: Ch 1, turn. Sc 4.
Row 4: Ch 1, turn. Sc 2.
Fasten off.
For the lower wing points, attach yarn near the outside edge and chain 3–4 stitches before slip stitching back into the wing.
Mirror the second wing.
Sew both wings to the back of the robe.
This design looks especially good in matte black yarn because the wing shape remains subtle while the white skull creates contrast.
Choosing the Right Grim Reaper Pattern
Choose the Classic Grim Reaper when you want a recognizable character with a complete outfit and miniature scythe.
Choose the Pocket Pal when you want something small that can be crocheted with very little yarn.
The Pumpkin Buddy is a good seasonal choice for a Halloween display because the pumpkin acts as the main body.
The Ghost Reaper Ornament works well for hanging decorations, gift toppers, and Halloween garlands.
The Bat-Wing Grim Reaper is a fun variation when you want a darker fantasy-inspired design without making the project significantly larger.
Common Amigurumi Problems and Easy Fixes
The stuffing is showing
Your stitches are probably too loose. Try using a smaller hook or slightly firmer tension.
The head looks lumpy
Add stuffing in small amounts and shape the piece with your fingers before closing the final round.
The eyes are uneven
Place both eyes before fully securing them. Count stitches from the center of the face so the spacing stays symmetrical.
The project leans to one side
Check that your stitch marker is moving correctly at the end of every round. A missed increase or decrease can change the shape quickly.
The arms feel loose
Sew them through several stitches rather than attaching them at only one point. Reinforce the seam from both directions.
Ideas for Displaying Your Finished Halloween Amigurumi
A small Grim Reaper looks right at home on a Halloween mantel, bookshelf, craft shelf, or seasonal entry table.
Group three different sizes together rather than placing every figure separately. A classic Reaper beside a Pumpkin Buddy and a Ghost Ornament creates variation without requiring a large display.
For a simple Halloween craft table, combine black crochet pieces with orange pumpkins, cream fabric, wooden trays, and warm lighting.
You can also attach a hanging loop to the smaller projects and use them as ornaments or garland pieces.
Care Tips for Crochet Amigurumi
Keep handmade amigurumi away from excessive moisture and direct heat.
For light dust, use a soft brush or gently wipe the surface with a slightly damp cloth. Avoid soaking stuffed crochet pieces unless your yarn label specifically allows washing.
When storing seasonal decorations, place them in a clean box away from sharp objects that could snag the yarn.
Final Thoughts
These Grim Reaper amigurumi patterns give you several ways to bring a handmade Halloween character into your seasonal decorations. From the classic robed Reaper and tiny Pocket Pal to the Pumpkin Buddy, Ghost Ornament, and Bat-Wing variation, each project uses simple shapes that are easy to customize.
The designs can also be changed with different yarn colors and facial expressions. Try charcoal gray instead of pure black, add a tiny orange pumpkin accessory, or make the robe longer for a more dramatic silhouette.
Because these projects are small, they are also useful for practicing amigurumi basics such as increases, decreases, stuffing, embroidery, and simple assembly before moving on to larger crochet toys.
FAQ
Are Grim Reaper amigurumi patterns good for beginners?
Several of these projects are suitable for advanced beginners who are comfortable with single crochet, increases, decreases, stuffing, and basic sewing. The Mini Pocket Pal and Pumpkin Buddy are the simplest starting points.
What yarn is best for Grim Reaper amigurumi?
Worsted-weight yarn works well for these designs because it produces a sturdy fabric and makes small details easy to see. Black, white, gray, and orange are useful colors for Halloween versions.
What hook size should I use for amigurumi?
A 3.25–3.5 mm hook is a useful starting point with worsted-weight yarn. The exact size depends on your tension. Your stitches should be firm enough that stuffing does not show through.
Can I make these Grim Reaper patterns larger?
Yes. A larger hook and thicker yarn will generally create a larger finished project, although the proportions may change. For the most predictable result, keep the same stitch pattern and increase the number of rounds gradually.
Can I sell finished Grim Reaper amigurumi?
You can make finished crochet items for personal use or sale, but review the specific terms that apply to any pattern or design you use before listing finished products.
Can I replace safety eyes with embroidery?
Yes. Embroidered eyes are a useful alternative, especially for decorative pieces or projects intended for small children. Use black embroidery thread or a small amount of black yarn and secure the ends firmly.