
Free Crochet Cardigan Pattern with Step by Step Guide
Follow our free crochet cardigan pattern with a clear step by step guide. We’ll show you how to make a cozy handmade layer with confidence at home today.
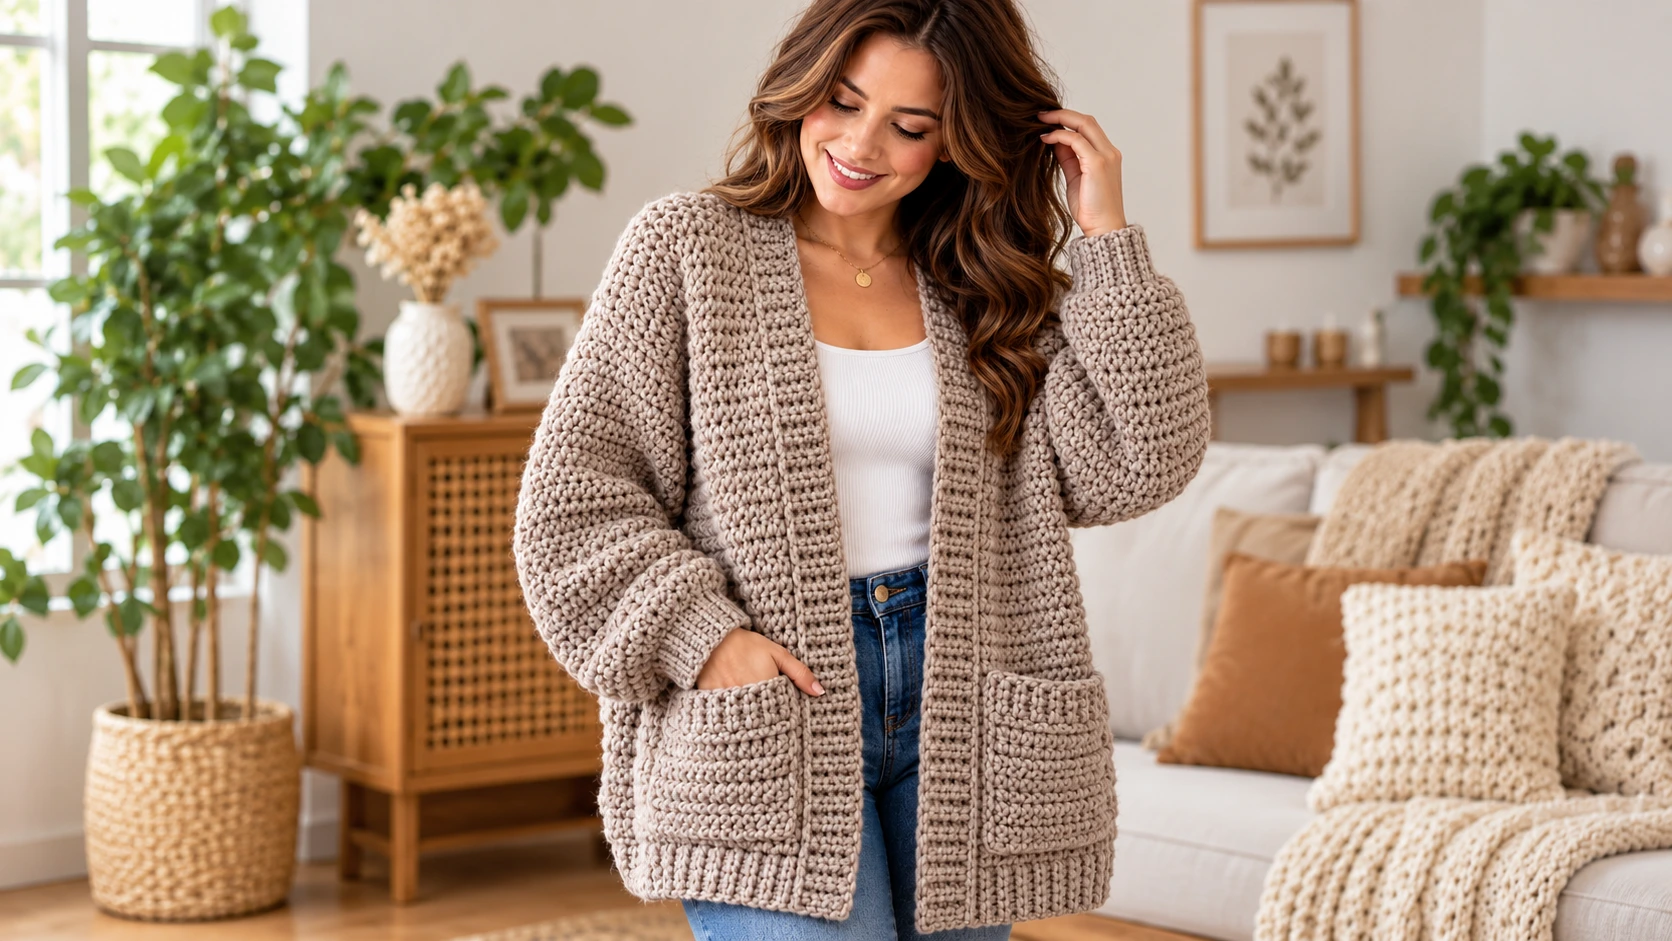
Table of Contents
Have you been looking for a free crochet cardigan pattern that feels stylish enough to wear every day but simple enough to finish without complicated shaping? This beginner-friendly cardigan uses basic double crochet, five simple pieces, and a relaxed drop-shoulder construction.
The best part is that you do not need advanced garment-making skills. Once you understand the back panel, front panels, and simple sleeve construction, the rest is mostly joining and edging. The finished cardigan has a comfortable open-front fit and can easily be adjusted for a longer, shorter, wider, or more fitted look.
This pattern is written in US crochet terminology and includes sizes XS through 5XL.
Free Crochet Cardigan Pattern at a Glance
Skill level: Easy / Advanced Beginner
Construction: Drop shoulder, 5 pieces
Yarn: Category 3 DK weight
Hook: 4.5 mm (US 7) crochet hook
Main stitch: Double crochet (dc)
Gauge: 14 dc × 8 rows = 4 × 4 inches
Fit: Relaxed, approximately 8 inches of ease
Finished style: Open-front cardigan
Materials
You will need:
- Category 3 DK-weight yarn
- 4.5 mm crochet hook
- Tapestry needle
- Stitch markers
- Scissors
- Measuring tape
- Optional: blocking mat and pins
- Optional: 2–3 buttons or a crocheted tie for the front
Yarn Amount
Approximate yardage will vary with tension, yarn fiber, and length adjustments.
| Size | Approx. Bust | Approx. Yarn |
|---|---|---|
| XS | 40 in finished | 1,200–1,350 yd |
| S | 44 in finished | 1,300–1,500 yd |
| M | 48 in finished | 1,450–1,650 yd |
| L | 52 in finished | 1,600–1,800 yd |
| XL | 56 in finished | 1,750–1,950 yd |
| 2XL | 60 in finished | 1,900–2,100 yd |
| 3XL | 64 in finished | 2,050–2,300 yd |
| 4XL | 68 in finished | 2,200–2,500 yd |
| 5XL | 72 in finished | 2,350–2,700 yd |
For garments, buying a little extra yarn is always safer, especially when using a different brand or substituting fibers.
Sizes and Finished Measurements
Choose your size based on your actual bust measurement plus approximately 8 inches of ease.
| Size | Body Bust | Finished Bust | Body Length |
|---|---|---|---|
| XS | 32 in | 40 in | 22 in |
| S | 36 in | 44 in | 23 in |
| M | 40 in | 48 in | 24 in |
| L | 44 in | 52 in | 25 in |
| XL | 48 in | 56 in | 26 in |
| 2XL | 52 in | 60 in | 27 in |
| 3XL | 56 in | 64 in | 28 in |
| 4XL | 60 in | 68 in | 29 in |
| 5XL | 64 in | 72 in | 30 in |
Because this is an open-front design, the cardigan is forgiving. For a closer fit, choose a size with less ease. For a slouchier oversized look, go up one size.
Crochet Abbreviations
- ch – chain
- dc – double crochet
- sc – single crochet
- sl st – slip stitch
- st – stitch
- sts – stitches
- RS – right side
- WS – wrong side
- fpdc – front-post double crochet
- bpdc – back-post double crochet
Gauge Swatch
Before making the cardigan, work a small double crochet swatch.
Gauge: 14 dc × 8 rows = 4 × 4 inches.
To make a simple swatch, chain 18 and work double crochet rows until you have a square large enough to measure in the center.
Measure after gently laying the swatch flat.
If you have more than 14 stitches in 4 inches, your stitches are too tight, so try a larger hook. If you have fewer than 14 stitches, your stitches are too loose, so try a smaller hook.
Do not skip the gauge swatch. Small tension differences can change the finished bust measurement considerably.
Step 1: Crochet the Back Panel
The back panel is a simple rectangle worked from the bottom edge upward.
Back Panel Stitch Counts
| Size | Back Stitches | Foundation Chain | Rows |
|---|---|---|---|
| XS | 70 dc | ch 72 | 44 |
| S | 77 dc | ch 79 | 46 |
| M | 84 dc | ch 86 | 48 |
| L | 91 dc | ch 93 | 50 |
| XL | 98 dc | ch 100 | 52 |
| 2XL | 105 dc | ch 107 | 54 |
| 3XL | 112 dc | ch 114 | 56 |
| 4XL | 119 dc | ch 121 | 58 |
| 5XL | 126 dc | ch 128 | 60 |
Back Panel Instructions
Foundation: Chain the number listed for your size.
Row 1: Dc in the 3rd chain from the hook and in each chain across. Turn.
Row 2: Ch 2. Dc in each stitch across. Turn.
Rows 3–44 (or size-specific final row): Repeat Row 2.
Do not count the turning chain as a stitch.
At the end of your final row, fasten off and leave a yarn tail long enough for seaming.
Back Panel Tip
Count your stitches at the end of every few rows. You should have the same stitch count throughout the rectangle. Keeping the side edges straight will make assembly much easier.
Step 2: Crochet the Two Front Panels
The cardigan has two matching front panels. Make one left front and one right front using the same instructions.
Front Panel Stitch Counts
| Size | Front Stitches | Foundation Chain | Rows |
|---|---|---|---|
| XS | 35 | ch 37 | 44 |
| S | 39 | ch 41 | 46 |
| M | 42 | ch 44 | 48 |
| L | 46 | ch 48 | 50 |
| XL | 49 | ch 51 | 52 |
| 2XL | 53 | ch 55 | 54 |
| 3XL | 56 | ch 58 | 56 |
| 4XL | 60 | ch 62 | 58 |
| 5XL | 63 | ch 65 | 60 |
Front Panel Instructions
Foundation: Chain the number listed for your size.
Row 1: Dc in the 3rd chain from the hook and in each chain across.
Row 2: Ch 2. Dc in each stitch across. Turn.
Rows 3–final: Repeat Row 2 until the panel reaches the same length as the back panel.
Make a second identical panel.
Optional Front Neckline Adjustment
For a deeper neckline, you can leave the top inner corner slightly shorter by removing 2–4 rows from the last section of the inner edge. For the simplest beginner version, keep both front panels rectangular.
Step 3: Crochet the Sleeves
The sleeves are also rectangles. This keeps the construction simple and creates the relaxed drop-shoulder shape.
The sleeve rectangle is designed so its long edge can be attached to the front and back armhole openings.
Sleeve Measurements
| Size | Sleeve Width | Sleeve Length | Rows |
|---|---|---|---|
| XS | 15 in | 16 in | 32 |
| S | 16 in | 17 in | 34 |
| M | 17 in | 17 in | 34 |
| L | 18 in | 18 in | 36 |
| XL | 19 in | 18 in | 36 |
| 2XL | 20 in | 18 in | 36 |
| 3XL | 21 in | 19 in | 38 |
| 4XL | 22 in | 19 in | 38 |
| 5XL | 23 in | 20 in | 40 |
Sleeve Stitch Counts
At the listed gauge, use approximately:
- XS: ch 55
- S: ch 58
- M: ch 62
- L: ch 65
- XL: ch 68
- 2XL: ch 72
- 3XL: ch 76
- 4XL: ch 79
- 5XL: ch 83
These counts may need a small adjustment if your personal gauge differs.
Sleeve Instructions
Foundation: Chain your size-specific number.
Row 1: Dc in the 3rd chain from the hook and across.
Row 2: Ch 2. Dc in each stitch across.
Rows 3–final: Repeat Row 2 until the sleeve reaches the listed length.
Make two identical sleeves.
For a longer sleeve, simply add rows. For a bracelet-length sleeve, stop several rows earlier.
Step 4: Block the Crochet Pieces
Blocking is optional but strongly recommended for a cardigan.
Lay each panel flat on a blocking mat and gently shape it to the intended measurements. Lightly mist the pieces with water and allow them to dry completely before assembly.
Do not stretch the fabric aggressively. The goal is to straighten the edges and help the pieces settle into consistent dimensions.
Step 5: Assemble the Cardigan
Now the five crocheted pieces become a wearable cardigan.
Join the Shoulders
Lay the back panel flat with the right side facing you.
Place the front panels on top, with the long outer edges aligned to the sides of the back panel.
For the neckline, leave the center portion of the back unseamed.
As a guide, sew approximately:
- XS: 5 in at each shoulder
- S: 5.5 in
- M: 6 in
- L: 6.5 in
- XL: 7 in
- 2XL: 7.5 in
- 3XL: 8 in
- 4XL: 8.5 in
- 5XL: 9 in
Use a mattress stitch for a neat seam or a slip-stitch join for a slightly more visible finish.
Join the Side Seams
Starting at the lower hem, seam upward.
Leave the following opening for each armhole:
- XS: 7.5 in
- S: 8 in
- M: 8.5 in
- L: 9 in
- XL: 9.5 in
- 2XL: 10 in
- 3XL: 10.5 in
- 4XL: 11 in
- 5XL: 11.5 in
Place stitch markers before sewing so both sides are the same height.
Step 6: Attach the Sleeves
Fold each sleeve rectangle in half lengthwise.
The long edge of the folded sleeve should form the underside seam.
Before sewing permanently, place the sleeve against the body opening and center it carefully.
Attach approximately half of the sleeve’s long edge to the front armhole edge and the other half to the back armhole edge.
Sew with a tapestry needle and matching yarn.
Once the sleeve is attached, fold it with right sides together and sew the underarm seam from the cuff upward.
Repeat for the second sleeve.
Try on the cardigan before weaving in all ends. This is the easiest time to check whether your sleeve length and armhole width feel comfortable.
Step 7: Add a Simple Front Border
A clean border helps the cardigan look finished and keeps the front opening from stretching too much.
Join yarn at the bottom front edge.
Border Round 1
Work sc evenly around the entire front opening, including the opposite front edge and neckline. At corners, work 2 sc in the same area when needed to prevent pulling.
Join with a sl st.
Border Round 2
Ch 1 and work sc around again.
For a firmer edge, use a slightly smaller hook for this round.
Fasten off and weave in the ends.
Optional Ribbed Border
For a more sweater-like finish, work a round of fpdc and bpdc around the front opening.
Alternate:
1 fpdc, 1 bpdc
Repeat around the opening and join with a slip stitch.
Step 8: Add Simple Cuffs
For each sleeve cuff, join yarn around the bottom edge.
Work one round of sc evenly around.
For a more textured cuff, follow with:
Round 2: Ch 2. Alternate fpdc and bpdc around.
Repeat for 2–3 rounds depending on how deep you want the cuff.
A shorter cuff gives a casual look, while three ribbed rounds create a more defined finish.
Step 9: Optional Closures
The cardigan is designed as an open-front layer, but you can add a closure.
Crocheted Tie
Chain 70–100 stitches, depending on size and preferred tie length.
Work one sl st into each chain, fasten off, and weave in the ends.
Attach the tie at bust height on both front panels.
Button Closure
For buttons, sew one or two buttons to one front panel and create simple chain-loop closures on the opposite side. Reinforce the attachment points well so the stitches do not stretch.
Step 10: Finishing and Fit Check
Before wearing your cardigan, inspect every seam.
Check:
- Both sleeves are the same length.
- Shoulder seams are even.
- Side seams stop at the same armhole height.
- Front edges lie flat.
- Cuffs are comfortable.
- There are no loose yarn tails.
Try the cardigan on over the type of clothing you plan to wear underneath it. A cardigan can feel very different over a thin T-shirt compared with a sweater.
If the body feels too short, add an additional border or a few rows before assembly. If the sleeves need extra length, add rows to the cuff edge.
How to Customize Your Crochet Cardigan
This pattern is intentionally simple, which makes it easy to personalize.
Make It Longer
Add rows to the back and front panels before assembly. Approximately 2 additional rows add about 1 inch at the listed gauge.
Make It Shorter
Stop the body panels earlier. Keep the front and back panel row counts identical.
Create an Oversized Cardigan
Choose the next larger size or add extra width to the back and front panels while keeping the same sleeve construction.
Change the Sleeve Style
For a loose sleeve, make the sleeve rectangle wider. For a more fitted sleeve, reduce the number of foundation stitches.
Add Stripes
Change yarn colors every 2, 4, or 8 rows. Alternating neutral colors creates a modern everyday look, while brighter stripes can make the cardigan feel playful.
Crochet Cardigan Styling Ideas
This handmade cardigan is easy to style throughout the year.
For a simple weekend outfit, pair it with a white T-shirt, straight-leg jeans, and sneakers. For a softer look, layer it over a fitted dress with ankle boots.
A neutral beige, cream, gray, or oatmeal yarn creates a classic wardrobe piece. Pastel colors work beautifully for spring, while deep brown, rust, forest green, and burgundy are cozy choices for fall.
Because the front remains open, the cardigan also works well as a lightweight layering piece indoors.
Care Instructions
Always follow the care instructions listed on your yarn label.
For most handmade crochet garments, gentle washing is the safest choice. Use cool water and a mild detergent, then reshape the cardigan while damp.
Avoid hanging the cardigan while it is wet. The weight of the water may stretch the stitches.
Instead, lay it flat on a clean towel and allow it to dry completely.
Store the finished cardigan folded on a shelf or in a drawer rather than on a hanger.
You can access the official pattern here:
Want to follow along with this cozy crochet project? Download the free CozLoop Home PDF guide for materials, sizing suggestions, stitch instructions, and assembly tips.
Click below to access your crochet guide and keep the instructions handy while you work.
Final Thoughts
This free crochet cardigan pattern with step by step guide is designed to prove that handmade crochet clothing does not have to involve complicated shaping. With five straightforward pieces, simple double crochet, and a relaxed drop-shoulder construction, you can create a comfortable cardigan that looks polished and feels practical.
The real advantage of this design is its flexibility. Once you understand the measurements, you can change the length, sleeve size, yarn color, or edging to make a cardigan that feels like your own.
Make a simple neutral version for everyday layering, experiment with stripes for a colorful statement piece, or use a soft textured yarn for a cozy fall cardigan. Save your measurements and gauge notes, because the same construction can become the foundation for many future crochet clothing projects.
FAQ
Is this crochet cardigan pattern good for beginners?
Yes. The body is made from simple rectangles using double crochet, and there is no complicated waist shaping. Basic crochet and seaming skills are enough to complete the project.
Can I use worsted-weight yarn instead of DK yarn?
You can, but the finished dimensions will change. If you substitute yarn, make a new gauge swatch and recalculate the stitch counts needed for your desired measurements.
How much ease does this cardigan have?
The pattern is designed around approximately 8 inches of ease. Because it is an open-front cardigan, you can also wear it with slightly more or less ease depending on the size you choose.
Can I make this cardigan longer?
Yes. Add rows to both front panels and the back panel before assembly. Keep the row counts the same for all three body pieces.
Can I make the sleeves longer?
Absolutely. Add additional rows to the sleeve rectangle before sewing the sleeve seams.
What stitch is used in this cardigan?
The main body and sleeves are worked in US double crochet. Single crochet and optional front-post/back-post double crochet are used for the finishing edges.
Do I need to block the cardigan?
Blocking is not mandatory, but it can improve the shape and make the seams easier to align. It is especially useful when your edges are slightly uneven.
Can I sell finished cardigans made from this pattern?
You may use the pattern to make finished handmade items for personal use or sale, but check the terms of your pattern source and any applicable marketplace rules before listing products.