
Unique Crochet Pumpkin Ideas to Inspire Your Fall Projects
Discover Crochet Pumpkin Ideas with step-by-step guidance for handmade fall decorations, festive gifts, and cozy seasonal projects beginners can enjoy.
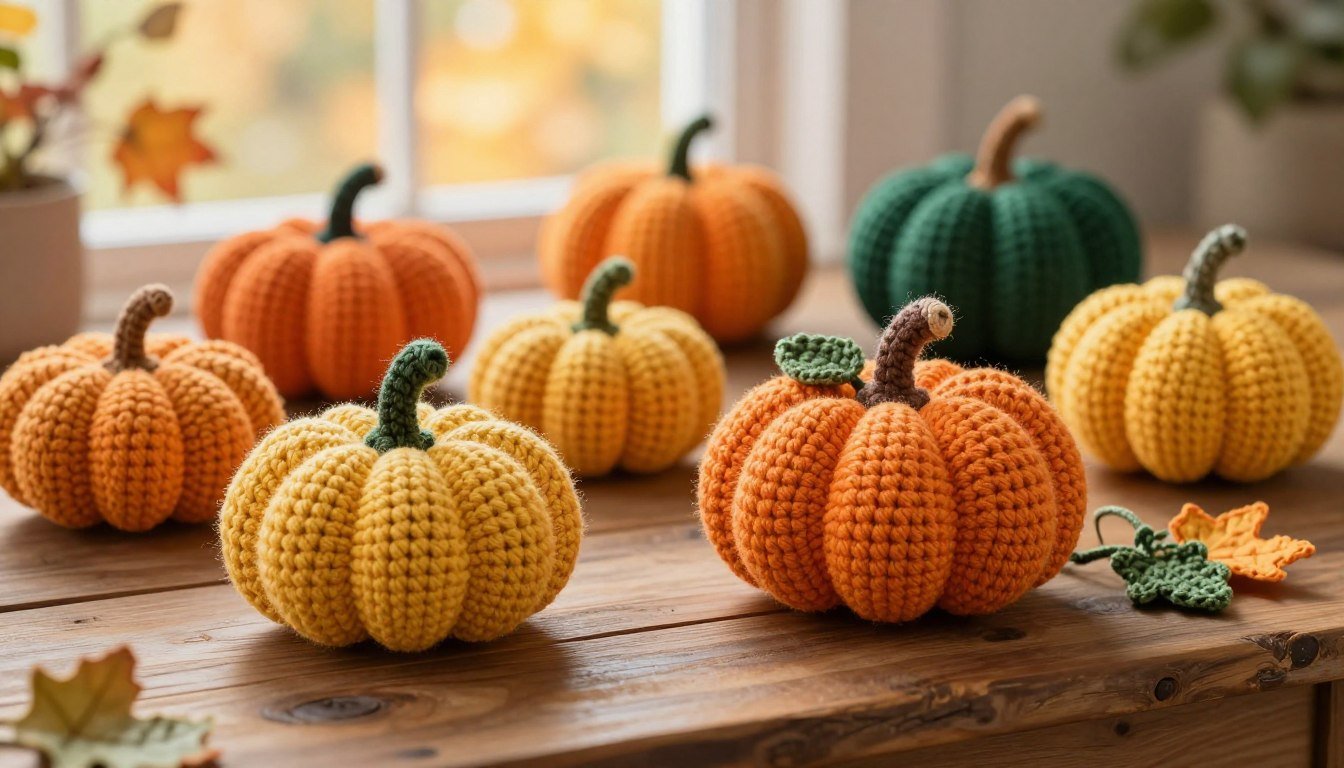
Have you ever wondered how a simple ball of yarn can transform your home into a cozy autumn sanctuary? As the air turns crisp, many makers look for fresh ways to celebrate the season through handmade decor.
Table of Contents
Exploring various crochet pumpkin ideas offers a delightful way to experiment with texture and color. You might choose traditional orange hues or opt for modern white tones to create a sophisticated harvest display. These projects range from tiny accents for your mantle to large, soft pillows that invite comfort into any living space.
Whether you are crafting a festive wreath or a unique wall hanging, these seasonal items make perfect gifts for friends and family. This guide provides practical tips on selecting the right materials and shaping your creations for a professional finish. By following these free crochet pumpkin patterns, you will gain the confidence to personalize every piece you make this year.
Gather Yarn, Tools, and a Pumpkin-Making Plan
Successful DIY crochet pumpkins begin with a well-organized workspace and quality materials. Taking time to select the right supplies ensures your finished project looks professional and lasts for many seasons.
Choose Yarn Weight, Fiber, and Autumn Colors
Compare Cotton, Acrylic, and Chenille Yarn
The fiber you choose significantly impacts the final look of your project. Cotton provides excellent stitch definition, while acrylic is budget-friendly and easy to wash.
Chenille yarn has become a popular choice for those seeking a soft, plush texture. Consider the following comparison to help you decide which material fits your specific crochet pumpkin ideas.
| Yarn Type | Best For | Texture |
|---|---|---|
| Cotton | Structured shapes | Firm and matte |
| Acrylic | General decor | Soft and durable |
| Chenille | Plush pumpkins | Velvety and thick |
Build a Fall Palette With Orange, Cream, Green, Brown, and Burgundy
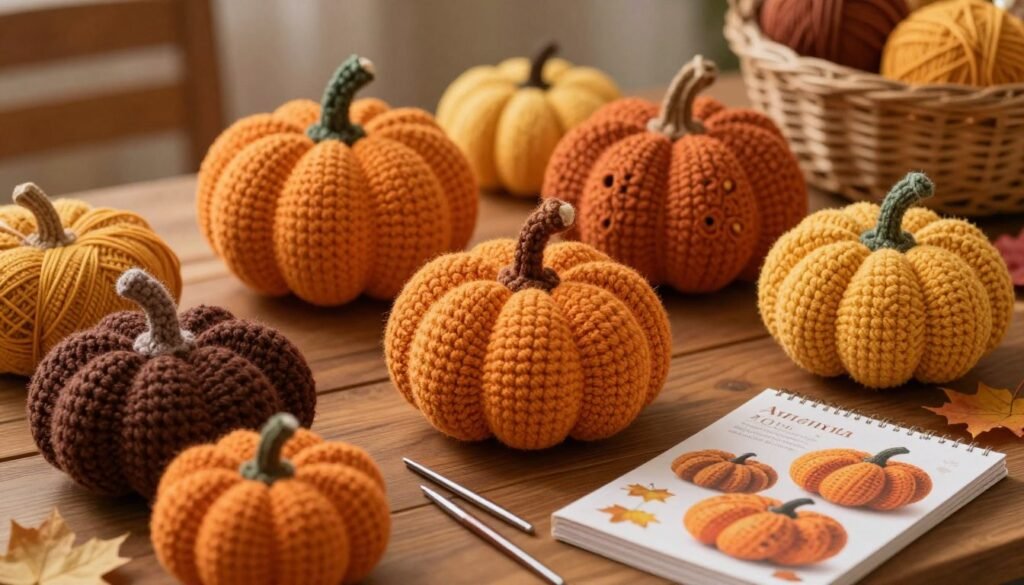
Selecting a cohesive color scheme ties your seasonal decor together. Classic orange remains a staple, but mixing in cream, deep burgundy, or forest green adds modern flair.
Many free crochet pumpkin patterns suggest using earthy tones to mimic nature. You can create a sophisticated display by blending these warm, autumnal shades.
Select Crochet Hooks, Filling, and Finishing Supplies
Match the Hook Size to the Yarn and Desired Pumpkin Texture
Your hook size determines the density of your fabric. A smaller hook creates tight stitches that prevent stuffing from showing through the gaps.
If you prefer a looser, more rustic look, try a larger hook size. Always test a small swatch before committing to your final project.
Use Washable Stuffing, Stitch Markers, Tapestry Needles, and Scissors
High-quality polyester fiberfill is the standard choice for stuffing your creations. Keep a set of locking stitch markers handy to track your rounds during the construction process.
A sharp pair of scissors and a sturdy tapestry needle are essential for finishing. These tools make weaving in ends and shaping your pumpkin much easier.
Decide on the Pumpkin Shape and Finished Size
Plan Small Tabletop Pumpkins, Medium Mantel Pumpkins, and Oversized Floor Décor
Before you begin, decide where your finished pieces will live. Small pumpkins work well for tiered trays, while larger versions make excellent floor accents.
Many crafters enjoy mixing sizes to create visual interest. Planning your layout helps you determine how many items you need to make.
Estimate Yarn Amounts and Check Gauge Before Starting
Always check your gauge to ensure your finished size matches your expectations. Using free crochet pumpkin patterns often requires estimating yardage based on the intended size.
Keep extra yarn on hand to avoid running out mid-project. Proper planning ensures your diy crochet pumpkins turn out exactly as you envisioned.
Crochet Pumpkin Ideas for Classic Handmade Shapes
Whether you prefer simple rectangles or complex rounds, there is a perfect pattern for every skill level. Exploring various crochet pumpkin ideas allows you to customize your autumn decor to fit any room in your house.
Make a Simple Ribbed Crochet Pumpkin
Work a Flat Rectangle With Half Double Crochet Stitches
The easiest way to start is by crocheting a flat rectangle. Use half double crochet stitches worked in the back loops only to create a stretchy, ribbed fabric that mimics natural pumpkin skin.
Seam, Gather, Stuff, and Cinch the Pumpkin Into Shape
Once your rectangle is complete, fold it in half and seam the short ends together to form a tube. Run a gathering stitch along the top and bottom edges, pull them tight, and stuff the center firmly before securing the yarn.
Create a Round Pumpkin With Increase and Decrease Rounds
Form the Body With Single Crochet Stitches in Continuous Rounds
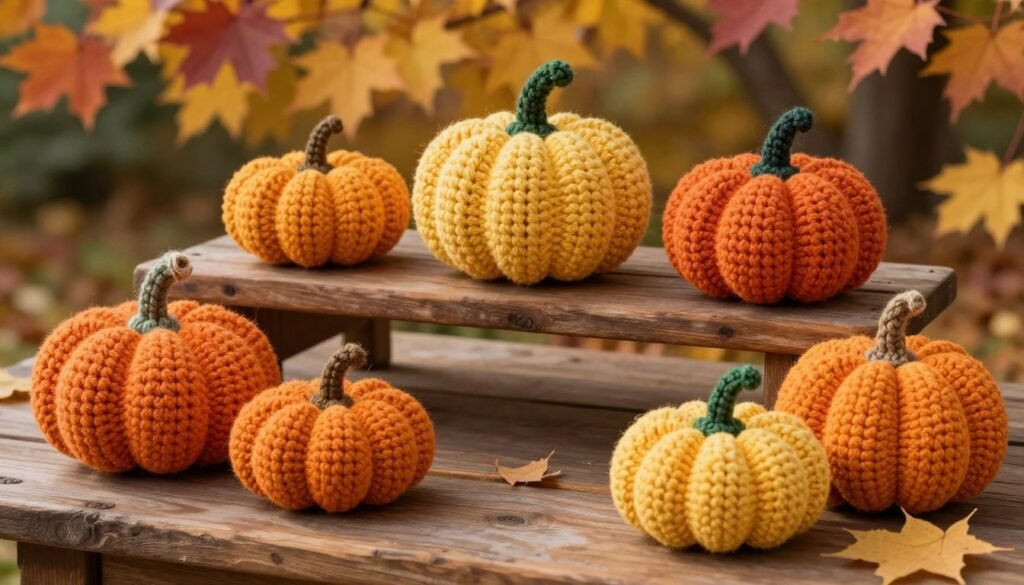
For a more traditional look, work in continuous rounds using single crochet stitches. Start with a magic ring and increase evenly until you reach the desired width for your pumpkin body.
Shape the Top and Bottom Evenly for a Plump Silhouette
After working the sides, begin your decrease rounds to mirror the initial increases. This creates a perfectly round, plump silhouette that sits beautifully on any flat surface.
Design a Stacked Pumpkin With Layered Sections
Combine Multiple Sizes for Tiered Fall Centerpieces
You can elevate your halloween crochet projects by stacking different sizes of pumpkins on top of each other. This tiered approach adds height and visual interest to your seasonal displays.
Secure the Sections With a Strong Center Stem
Use a sturdy wooden dowel or a thick piece of twine to thread through the center of each pumpkin. This ensures your stacked creation remains stable and upright throughout the season.
Add Defined Pumpkin Ridges and Natural Texture
Use Surface Crochet, Long Stitches, or Cinched Yarn Lines
To achieve cute crochet pumpkin designs, focus on adding texture to the exterior. You can use surface crochet slip stitches or long vertical stitches to create deep, realistic ridges.
Vary Ridge Spacing to Create Handmade Character
Experiment with the distance between your ridges to give each piece a unique personality. Consider these tips for adding character:
- Use a contrasting yarn color for the ridges to make them pop.
- Vary the tension of your cinching yarn to create organic, lumpy shapes.
- Add small crocheted leaves or vines near the stem for extra detail.
Step-by-Step Details for Constructing DIY Crochet Pumpkins
Building DIY crochet pumpkins requires a few simple steps to ensure a professional look. By following a structured approach, you can transform basic yarn into charming seasonal decorations that last for years.
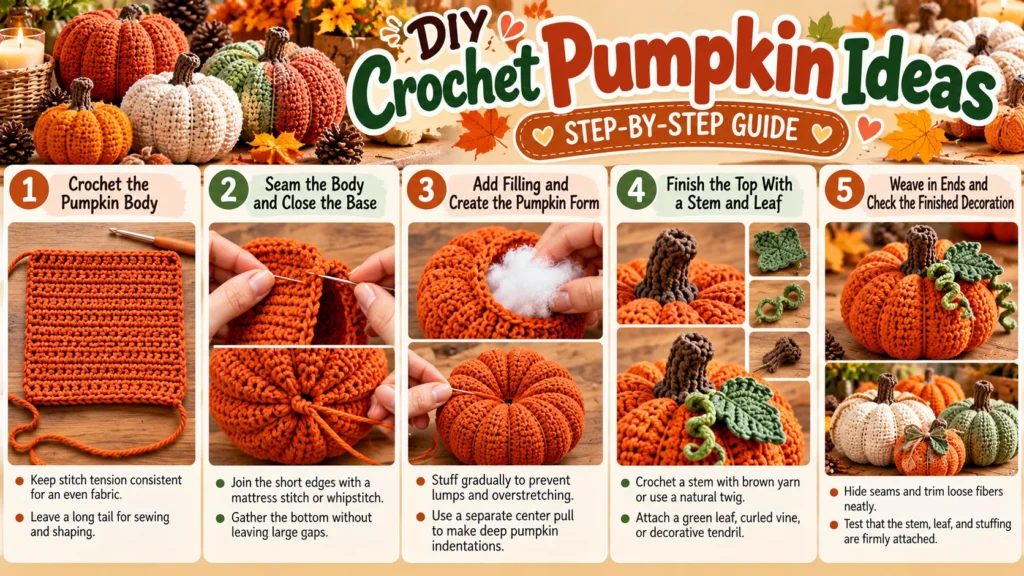
Step One: Crochet the Pumpkin Body
Keep Stitch Tension Consistent for an Even Fabric
Consistency is the secret to a polished project. Maintain an even tension throughout your rows to ensure the fabric looks uniform and professional.
Leave a Long Tail for Sewing and Shaping
Always leave a long yarn tail when you finish your final row. This extra length is essential for seaming the sides and creating the signature indentations later.
Step Two: Seam the Body and Close the Base
Join the Short Edges With a Mattress Stitch or Whipstitch
Fold your crocheted rectangle in half and align the edges. Use a mattress stitch for an invisible seam or a whipstitch for a sturdy, decorative join.
Gather the Bottom Without Leaving Large Gaps
Use your yarn needle to weave through the stitches at the bottom edge. Pull the yarn tight to close the base securely, ensuring no stuffing will leak out.
Step Three: Add Filling and Create the Pumpkin Form
Stuff Gradually to Prevent Lumps and Overstretching
Add your polyester fiberfill in small amounts. This method helps you distribute the stuffing evenly and prevents the fabric from stretching out of shape.
Use a Separate Center Pull to Make Deep Pumpkin Indentations
To achieve that classic look, use a long piece of yarn to pull the center of the top and bottom together. This creates the deep ridges that define your DIY crochet pumpkins.
Step Four: Finish the Top With a Stem and Leaf
Crochet a Stem With Brown Yarn or Use a Secure Natural Twig
You can crochet a small cylinder using brown yarn for a soft look. Alternatively, a clean, natural twig adds a rustic touch to your design.
Attach a Green Leaf, Curled Vine, or Decorative Tendril
Enhance your project by adding small details. Consider these options for a realistic finish:
- Small crocheted leaves in various shades of green.
- Tight, curled chains to mimic pumpkin vines.
- Decorative felt cutouts for a modern aesthetic.
Step Five: Weave in Ends and Check the Finished Decoration
Hide Seams and Trim Loose Fibers Neatly
Secure all loose ends by weaving them back into the body of the pumpkin. Trim any excess yarn close to the surface for a clean appearance.
Test That the Stem, Leaf, and Stuffing Are Firmly Attached
Give your finished DIY crochet pumpkins a gentle squeeze to ensure everything is secure. Check that the stem is firmly attached and the stuffing remains evenly distributed before displaying your work.
Creative Crochet Pumpkin Ideas for Fall and Halloween Décor
Creative crochet pumpkin ideas offer endless possibilities for styling your living space. These versatile projects transition perfectly from early autumn harvest themes to the spooky atmosphere of late October. By choosing different textures and colors, you can tailor your handmade items to match any interior design style.
Make Cute Crochet Pumpkin Designs for a Mantel or Table
Use Tiny Pumpkins in Bowls, Garlands, and Tiered Trays
Small, miniature pumpkins are perfect for filling decorative wooden bowls or glass jars. You can also string them together to create a festive garland for your fireplace mantel. These tiny accents add a touch of handmade charm to tiered trays when paired with other seasonal trinkets.
Decorate Larger Pumpkins With Buttons, Bows, and Embroidered Details
Larger pieces serve as excellent focal points for your dining table or entryway console. You can personalize these items by sewing on vintage buttons or tying rustic burlap bows around the stems. Simple embroidery stitches can also add intricate patterns that make each piece feel truly unique.
Turn Pumpkins Into Halloween Crochet Projects
Create Jack-o’-Lantern Faces With Embroidery or Appliqué
Transforming your diy crochet pumpkins into classic holiday icons is a fun way to celebrate the season. Use black felt for appliqué eyes and mouths to give your pumpkins a traditional look. Embroidery thread works well for adding stitched smiles or jagged teeth to your creations.
Use Black, Purple, White, and Green Accents for a Spooky Palette
Halloween crochet projects often benefit from a departure from traditional orange yarn. Try using deep purple, lime green, or stark black to create a moody, festive aesthetic. White yarn is also a great choice for a modern, ghostly look that fits perfectly with minimalist decor.
Craft Seasonal Pumpkin Characters and Animals
Add Cat Ears, Bat Wings, Ghost Faces, or Witch Hats
You can easily turn a basic pumpkin shape into a whimsical character by adding simple accessories. Small felt bat wings or crocheted cat ears instantly change the personality of your project. Adding a tiny witch hat on top creates a playful centerpiece that guests will love.
Build Friendly Characters That Work as Child-Safe Decorations
Soft, yarn-based characters are ideal for homes with young children. Ensure all buttons or small parts are securely attached to keep the items safe for little hands. These friendly faces bring a sense of joy and comfort to any nursery or playroom during the fall months.
Combine Crochet Pumpkins With Other Autumn Decorations
Pair Pumpkins With Acorns, Leaves, Mushrooms, and Candy Corn
Mixing your handmade pumpkins with natural elements creates a rich, layered display. Arrange them alongside felt acorns, silk autumn leaves, or wooden mushrooms for a forest-inspired look. Adding a few faux candy corn pieces can also introduce a pop of classic seasonal color.
Arrange Coordinating Pieces for a Thanksgiving or Harvest Display
When preparing for Thanksgiving, group your pumpkins with other harvest-themed items like wheat stalks or dried corn. Focus on a cohesive color palette to ensure your display looks polished and intentional. These arrangements provide a warm, inviting atmosphere for your holiday gatherings.
Personalize Free Crochet Pumpkin Patterns for Gifts and Home Projects
Transforming basic patterns into custom treasures is a rewarding part of the crafting process. By adjusting simple elements, you can create unique diy crochet pumpkins that perfectly match your personal style or home decor theme.
Adapt Pumpkin Patterns for Different Skill Levels
Simplify Beginner Designs With Basic Single Crochet and Half Double Crochet
If you are new to the craft, look for free crochet pumpkin patterns that rely on simple stitches. Using single crochet or half double crochet allows you to focus on shaping without getting overwhelmed by complex techniques.
Challenge Experienced Crocheters With Cables, Colorwork, or Textured Stitches
Advanced makers can elevate their work by incorporating intricate cable patterns or tapestry colorwork. These additions turn standard shapes into sophisticated pieces that showcase your technical skills.
Customize Size, Color, and Texture
Resize the Pattern by Changing Stitch Counts and Row Numbers
You can easily scale your projects by adjusting the number of starting chains or the total rows worked. This flexibility helps you create cute crochet pumpkin designs in various sizes, from tiny ornaments to large floor cushions.
Combine Smooth, Bouclé, Velvet, and Chenille Textures Carefully
Mixing different yarn fibers adds visual interest and a tactile quality to your display. However, ensure that the weight of your chosen yarns remains consistent to maintain the structural integrity of the pumpkin.
| Yarn Type | Texture | Best Use |
|---|---|---|
| Cotton | Smooth | Detailed stitch work |
| Velvet | Soft/Plush | Cozy home decor |
| Bouclé | Bumpy/Curly | Rustic, natural look |
| Chenille | Fuzzy/Thick | Large, soft pumpkins |
Use Crochet Pumpkins as Handmade Gifts
Package Small Pumpkins as Hostess Gifts or Fall Party Favors
Small, handmade items make excellent gifts for autumn gatherings. Wrap them in clear cellophane with a rustic twine bow to create a charming presentation for your halloween crochet projects.
Create Personalized Sets for Teachers, Neighbors, and Craft-Loving Friends
Consider grouping pumpkins in different sizes or colors to create a cohesive set. These thoughtful bundles are perfect for showing appreciation to those who value handmade artistry.
Apply Safe and Durable Finishing Techniques
Secure Embellishments When Making Items for Children or Pets
Safety is essential when crafting for little ones or furry friends. Always ensure that buttons, beads, or felt accents are sewn on tightly to prevent them from becoming choking hazards.
Keep Finished Pumpkins Away From Open Flames, Heat, and Moisture
To keep your decorations looking fresh, display them in a cool, dry area. Avoid placing them near candles or heaters, as synthetic fibers can melt or become damaged by excessive heat.
Conclusion
Transforming simple yarn into seasonal decor relies on your choice of materials and attention to detail. Thoughtful yarn selection, reliable shaping, and secure finishing techniques elevate your work into professional-grade displays. These projects adapt easily to your schedule, whether you craft tiny accents or large statement pieces.
Explore various crochet pumpkin ideas to find the perfect fit for your home. You might start with free crochet pumpkin patterns to build your confidence before experimenting with custom colors or textures. Mixing these handmade items with natural autumn accents creates a warm, inviting atmosphere for any room.
Consider how these pieces function as thoughtful gifts or festive additions to your Halloween arrangements. You can create cute crochet pumpkin designs that reflect your personal style and decorating goals. Start your next project today to celebrate the harvest season with unique, handmade charm.